
Focusing on individual jars for this no bake cheesecake turns a simple dessert into a collection of tiny, personal indulgences. It’s about small moments—each jar feels like a gift, a mini celebration in your hand that’s easy to customize and share. No fuss, no slicing, just creamy, tangy goodness in a portable package that’s perfect for busy days or spontaneous get-togethers.
This approach also keeps things honest and straightforward. I like the tactile feel of assembling each jar—crushing graham crackers, mixing the filling, layering everything carefully. It’s imperfect, a little messy even, but that’s part of the charm. Sometimes, it’s these small, unpolished touches that make the dessert feel more real and inviting.
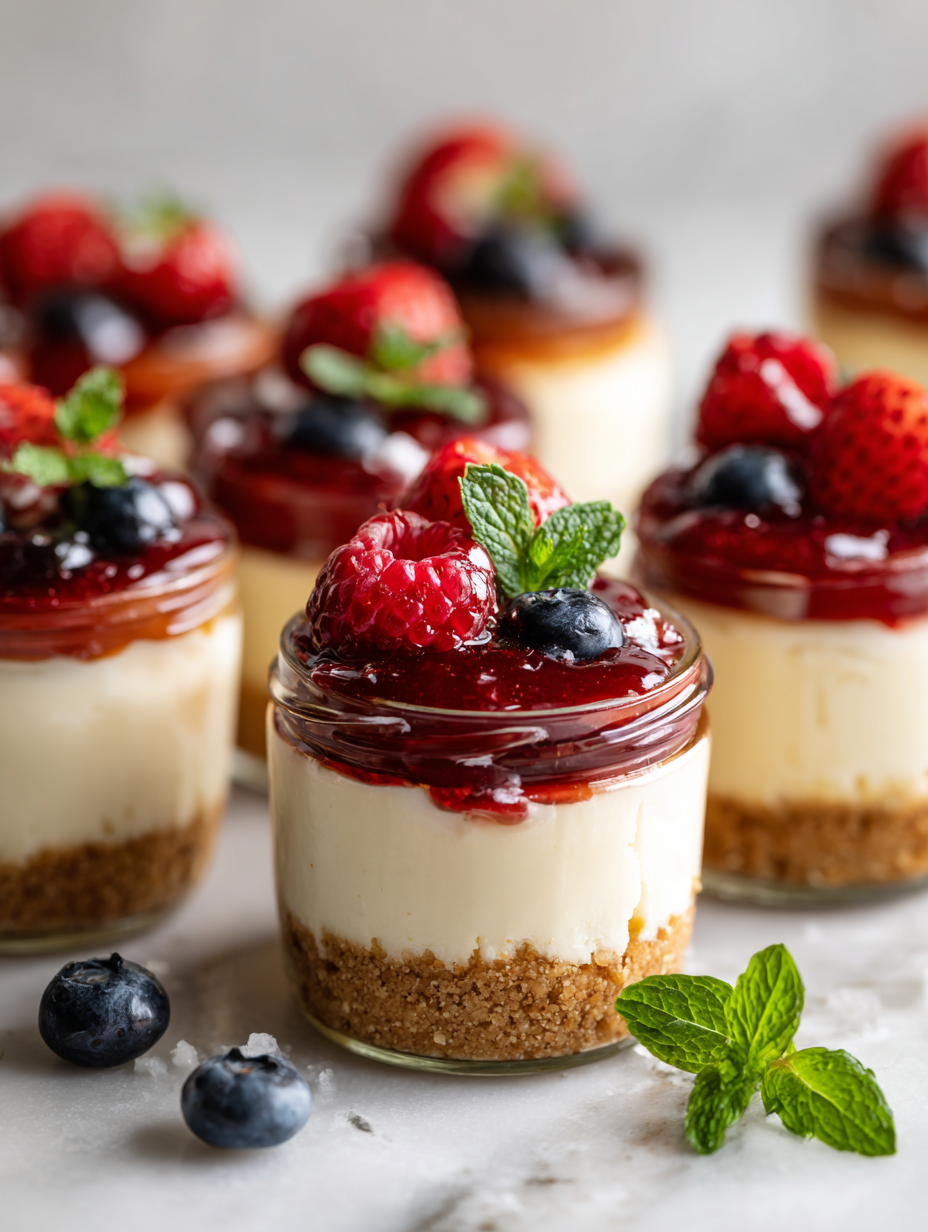
Focusing on individual jars transforms a shared dessert into personal moments, making each serving feel special and intimate, like a tiny celebration in your hand.
Mini Cheesecake Celebrations
- There’s a quiet joy in assembling each jar—layering the creamy filling and crunchy graham crackers feels like a small act of self-care.
- I love how these jars turn a simple dessert into tiny personal moments—each one feels like a little celebration on its own.
- Making these is surprisingly calming—mashing biscuits, mixing cheese, and watching the layers come together gives me a break from chaos.
- Sharing these jars feels more intimate than a slice—everyone gets their own, and I get to see their faces light up.
- Filling each jar with my favorite fruit toppings makes me nostalgic for summer afternoons and lazy weekend mornings.
Mini Cheesecake Celebrations
- This recipe came together on a lazy Saturday when I had a handful of jars and a craving for something sweet but refreshing. I wanted a dessert that was easy to assemble, no oven required, and perfect for summer heat. The idea of individual jars struck me as a way to make dessert feel personal, almost like tiny, edible gifts.
- I remember my first attempt—layering creamy filling with crushed cookies and fresh berries—feeling a little messy but totally worth it. The joy of pulling out a jar, seeing those swirls of cheese and fruit, and hearing the satisfying crackle of the cookie crust still makes me smile. It’s simple, honest, and a little imperfect, which is exactly what makes it special.
- heading
- story_type
Trivia and Origins of the No Bake Cheesecake Jars
- This recipe draws inspiration from vintage European desserts where individual servings made sharing more personal and elegant.
- The idea of serving cheesecake in jars gained popularity in the early 2000s as a portable, mess-free alternative to traditional slices.
- Jars evoke a nostalgic charm, reminiscent of homemade jams and preserves, bringing a rustic, cozy feel to modern desserts.
Key Ingredients and Tips
- Cream cheese: I prefer it softened at room temperature so it blends smoothly, avoiding lumps. For a tangier kick, try a full-fat cream cheese—silky texture, rich flavor.
- Graham crackers: Crush them finely for a smooth crust, but a few bigger bits add crunch. Toast lightly if you want a nuttier aroma and deeper flavor.
- Sweetener: I use honey or maple syrup for a warm note that complements the tang. Adjust sweetness to taste—sometimes I like it just subtly sweet.
- Lemon juice: Brightens everything up with a zesty punch. Use freshly squeezed for that crisp, citrusy smell—skip if you want a milder flavor.
- Heavy cream: Whipped until fluffy, it gives the filling a light, airy texture. For a richer taste, add a dollop of mascarpone—soft and velvety, it melts in your mouth.
- Fruit toppings: Fresh berries are my go-to—juicy and vibrant. For a twist, try caramelized peaches or a drizzle of berry compote, adding extra layers of flavor.
- Vanilla extract: A splash adds warmth and depth. Use pure vanilla for the best aroma—artificial can be a little flat, so measure carefully.
Spotlight on key ingredients
Cream cheese:
- I prefer it softened at room temperature so it blends smoothly, avoiding lumps. For a tangier kick, try a full-fat cream cheese—silky texture, rich flavor.
- Graham crackers: Crush them finely for a smooth crust, but a few bigger bits add crunch. Toast lightly if you want a nuttier aroma and deeper flavor.
Heavy cream:
- Whipped until fluffy, it gives the filling a light, airy texture. For a richer taste, add a dollop of mascarpone—soft and velvety, it melts in your mouth.
- Fruit toppings: Fresh berries are my go-to—juicy and vibrant. For a twist, try caramelized peaches or a drizzle of berry compote, adding extra layers of flavor.
Notes for ingredient swaps
- Dairy-Free: Swap cream cheese for a coconut cream-based spread—adds a rich, slightly coconutty flavor, less tang.
- Gluten-Free: Use crushed gluten-free cookies or a nut-based crust—keeps the crunch but skips the wheat.
- Sweetener: Replace powdered sugar with maple syrup or agave nectar—gives a more caramel-like note, adjust quantity.
- Lemon Juice: Use bottled lemon juice if fresh is unavailable—still brightens the flavor, but less fragrant.
- Heavy Cream: Substitute with full-fat coconut milk, chilled and whipped—adds creaminess with a hint of coconut aroma.
- Fruit Toppings: Use thawed frozen berries or canned peaches—convenient and still vibrant, just a tad softer.
- Vanilla: Switch to vanilla bean paste for a richer aroma—speckles and depth, or omit for a more neutral flavor.
Equipment & Tools
- Jars: Portable, individual servings, easy to assemble and serve.
- Crushing tool or rolling pin: Crush graham crackers into fine crumbs.
- Mixing bowls: Combine and whip ingredients smoothly.
- Electric mixer or whisk: Whip heavy cream to stiff peaks.
- Spoon or piping bag: Layer and decorate the filling.
- Lids or plastic wrap: Seal jars for chilling and storage.
Step-by-step guide to no bake cheesecake jars
- Gather your jars—preferably wide-mouthed, about 250ml (1 cup) size—clean and dry. You’ll need 4-6 for this recipe.
- Prepare the crust: crush 150g (1 1/4 cups) of graham crackers into fine crumbs. Mix with 50g (1/4 cup) melted butter and a pinch of salt. Press evenly into the bottom of each jar, about 1-2 cm deep. Chill in the fridge for 10 minutes to set.
- Make the filling: in a mixing bowl, beat 200g (7 oz) softened cream cheese until smooth. Add 60g (1/4 cup) powdered sugar, a teaspoon of vanilla, and 1 tablespoon lemon juice. Mix until creamy and combined.
- In a separate bowl, whip 200ml (¾ cup) heavy cream until stiff peaks form. Gently fold the whipped cream into the cream cheese mixture in three parts, maintaining airiness.
- Layer the filling: spoon or pipe the cream cheese mixture into each jar, on top of the crust, filling nearly to the top. Smooth the surface with the back of a spoon.
- Add toppings: layer fresh berries, fruit compote, or a drizzle of fruit preserves on top of the filling. Cover with lids or plastic wrap.
- Chill the jars: refrigerate for at least 4 hours, preferably overnight, to let flavors meld and the filling firm up. If you’re short on time, chill for 2 hours, but texture will be softer.
- Before serving, optionally garnish with extra berries or a sprig of mint. Serve straight from the fridge for best texture and freshness.
Chill jars in the fridge for at least 4 hours or overnight. Before serving, remove from fridge, add fresh toppings if desired, and serve cold directly from the jar.
How to Know It’s Done
- Crust: golden-brown edges, firm but crumbly texture.
- Filling: jiggles slightly when shaken, smooth surface, no lumps.
- Chilled: firm but creamy, holds shape when gently pressed.
Mini Cheesecake Jars
Ingredients
Equipment
Method
- Place the graham crackers in a plastic bag and crush them into fine crumbs using a rolling pin or crushing tool. Mix the crumbs with melted butter until evenly coated and press about 1-2 cm of this mixture into the bottom of each jar to form a crust. Chill the jars in the fridge for 10 minutes to set the crust.
- In a mixing bowl, beat the softened cream cheese until smooth and creamy. Add powdered sugar, vanilla extract, and lemon juice, mixing until well combined and silky.
- In a separate bowl, whip the chilled heavy cream until stiff peaks form—listen for the soft swish and see the cream hold its shape. Gently fold the whipped cream into the cream cheese mixture in three additions, maintaining the light, airy texture.
- Spoon or pipe the creamy filling into each jar, over the chilled crust, filling almost to the top and smoothing the surface with the back of a spoon.
- Top each jar with fresh berries or your favorite fruit toppings for vibrant color and flavor. Cover the jars with lids or plastic wrap and refrigerate for at least 4 hours or overnight to allow the flavors to meld and the filling to firm up.
- Before serving, optionally garnish with additional berries or a sprig of mint. Serve chilled directly from the fridge for a refreshing, layered treat that feels personal and festive.
Tips & Tricks for Best Results
- Bolded mini-head: Chill your crust mixture before pressing—this helps it set faster and prevents sogginess.
- Bolded mini-head: Gently fold whipped cream into the cheese filling—avoid stirring too vigorously to keep it light and airy.
- Bolded mini-head: Use a piping bag for filling jars—this makes layering neater and more controlled.
- Bolded mini-head: Slightly under-whip your cream—stiff peaks are ideal, but over-whipping can cause it to turn grainy.
- Bolded mini-head: Chill the assembled jars overnight—this allows flavors to meld and the filling to firm up properly.
- Bolded mini-head: For a smoother crust, pulse graham crackers finely—larger crumbs add crunch, but too coarse can be gritty.
- Bolded mini-head: Add a splash of lemon juice to the filling—brightens the flavor and balances the richness, especially if using full-fat cheese.
Common mistakes and how to fix them
- FORGOT to chill the crust; fix by refrigerating to set properly.
- DUMPED the whipped cream; fold gently to maintain airiness.
- OVER-TORCHED the crust; bake at lower temp or watch closely.
- SCOOPED filling too quickly; fill jars slowly to avoid mess.
Quick Fixes for Common Issues
- If the crust crumbles, splash in a little more melted butter and press again firmly.
- When the filling is runny, dump it back into the bowl, whip briefly, and fold in extra whipped cream.
- Over-baked crust? Patch with a fresh layer of crushed graham crackers and chill again.
- When the filling cracks while setting, shield with a thin layer of whipped cream or fruit topping.
- Splash a tiny bit of lemon juice if the filling tastes dull or flat.
Prep, store, and reheat tips
- Prepare the crust and filling components a day in advance; keep chilled in separate airtight containers for a fresh, creamy finish.
- Assemble the jars with crust, filling, and toppings up to 24 hours ahead; store covered in the fridge to keep everything firm and fresh.
- Shelf life is best within 2 days for optimal texture and flavor; after that, the crust may soften and toppings may release moisture.
- Reheat is unnecessary—serve chilled. If you prefer slightly softer filling, let jars sit at room temperature for 10 minutes, then enjoy a creamier bite.
Top questions about no bake cheesecake jars
1. How do I prevent lumps in the filling?
Use room temperature cream cheese so it blends smoothly, avoiding lumps and ensuring a creamy texture.
2. How long should I chill the jars before serving?
Chill the jars for at least 4 hours or overnight; this helps the filling set firm and flavors meld.
3. Can I make these dairy-free?
Replace heavy cream with coconut milk, chilled and whipped, for a dairy-free option that still offers a light, airy texture.
4. What are good substitutes for graham crackers?
Use crushed digestive biscuits or gluten-free cookies as substitutes for graham crackers, adjusting the crunch and flavor slightly.
5. What toppings work best for these jars?
Add fresh berries or fruit compote on top for bright, juicy bursts—modify toppings based on season and preference.
6. How do I avoid over-whipping the cream?
Over-whipped cream can turn grainy; fold gently and stop whipping as soon as stiff peaks form to keep it fluffy.
7. How can I improve the crust texture?
For a smoother crust, pulse the crackers finely and press into jars firmly, then chill to set properly.
8. What if my filling is too soft?
If the filling is too runny, gently fold in extra whipped cream or refrigerate longer until it firms up.
9. How can I make filling layers cleaner?
Use a piping bag for filling jars to keep layers neat and prevent messes during assembly.
10. How long can I keep these jars in the fridge?
Store leftovers covered in the fridge for up to 2 days to keep the filling fresh and prevent sogginess.
Sharing these no bake cheesecake jars turns dessert into a personal ritual, a small moment of joy in a busy day. There’s something honest about layering creamy cheese, crunchy crumbs, and fresh fruit—each step feels real, a little messy, but worth it.
They’re perfect for spontaneous gatherings or quiet nights when you need a simple, satisfying treat. Sometimes, it’s the uncomplicated things—like a jar of cheesecake—that remind us to slow down and enjoy the little pleasures.

Hi, I’m Mia Bennett, the chef and storyteller behind Grounding in Tradition. I’m so glad you’re here. This blog is my way of preserving the flavors, techniques, and rituals that shaped me as both a cook and a professional chef. Grounding in Tradition is not about trends or shortcuts. It is about honoring where food comes from, understanding the hands that prepare it, and carrying forward recipes that deserve to be remembered.


Leave a Reply