
This no-bake peanut butter cookie recipe is my go-to when mornings are chaotic and I need a quick sweet fix. No oven, no fuss, just a handful of pantry staples coming together in minutes. It’s honestly like a little rescue mission for my sweet tooth, especially when I’m running out the door.
There’s something honest about these cookies—simple ingredients, honest flavors, no pretenses. I love the way the peanut butter and oats melt into a chewy, sticky mess that’s just right. It’s the kind of treat that feels like a warm hug, even when it’s made in a rush.
Focusing on how this no-bake peanut butter cookie recipe can serve as a quick, comforting fix during busy mornings when you need a sweet hit without the fuss of baking.
A Quick Fix for Busy Mornings
- These cookies remind me of childhood afternoons, sticky fingers and all, sitting at the kitchen table.
- I love how versatile this recipe is—swap out peanut butter for almond or sunflower, and it still works.
- There’s a relief in making something quick that satisfies that sweet craving without turning on the oven.
- A batch of these always feels like a small victory during busy mornings or when friends drop by unexpectedly.
- The first bite is a burst of peanutty richness with just enough chew—comfort in every crumb.
The story behind this recipe
- This recipe was born out of a lazy afternoon, when I found myself rummaging through the pantry and craving something sweet but quick. I remember the smell of peanut butter warming up in the microwave, and thinking, why not just skip the baking part altogether? It’s a relief to have a treat that comes together with just a spoon and some patience for chilling.
- Every time I make these, I’m transported back to childhood summer afternoons—messy, spontaneous, full of giggles and sticky fingers. It’s a reminder that sometimes, simplicity in the kitchen is what makes the best memories. These cookies aren’t fancy, but they’re honest and fast, perfect for those moments when time’s short but the sweet tooth’s loud.
- heading: ‘The story behind this recipe’
Historical and Cultural Trivia
- These cookies likely originated during times of resourcefulness, when oven access was limited or unavailable, making no-bake treats a practical solution.
- In the 1950s and 60s, many home cooks turned to simple, quick recipes like this as post-WWII convenience foods gained popularity.
- The combination of peanut butter and oats reflects a mid-20th-century trend of creating hearty, energy-boosting snacks during wartime and post-war austerity.
- Some believe this recipe evolved from older energy ball recipes, adapted to suit the American pantry staples of peanut butter, sugar, and oats.
- The no-bake method was a clever way to keep homemade treats accessible during times of limited oven use or fuel shortages.
Key Ingredients Breakdown
- Creamy peanut butter: I prefer a natural variety with just peanuts and salt—it’s oozier and richer. Feel free to swap for a chunkier version if you like some texture in your cookies.
- Old-fashioned oats: I use quick oats for that instant chew, but if you want a heartier bite, rolled oats work just fine—just give them a quick blitz in the food processor if too chunky.
- Brown sugar: I love the deep caramel notes it adds, but coconut sugar can stand in for a lighter, slightly more smoky flavor—just be aware it might change the sweetness a tad.
- Honey or maple syrup: I add a splash for stickiness and a touch of floral sweetness. Skip it if you want a less sticky cookie or try agave for a neutral sweetness.
- Vanilla extract: This small splash boosts the overall flavor with a warm, aromatic note. Feel free to omit or swap for a pinch of cinnamon if you like a spicy undertone.
- Chocolate chips (optional): I toss in a handful for melty bursts—dark chocolate is my favorite, but white or semi-sweet also work if you want a different flavor punch.
- Salt: Just a pinch to balance the sweetness—don’t skip it or the cookies might taste flat. Sea salt flakes on top before chilling add a nice crunch and shimmer.
Spotlight on key ingredients
Peanut Butter:
- Creamy peanut butter: I prefer a natural variety with just peanuts and salt—it’s oozy and intensely nutty. Swap for chunky if you want more texture in your cookies.
- Old-fashioned oats: I use quick oats for that instant chew, but if you like a heartier bite, rolled oats work—just pulse them briefly if too chunky.
Sweeteners:
- Brown sugar: I love the deep caramel flavor it adds, but coconut sugar can stand in for a lighter, smoky sweetness—just watch for slight flavor shifts.
- Honey or maple syrup: I add a splash for stickiness and floral notes, but you can skip or swap with agave if you prefer a less sticky mix.
Notes for ingredient swaps
- Nuts-Free: Use sunflower seed butter instead of peanut butter. It’s less creamy but still sticky enough to hold the cookies together.
- Sweetener Swap: Maple syrup can replace honey for a slightly different flavor profile—think caramel undertones instead of floral notes.
- Sugar Alternatives: Coconut sugar or agave syrup can be used in place of brown sugar. Expect a different texture and a hint of caramel or neutral sweetness.
- Oats: Swap rolled oats for quick oats if you’re short on time; they blend in faster but might give a slightly softer cookie.
- Add-ins: Dried cranberries or chopped dried apricots add a chewy tartness—omit chocolate chips for a fruitier, less sweet punch.
- Chocolate: Use cocoa nibs or omit altogether for a less decadent, more straightforward peanut butter bite.
- Salt: Flaked sea salt on top before chilling elevates flavor with a crisp, salty shimmer—skip if you want a milder taste.
Equipment & Tools
- Medium saucepan: To melt ingredients evenly
- Mixing spoon: To stir ingredients smoothly
- Parchment-lined baking sheet: To prevent sticking and for easy cleanup
- Spatula: To shape and flatten cookies
Step-by-step to perfect cookies
- Gather your equipment: a medium saucepan, mixing spoon, parchment-lined baking sheet, and a spatula for shaping. No fancy tools needed, just basic kitchen gear.
- In the saucepan, combine 1 cup peanut butter, 1/2 cup honey or maple syrup, and 1/2 cup brown sugar. Warm over medium heat (about 150°C / 300°F) just until everything melts together, about 2-3 minutes. Stir constantly to prevent sticking or burning.
- Once melted, remove from heat. Stir in 1 teaspoon vanilla extract and a pinch of salt. Mix until smooth and fragrant—your kitchen will smell nutty and sweet.
- Add 2 cups old-fashioned oats to the mixture. Stir well until fully coated and sticky. If it feels too loose, sprinkle in a little more oats; if too thick, a tiny splash of warm water can loosen it up.
- Using a tablespoon or small ice cream scoop, portion out the mixture onto your parchment-lined sheet. Flatten each cookie slightly with the back of a fork or spatula, about 1.5 cm thick.
- Let the cookies rest at room temperature for about 20 minutes, or until they firm up and lose their sticky sheen. For quicker setting, pop them in the fridge for 15-20 minutes.
- Check for doneness: the cookies should be set but still chewy, with a slight sheen on top. They should hold their shape but still feel a bit soft when pressed.
- Once firm, transfer to a plate or container. Store in an airtight jar at room temperature for up to a week, or freeze for longer storage. These cookies taste best after they’ve had a bit of time to settle, around 2 hours after chilling.
Let the cookies cool and set at room temperature or in the fridge. Serve once firm, and enjoy that sticky-chewy texture. No additional finishing needed—just a quick pause before diving in.
How to Know It’s Done
- Color: cookies should be a golden hue with a slight sheen.
- Texture: firm but chewy, not sticky or overly soft.
- Appearance: cookies hold shape and have a glossy, slightly crackled surface.
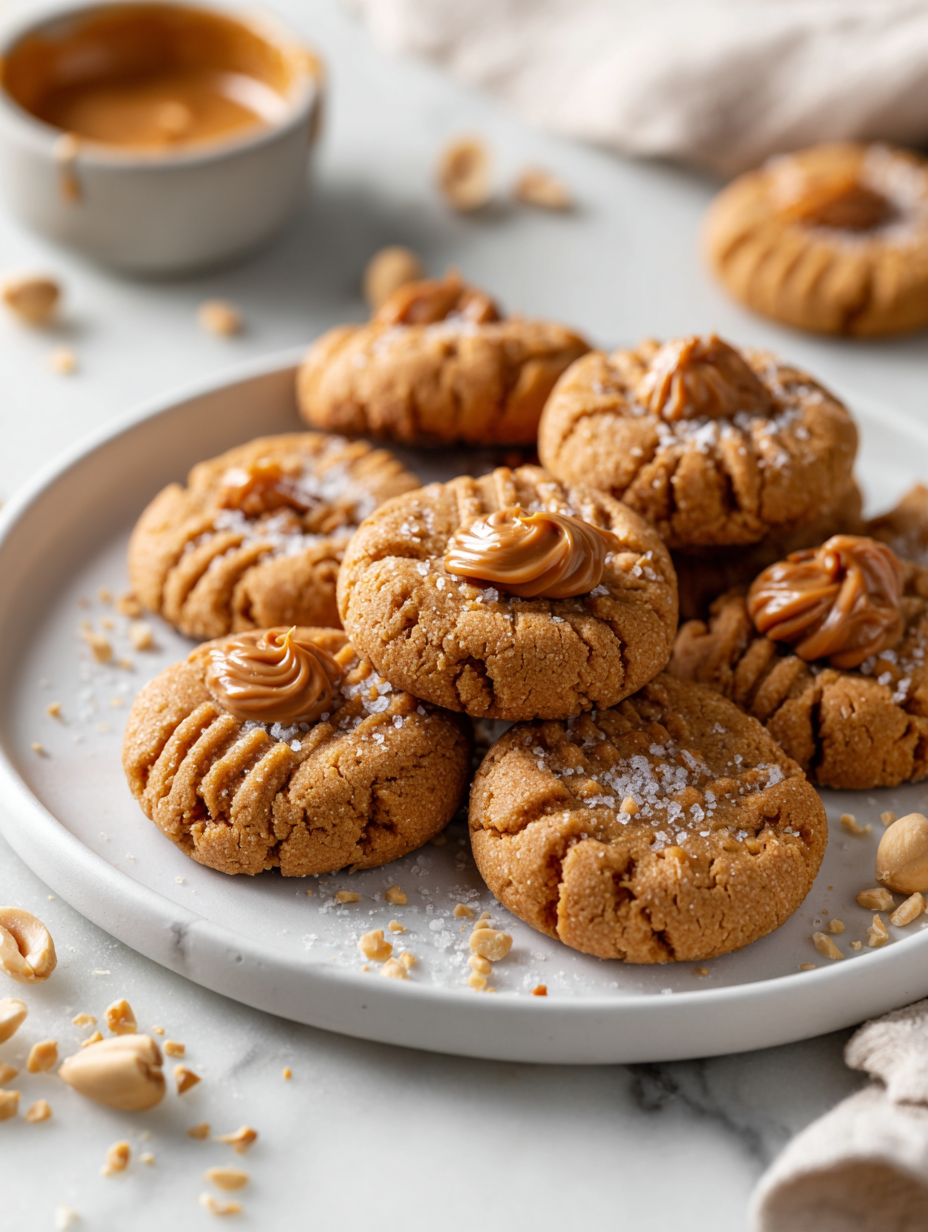
No-Bake Peanut Butter Cookies
Ingredients
Equipment
Method
- Place a medium saucepan on the stove and add the peanut butter, honey, and brown sugar. Warm over medium heat, stirring constantly, until the mixture is smooth, glossy, and just starting to bubble, about 2-3 minutes.
- Remove the saucepan from heat and stir in the vanilla extract and a pinch of salt, mixing until fragrant and well combined.
- Add the oats to the saucepan and stir vigorously until the oats are fully coated and the mixture is thick and sticky. If it feels too loose, add a bit more oats; if too dry, add a splash of warm water.
- Using a tablespoon or small scoop, portion out the mixture onto a parchment-lined baking sheet. Gently flatten each cookie with the back of a fork or spatula to about 1.5 cm thickness.
- Sprinkle a tiny pinch of salt or some chocolate chips on top of each cookie if desired, then let the cookies rest at room temperature for about 20 minutes to set. For quicker results, pop them in the fridge for 15-20 minutes.
- Once the cookies are firm and slightly glossy, carefully transfer them to a plate or container. Serve immediately or store in an airtight container at room temperature for up to a week.
Tips & Tricks for Best Results
- Use fresh peanut butter: Oozes with rich oils, making your cookies extra creamy and flavorful.
- Warm the mixture gently: Slightly melted ingredients blend better, creating a smoother, more cohesive dough.
- Don’t skip the chilling: Sets the cookies faster and improves their chewy texture — patience makes perfect.
- Adjust oats for texture: More oats make for a denser cookie, less oats for a softer, chewier bite.
- Flatten cookies evenly: Use the back of a fork for consistent thickness and quicker setting in the fridge.
- Add a pinch of salt on top: Enhances sweetness and adds a satisfying crunch with each bite.
- Experiment with add-ins: Chopped nuts, dried fruit, or chocolate chips can personalize your batch easily.
Common mistakes and how to fix them
- FORGOT to measure ingredients precisely? Use a scale for accuracy, especially with peanut butter.
- DUMPED in too much sugar? Reduce or substitute with a sugar alternative to prevent overly sweet cookies.
- OVER-TORCHED the mixture? Lower heat and stir constantly to avoid burning and achieve smooth melting.
- MISSED the chilling step? Allow cookies to rest at least 20 minutes for proper set and chewiness.
Quick Fixes and Pantry Swaps
- When mixture is too dry → Splash in a tiny bit of warm water, stir until shiny and cohesive.
- If cookies are too sticky → Chill the dough for 10 minutes, then scoop and shape again.
- Splash melted chocolate on top → Let it shimmer and set for a glossy finish and extra flavor.
- Patch over cracks with a bit of warm peanut butter for a seamless look and better bite.
- Shield cookies from drying out → Store in an airtight container, adding a slice of bread for moisture.
Prep, store, and reheat tips
- Prepare the cookie mixture ahead of time by mixing ingredients; it can be stored in the fridge for up to 24 hours, keeping the flavors fresh and the mixture firm enough to scoop later.
- Cookies can be kept in an airtight container at room temperature for up to a week, but for best freshness, store in the fridge, where they stay chewy and the peanut butter flavor intensifies slightly.
- If making in advance, chill the formed cookies for at least 30 minutes before serving; this helps them set up and develop a better texture.
- Reheat briefly in the microwave (10-15 seconds) if you prefer a softer, melty cookie—watch for a warm, fragrant peanut aroma as a sign it’s ready.
Top questions about no bake peanut butter cookies
1. Can I use chunky peanut butter?
Use creamy peanut butter for the best smooth, melt-in-your-mouth texture. Chunky works if you want more bite.
2. Can I replace honey with syrup?
Yes, you can swap honey for maple syrup or agave. It slightly changes the flavor but keeps it sticky and sweet.
3. How long should I chill the mixture?
Chill the mixture for at least 30 minutes to help it firm up before shaping. It makes forming cookies easier.
4. How do I know when the cookies are ready?
Cookies are done when they’re firm but chewy, with a glossy surface and a slight crackle when pressed.
5. How should I store these cookies?
Store cookies in an airtight container at room temp for up to a week or freeze for longer. Let thaw briefly before eating.
6. What if my mixture is too dry or sticky?
If mixture feels too dry, add a tiny splash of warm water to loosen it. If too sticky, chill briefly or add more oats.
7. Can I add extras to the cookies?
You can add chopped nuts, dried fruits, or chocolate chips to customize your batch. Just fold in after mixing.
8. How do I shape the cookies?
Use a spoon or small scoop for even-sized cookies. Flatten slightly with a fork for a neat look and quicker setting.
9. Can I reheat these cookies?
Reheat in the microwave for about 10 seconds for a melty, warm treat. Watch for a fragrant peanut aroma.
10. What if my cookies turn out too greasy or dry?
If mixture is too greasy, use less peanut butter or add more oats. If too dry, add a small amount of honey or syrup.
These cookies are a quick, honest fix when time is tight but you still crave something sweet. The smell of peanut butter and oats, warm and inviting, fills the kitchen in minutes. They’re messy and imperfect, but that’s what makes them feel real and comforting.
In a busy world, sometimes the simplest treats are the most satisfying. No fuss, no oven, just good ingredients coming together—exactly how I like it when I need a small victory or a moment of indulgence.

Hi, I’m Mia Bennett, the chef and storyteller behind Grounding in Tradition. I’m so glad you’re here. This blog is my way of preserving the flavors, techniques, and rituals that shaped me as both a cook and a professional chef. Grounding in Tradition is not about trends or shortcuts. It is about honoring where food comes from, understanding the hands that prepare it, and carrying forward recipes that deserve to be remembered.


Leave a Reply