
This no bake chocolate coconut cookie recipe is my go-to when I need something sweet and quick, especially on those chaotic days when the oven feels like a distant dream. It’s honest, a little messy, and totally forgiving—perfect for when I want to whip up something without fuss, fingers sticky and all. The best part? It reminds me that sometimes, the simplest treats are the most satisfying, especially when they come together in a flash.
Growing up, I remember sneaking spoonfuls of coconut and chocolate when my mom wasn’t looking, the sweet, smoky aroma filling the kitchen. Now, I make these cookies in my own way—no baking, just a handful of ingredients and a bit of patience as they set. It’s not about perfection; it’s about the joy of spontaneous baking and the comfort of something sweet, made with love and a little bit of chaos.
This recipe is inspired by the childhood chaos of my kitchen, where I needed a quick sweet fix without the fuss of baking. It’s a messy, honest process—clumsy scoops, sticky fingers, and the joy of tasting as I go. It reminds me that sometimes, the best treats are born from spontaneity and a little bit of chaos.
Chaos, Coconut, and Quick Comfort
- Making these cookies feels like a small victory on hectic days, where I need a quick sweet escape.
- I love how the smell of melting chocolate and toasted coconut fills my kitchen, even if I didn’t plan for it.
- Sometimes, I sneak an extra spoonful of the mixture before they set—no regrets, just pure joy.
- These cookies remind me that simple ingredients can create something unexpectedly special, even in chaos.
The story behind this recipe
- This recipe was born out of a chaotic weekend when I needed a sweet fix fast, but didn’t want to turn on the oven. I remember rummaging through my pantry, grabbing whatever I had—coconut, chocolate chips, a splash of vanilla—and just mixing it all haphazardly. The smell of melting chocolate and toasted coconut filled the kitchen, and I realized how satisfying simple, no-fuss treats could be.
- It’s a kind of comfort food that doesn’t demand perfection or time. Just honest ingredients, a messy spoon, and patience as they firm up in the fridge. Every batch feels like a little rebellion against the fuss of baking, a quick reminder that sometimes, the best treats are born from spontaneity and a bit of chaos.
- heading: ‘The story behind this recipe’
Historical and Cultural Tidbits
- These cookies have roots in resourceful kitchen moments, where quick fixes were the only way forward.
- In the 1950s, no-bake desserts gained popularity during post-war rationing, emphasizing simplicity and minimal ingredients.
- Coconut and chocolate combos date back to colonial times, when tropical ingredients entered European cuisines in sweet, snack-like forms.
Ingredient breakdown: key components
- Coconut flakes: I like mine toasted until golden—adds a smoky, nutty crunch that makes these cookies special. If you prefer softer coconut, skip the toast, but you’ll lose that deep aroma.
- Chocolate chips: I use semi-sweet for balance, but dark or even white chocolate can switch things up. Melted chocolate is key—makes the mixture oozy, almost fudgy. If it’s not melting, gently warm it with a splash of cream.
- Sweetened condensed milk: This is the glue that holds everything together. If you want a less sweet version, try evaporated milk, but expect a thinner, less sticky texture.
- Vanilla extract: Just a splash amplifies all the flavors. Skip it if you’re out, but it’s the secret to that warm, cozy aroma that hugs the whole cookie.
- Oats (optional): I sometimes add a handful for texture—gives a chewy bite. If you do, reduce the coconut a bit so it doesn’t get too dense.
- Salt: Just a pinch heightens the chocolate and coconut flavors. If you’re using salted butter, cut back the added salt to avoid over-salting.
- Butter (or coconut oil): I prefer butter for richness, but coconut oil works if you want dairy-free. Melt it before mixing so everything combines smoothly, and the cookies set firm.
Spotlight on key ingredients
Coconut flakes:
- I prefer toasted until golden—adds a smoky, nutty crunch and a deeper aroma. Skip to keep it softer, but miss out on that rich toastiness.
- Chocolate chips: Semi-sweet are my go-to, melting into a glossy, fudgy texture. If you want a richer or darker flavor, switch to dark or vegan chips—just watch the melting point.
Chocolate chips:
- Sweetened condensed milk: It’s the sticky glue that holds everything together, with a luscious sweetness and creamy texture. For a less sweet version, try evaporated milk, but expect a thinner consistency.
- Chocolate: The star of the show. Melts into a velvety, oozy mixture that makes every bite irresistibly fudgy. Gently warm if it’s not melting thoroughly, and avoid overheating to prevent seizing.
Notes for ingredient swaps
- Dairy-Free: Coconut condensed milk or coconut cream can replace sweetened condensed milk, but expect a slightly less sticky, more coconut-forward taste.
- Vegan: Swap butter for coconut oil or vegan butter; chocolate chips should be dairy-free. The texture may be a touch less rich but just as delicious.
- Sugar-Free: Use sugar-free chocolate chips and a sugar substitute like erythritol or stevia, but be mindful of potential aftertastes and adjust sweetness to taste.
- Coconut Variations: Toasted shredded coconut adds smoky depth, but raw shreds keep it lighter and softer—choose based on your texture preference.
- Chocolate Options: Dark chocolate or vegan chocolate chips can be used for a more intense, less sweet flavor. White chocolate offers a sweeter, creamier twist.
- Sweetener Adjustments: If you prefer less sweetness, reduce the condensed milk slightly or add a splash of vanilla for extra flavor without the sugar hit.
- Oats: Add more oats for chewiness or skip entirely for a more coconut and chocolate-focused treat—just keep an eye on the overall texture.
Equipment & Tools
- Microwave-safe bowl: Melting chocolate and butter evenly.
- Measuring cups and spoons: Accurate ingredient portions.
- Parchment paper: Prevent sticking and easy cleanup.
- Large mixing bowl: Combine ingredients thoroughly.
- Spoon or small scoop: Portioning cookies uniformly.
Step-by-step guide to no bake cookies
- Gather all your ingredients: coconut, chocolate chips, condensed milk, vanilla, and optional oats. Measure out everything before starting; it makes the process smoother.
- Line a baking sheet with parchment paper. This is where your cookies will set, no fuss clean-up afterward.
- In a microwave-safe bowl, melt the chocolate chips and butter together in 30-second bursts, stirring each time until smooth. (Approx. 1-2 minutes total.) Watch for a shiny, oozy mixture—if it’s not melting, warm it gently on low heat.
- In a large mixing bowl, combine the toasted coconut, oats (if using), and a pinch of salt. Stir in the melted chocolate and butter, then add the condensed milk and vanilla. Mix well—think sticky, fudgy mess.
- Use a tablespoon or small ice cream scoop to portion out the mixture onto your prepared sheet. Flatten slightly with the back of the spoon if you like a thinner cookie.
- Chill in the fridge for at least 2 hours, or until firm. This is the waiting game that makes all the difference—don’t rush it.
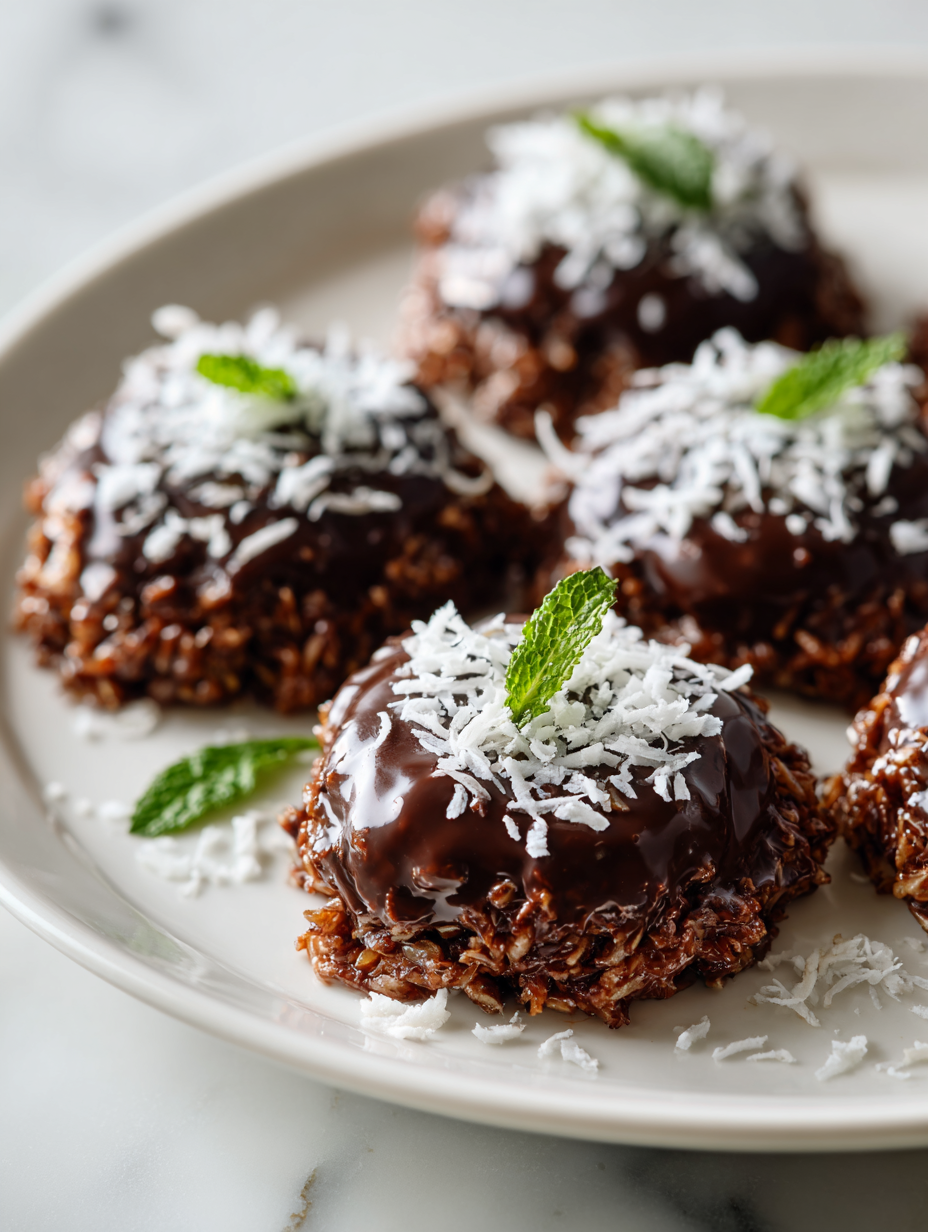
- Once set, gently peel the cookies from the parchment. They should be firm but tender, with a glossy, chocolatey sheen. If they’re sticky, pop them back in the fridge for 20 more minutes.
- Serve straight from the fridge—these cookies are best cold. Keep leftovers in an airtight container for up to a week, or freeze for longer storage.
Chill the cookies on the sheet for a minimum of 2 hours until firm. Gently transfer to a plate or storage container. Serve cold, straight from the fridge for best texture and flavor.
How to Know It’s Done
- Chocolate mixture should be shiny and oozy before mixing.
- Cookies should hold their shape and be firm to the touch after chilling.
- Surface should be glossy with a slight crack when set.
No Bake Chocolate Coconut Cookies
Ingredients
Equipment
Method
- Measure out your chocolate chips and butter, then place them in a microwave-safe bowl.
- Warm the mixture in the microwave in 30-second bursts, stirring each time until smooth and glossy, about 1-2 minutes total. The chocolate should be shiny and oozy.
- In a large mixing bowl, combine toasted coconut flakes, a pinch of salt, and oats if using. Mix briefly to distribute evenly.
- Pour the melted chocolate mixture over the dry ingredients, then add the vanilla extract and sweetened condensed milk. Stir thoroughly until everything is well combined and sticky, resembling fudgy dough.
- Line a baking sheet with parchment paper. Using a spoon or small scoop, portion out the mixture onto the prepared sheet, then gently flatten each cookie with the back of the spoon.
- Place the tray in the fridge and chill for at least 2 hours, or until the cookies are firm and glossy. The wait is key to achieving the perfect chewy, fudgy texture.
- Once set, carefully peel the cookies from the parchment paper. The finish should be shiny and the cookies should hold their shape with a slightly chewy bite.
- Serve these cookies straight from the fridge for the best texture and flavor. Keep leftovers stored in an airtight container in the fridge for up to a week or freeze for longer storage.
Notes
Tips for perfect no bake cookies
- Bold chocolate: Melt in short 30-second bursts, stirring well each time for a glossy, smooth finish.
- Toasted coconut: Lightly toast until golden to boost flavor and add a smoky crunch that contrasts with the sticky mixture.
- Room temperature ingredients: Ensure butter and condensed milk are at room temp to mix evenly and prevent clumping.
- Chill for texture: Refrigerate the cookies at least 2 hours until firm, for that perfect bite and glossy finish.
- Avoid overheating: When melting chocolate, keep heat low and stir frequently to prevent seizing and bitterness.
- Mix thoroughly: Ensure all ingredients are evenly combined—this creates uniform texture and flavor in each cookie.
- Quick fridge fix: If cookies are too soft, pop them back in the fridge for 20 minutes; they’ll set up nicely.
Common mistakes and how to fix them
- FORGOT to check chocolate melting; do low and slow to avoid seizing.
- DUMPED too much coconut; measure carefully to prevent dry cookies.
- OVER-TORCHED the chocolate; remove from heat immediately once shiny and smooth.
- MISSED the fridge time; ensure firm texture by chilling at least 2 hours.
Quick fixes and pantry swaps
- If mixture is too sticky, splash in a little more coconut or oats.
- When chocolate isn’t melting smoothly, gently warm it with a splash of cream.
- Splash cold water on over-torched chocolate to stop seizing immediately.
- Patch dry cookies by pressing them back together and chilling for 30 minutes.
- Shield sticky fingers by using a small scoop to form cookies instead of hands.
Prep, store, and reheat tips
- Prepare the mixture ahead of time and keep it covered in the fridge for up to 24 hours; the flavors meld and the mixture stays sticky and easy to scoop.
- Store the cookies in an airtight container in the fridge for up to a week. The chocolate keeps glossy, and the coconut stays chewy.
- For longer storage, freeze the cookies in a single layer, then transfer to a bag. They can last up to 3 months and stay firm yet fudgy.
- Reheat chilled cookies briefly at room temperature—about 10 minutes—and they’ll soften just enough to enjoy that decadent, melt-in-your-mouth texture with a hint of chill.
Top questions about no bake cookies
1. How do I know when the mixture is ready to shape?
Look for a shiny, fudgy texture that holds together when you press it slightly; it should be firm but not hard.
2. My mixture is too sticky, what can I do?
If your mixture is too runny, try adding a bit more shredded coconut or oats to absorb moisture.
3. How long should I refrigerate the cookies?
Chill the cookies for at least 2 hours; they should be firm, glossy, and hold their shape when you pick them up.
4. Can I use different types of chocolate?
Use semi-sweet or dark chocolate chips for a richer flavor; white chocolate adds sweetness and creaminess.
5. Can I make these dairy-free?
Yes, you can substitute coconut oil for butter; the texture remains fudgy, but the flavor is slightly different.
6. Should I toast the coconut first?
Toast the coconut until golden for a smoky, nutty flavor that adds depth; skip to keep it lighter.
7. How do I melt the chocolate properly?
Warm the chocolate gently in short bursts, stirring each time; over-heating can cause seizing or bitterness.
8. How should I store these cookies?
Store leftovers in an airtight container in the fridge for up to a week for best texture and flavor.
9. My mixture is too stiff to scoop, what now?
If the mixture is too thick to scoop, add a tiny splash of milk or cream to loosen it slightly.
10. When is the best time to enjoy these cookies?
These cookies are best served cold, straight from the fridge, with a faint chocolate aroma and chewy texture.
These cookies are a little messy, a little spontaneous, but always satisfying. They remind me that sometimes, the best treats come from just throwing ingredients together and letting chaos do its thing.
Whenever I make these, I think about those lazy afternoons when a quick, homemade sweet was all I needed. They’re perfect for any moment that calls for something rich, chocolatey, and honestly, just a little bit forgiving.

Hi, I’m Mia Bennett, the chef and storyteller behind Grounding in Tradition. I’m so glad you’re here. This blog is my way of preserving the flavors, techniques, and rituals that shaped me as both a cook and a professional chef. Grounding in Tradition is not about trends or shortcuts. It is about honoring where food comes from, understanding the hands that prepare it, and carrying forward recipes that deserve to be remembered.


Leave a Reply