
This recipe is my secret weapon for a quick, satisfying treat during hectic afternoons when I need a moment of comfort without the fuss of baking. It’s a simple, honest way to indulge, especially when I crave that rich, nutty crunch paired with deep chocolate flavor, but don’t have hours to spare.
I love how these no-bake clusters come together in minutes, yet feel indulgent enough to hand around at gatherings or just keep in the fridge for a quick fix. They’re messy in the best way—sticky, sweet, with that satisfying snap of almonds and melt-in-your-mouth chocolate. It’s a recipe I turn to when I want something homemade but don’t want to get bogged down in complicated steps.
This recipe is my secret weapon for a quick, satisfying treat during hectic afternoons when I need a moment of comfort without the fuss of baking. It’s a simple, honest way to indulge, especially when I crave that rich, nutty crunch paired with deep chocolate flavor, but don’t have hours to spare.
A Secret Treat for Busy Days
- These clusters remind me of childhood afternoons at my grandma’s, where the smell of toasted almonds filled the air.
- I get oddly proud when I manage to keep the chocolate smooth and shiny without overdoing it on the stove.
- There’s a quiet joy in breaking into one of these and hearing that satisfying snap, like a small celebration.
- Whenever I make these, I feel a rush of relief—no oven, no fuss, just pure, honest chocolate and nuts coming together.
The story behind this recipe
- This recipe was born out of a chaotic afternoon when I needed something sweet but didn’t want to turn on the oven or fuss with complicated steps. I remembered a batch of almonds I’d toasted last week, sitting in the fridge, waiting for a purpose. Combining melted chocolate with crunchy almonds felt like a small act of rebellion against the usual baking routine.
- I love how these clusters came together on a whim, quick and easy but still satisfying—like a little secret I could whip up in minutes. They’re not fancy, but they carry a quiet kind of comfort, especially after a long day. Sometimes, the simplest treats are the ones that stick with you most.
- heading
- story_type
Historical & Cultural Tidbits
- These chocolate almond clusters trace back to post-war rationing days, where resourcefulness turned simple ingredients into treats.
- Originally, they were a way to make use of leftover nuts and chocolate scraps, turning them into something special without oven time.
- In some cultures, similar no-bake confections were shared during harvest festivals, symbolizing abundance and gratitude.
- The combination of chocolate and almonds became popular in America in the early 20th century, especially as a quick homemade gift.
Key Ingredients Breakdown
- Dark chocolate: I prefer a good quality bar with at least 70% cacao, it melts smoothly and offers a rich, slightly bitter contrast to the sweetness. Swap for milk chocolate if you want it sweeter but expect a creamier, less intense flavor.
- Almonds: Toasted almonds add a smoky, nutty depth and crunch that makes these clusters special. If you’re out, pecans or walnuts work—just toast them first for that extra oomph.
- Honey or maple syrup: I use a touch of honey to help the chocolate set with a glossy sheen; maple syrup can add a different, caramelized note. Skip if you prefer a less sticky cluster, but don’t skip the sweetness altogether.
- Coconut oil: A splash helps melt the chocolate smoothly and keeps the texture glossy. Use a neutral oil if you dislike coconut flavor, or leave it out for a thicker, fudgier consistency.
- Sea salt: Just a tiny pinch on top elevates the flavor—really amplifies the chocolate and nut combo. If you’re not a salt fan, leave it off, but I recommend trying it at least once.
- Optional add-ins: Dried cranberries or sea salt flakes add a burst of contrast. Keep it simple, or go wild—these clusters are forgiving and can handle a little chaos.
Spotlight on key ingredients
Dark chocolate:
- I prefer a good quality bar with at least 70% cacao, it melts smoothly and offers a rich, slightly bitter contrast to the sweetness. Swap for milk chocolate if you want it sweeter but expect a creamier, less intense flavor.
- Almonds: Toasted almonds add a smoky, nutty depth and crunch that makes these clusters special. If you’re out, pecans or walnuts work—just toast them first for that extra oomph.
Almonds:
- Toasted almonds add a smoky, nutty depth and crunch that makes these clusters special. If you’re out, pecans or walnuts work—just toast them first for that extra oomph.
- ingredient
Notes for ingredient swaps
- Dairy-Free: Use coconut or cashew-based chocolate to keep it dairy-free, though expect a slightly different melt and flavor profile.
- Nut Variations: Swap almonds for pecans or walnuts for a softer bite and different roasted notes.
- Sweetener Options: Maple syrup or agave can replace honey for a vegan or different flavor, but might alter the stickiness slightly.
- Oil Choices: Instead of coconut oil, try a neutral oil like grapeseed or light olive oil for a subtler sheen and flavor.
- Add-ins: Dried fruits like cranberries or apricots add a chewy contrast—use sparingly to keep the texture balanced.
- Chocolate Types: Milk chocolate or white chocolate can be substituted, but expect a sweeter, creamier result.
- Salt: Finishing with sea salt flakes enhances the chocolate and nuts—skip if you prefer a milder finish.
Equipment & Tools
- Baking sheet with parchment: To hold clusters without sticking and for easy cleanup.
- Heatproof bowl: For melting chocolate evenly over simmering water.
- Small spoon or scoop: To portion out and shape clusters consistently.
- Cooling rack: To let clusters set and cool without sitting in excess moisture.
Step-by-step guide to clusters
- Equipment & Tools: Line a baking sheet with parchment paper; use a heatproof bowl for melting chocolate; have a spoon or small spatula ready for mixing; place a cooling rack nearby for setting clusters.
- Toast the almonds in a dry skillet over medium heat (about 5 minutes at 180°C / 356°F). Stir often, smell for that nutty aroma, and watch for golden edges. Let cool.
- Melt the chocolate: Chop the chocolate into small pieces. In the heatproof bowl, set over a pot of simmering water (bain-marie) at 60°C / 140°F. Stir until smooth, shiny, and completely melted. Add a teaspoon of coconut oil for gloss.
- Mix in the almonds and sweetener: Fold the cooled almonds into the melted chocolate. If using honey or maple syrup, stir it in now for a sticky, flavorful binder. Mix until evenly coated.
- Form clusters: Use a spoon or small scoop to drop dollops onto the prepared parchment. Lightly press down if needed. Space them out to prevent sticking.
- Chill and set: Place the tray in the fridge (around 4°C / 39°F). Let them set for at least 30 minutes. The chocolate should harden, and clusters will become firm but still tender.
- Final touch: Before serving, sprinkle a tiny pinch of sea salt or garnish with extra almonds for crunch. Gently break apart any clusters that stick together if needed.
- Resting & Finishing: Keep the clusters in an airtight container in the fridge for up to a week. For best texture, serve straight from the fridge; they’ll be delightfully firm and glossy.
- Checkpoints & How to Know It’s Done: The clusters should be firm to the touch, shiny, and hold their shape when gently pressed. The chocolate should be fully set, not sticky or soft, and almonds should be crunchy.
Keep clusters refrigerated in an airtight container. Serve directly from fridge for maximum crunch. Let sit at room temperature for a few minutes if you prefer a softer bite.
How to Know It’s Done
- Chocolate is glossy and fully melted before mixing.
- Clusters are firm and shiny after chilling.
- Almonds are toasted and fragrant before mixing.
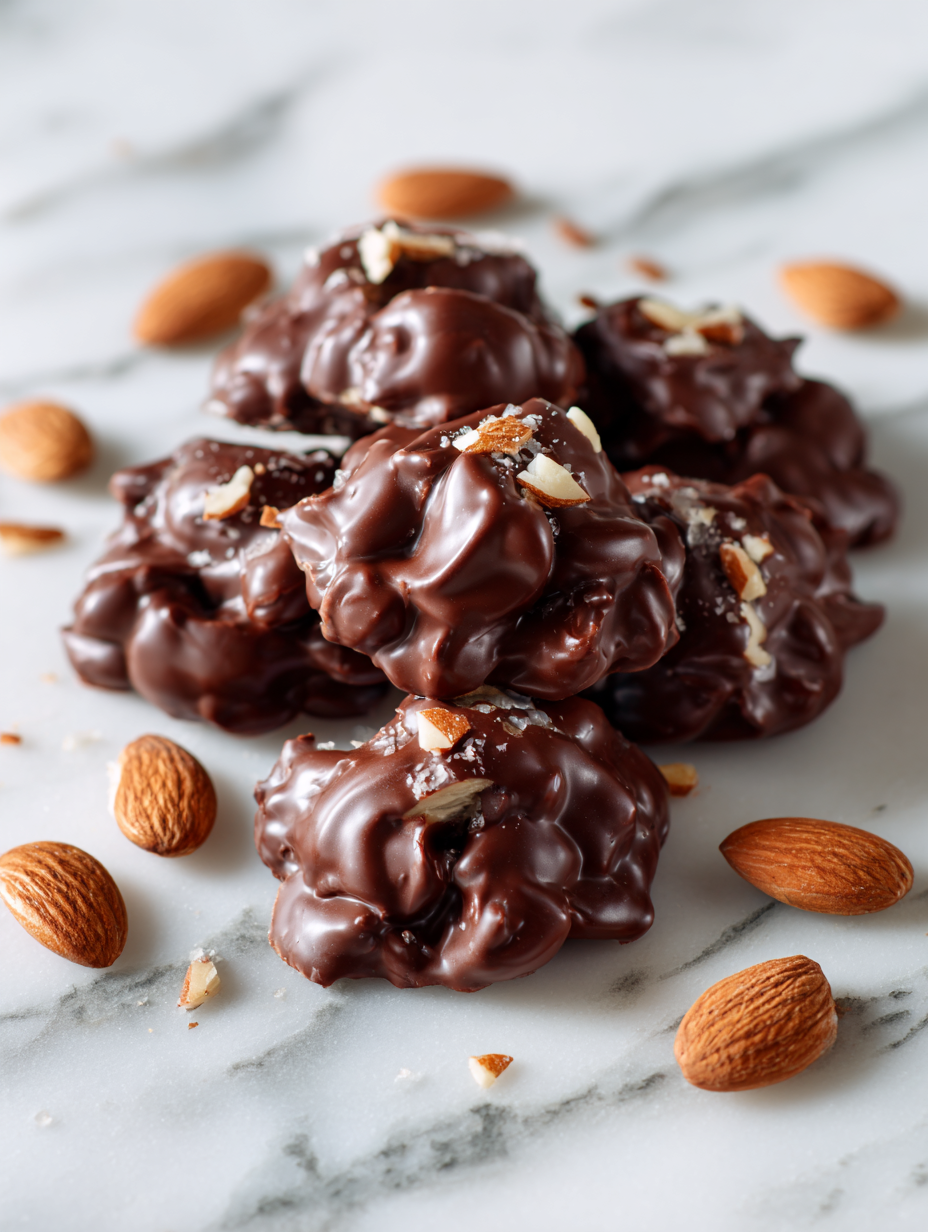
Chocolate Almond Clusters
Ingredients
Equipment
Method
- Preheat your oven to 180°C (356°F) and toast the almonds on a baking sheet for about 5 minutes, stirring occasionally until fragrant and golden. Let them cool while you prepare the chocolate.
- Chop the dark chocolate into small pieces and place it in a heatproof bowl. Set the bowl over a pot of simmering water, making sure the bottom doesn’t touch the water. Stir gently until the chocolate melts completely and becomes glossy.
- Once melted, stir in a teaspoon of coconut oil and honey to add shine and sweetness, mixing until smooth and well combined.
- Fold the cooled toasted almonds into the melted chocolate, ensuring they are evenly coated with the chocolate mixture.
- Using a small spoon or scoop, dollop the chocolate-almond mixture onto a parchment-lined baking sheet, spacing each cluster to prevent sticking. Gently press down if needed.
- Sprinkle a tiny pinch of sea salt on top of each cluster for added flavor contrast.
- Place the tray in the refrigerator and chill for at least 30 minutes, or until the chocolate has set and the clusters are firm to the touch.
- Once set, gently break apart any clusters that may have stuck together and transfer them to a serving plate or store in an airtight container in the fridge for up to a week.
Pro tips for perfect clusters
- Bolded mini-head: Use a silicone spatula for gentle folding—keeps the chocolate smooth and prevents breakage.
- Bolded mini-head: Slightly under-melt the chocolate; it will finish melting with residual heat, avoiding overheating and seizing.
- Bolded mini-head: Toast almonds until fragrant and golden—this intensifies their nutty aroma and adds depth to the clusters.
- Bolded mini-head: Chill the clusters on a cold surface or in the fridge to speed up setting and maintain glossy sheen.
- Bolded mini-head: For a shiny finish, add a tiny splash of coconut oil to the melted chocolate before mixing.
- Bolded mini-head: If clusters are sticking together, gently separate them while still slightly soft, then refrigerate again.
- Bolded mini-head: Use quality chocolate with at least 70% cacao for a richer flavor and smoother melt.
Common mistakes and how to fix them
- FORGOT to toast nuts before adding? Toast them longer, until fragrant and golden, then cool.
- DUMPED too much chocolate? Use less or add a splash of coconut oil to loosen the mixture.
- OVER-TORCHED chocolate? Remove from heat immediately, stir until smooth, and start over if burned.
- MISSED the chill time? Let clusters set at least 30 minutes, or they’ll be sticky and soft.
Quick fixes and pantry swaps
- When chocolate seizes, splash in a bit of warm coconut oil to loosen the mixture.
- If clusters stick together, gently separate them while still soft, then refrigerate again.
- Dumped too much chocolate? Use less next time or add a splash of coconut oil for easier mixing.
- Over-torched chocolate? Remove immediately, stir until smooth, and start over if burned.
- Splash cold water on the tray if clusters are soft; quick chill helps set them faster.
Prep, store, and reheat tips
- Prepare the clusters up to two days in advance; store in an airtight container in the fridge to maintain freshness and shine.
- The chocolate flavor deepens over time; keep clusters refrigerated for up to one week, or freeze for up to a month for longer storage.
- Refrigerate at least 30 minutes before serving to ensure they’re firm and the chocolate is glossy; let sit at room temperature for a softer bite if desired.
- For reheating, briefly warm in a low oven (around 80°C / 175°F) or gently microwave in short bursts, just until the chocolate softens—watch for melting or burning.
Top questions about clusters
1. Can I use different types of chocolate?
Yes, you can swap dark chocolate for milk or white chocolate, but the flavor will be sweeter and less intense.
2. Can I substitute almonds with other nuts?
Absolutely. Toasted pecans or walnuts work well as substitutes for almonds, adding their own crunch and flavor.
3. How long do these clusters last?
Storing in an airtight container in the fridge keeps them fresh for up to a week; freeze for longer storage.
4. How do I know when they’re ready to eat?
Refrigerate the clusters for 30 minutes to set the chocolate; serve chilled or let sit at room temp for softer texture.
5. What if my chocolate seizes during melting?
If the chocolate seizes or becomes grainy, add a splash of warm coconut oil and stir until smooth.
6. How can I keep the clusters shiny?
Use a silicone spatula for gentle folding to keep the chocolate glossy and prevent breaking the nuts.
7. How do I speed up setting time?
Chill the clusters on a cold surface or in the fridge for faster setting and to preserve that glossy finish.
8. My clusters are sticking together, what now?
Too sticky clusters? Gently separate them while still soft, then refrigerate again for firmness.
9. Should I add salt?
Adding a pinch of sea salt on top enhances the chocolate and nuts; skip if you prefer milder flavors.
10. Can I make these in advance?
Yes, these are perfect for making ahead. Keep in fridge or freezer and re-chill before serving for best texture.
These clusters are a quiet reminder that simple ingredients can create something special. They’re perfect for when you need a sweet fix without fuss, especially now when quick, satisfying treats feel more necessary than ever.
Whenever I make these, I appreciate the little moments of mindfulness—melting chocolate, toasting nuts—that turn a busy day into a small celebration of flavors and textures. They’re not just a snack, but a tiny act of homemade kindness in a hectic world.

Hi, I’m Mia Bennett, the chef and storyteller behind Grounding in Tradition. I’m so glad you’re here. This blog is my way of preserving the flavors, techniques, and rituals that shaped me as both a cook and a professional chef. Grounding in Tradition is not about trends or shortcuts. It is about honoring where food comes from, understanding the hands that prepare it, and carrying forward recipes that deserve to be remembered.


Leave a Reply