
This recipe is a secret weapon for those nights when I crave something sweet but am too tired to turn on the oven. It’s a no-fuss, no-mess fix that comes together in minutes, yet feels indulgent enough to share. Perfect for chaotic weekends or last-minute gatherings, it’s my go-to for instant comfort.
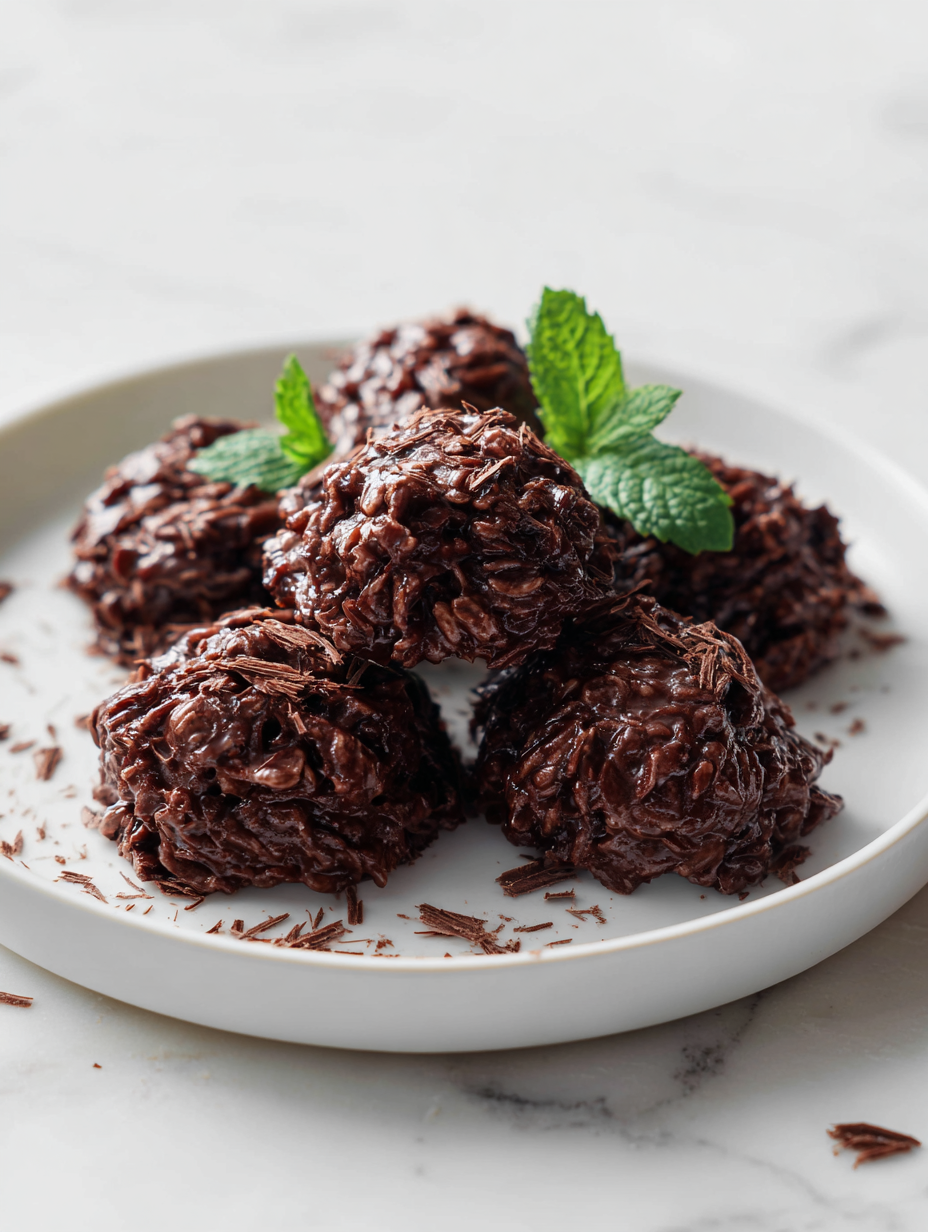
What I love most is how forgiving it is—no baking means fewer worries about overcooking or uneven textures. The chewy, fudgy bite of these chocolate chewies makes them feel special, even when whipped up in a rush. Sometimes, I stash a batch in the freezer just to have an immediate treat ready for unexpected guests or a midnight craving.
This recipe is a secret weapon for those nights when I crave something sweet but am too tired to turn on the oven. It’s a no-fuss, no-mess fix that comes together in minutes, yet feels indulgent enough to share. Perfect for chaotic weekends or last-minute gatherings, it’s my go-to for instant comfort.
A Secret Snack in Minutes
- This recipe is a secret weapon for those nights when I crave something sweet but am too tired to turn on the oven. It’s a no-fuss, no-mess fix that comes together in minutes, yet feels indulgent enough to share. Perfect for chaotic weekends or last-minute gatherings, it’s my go-to for instant comfort.
- What I love most is how forgiving it is—no baking means fewer worries about overcooking or uneven textures. The chewy, fudgy bite of these chocolate chewies makes them feel special, even when whipped up in a rush. Sometimes, I stash a batch in the freezer just to have an immediate treat ready for unexpected guests or a midnight craving.
- There’s something about mixing melted chocolate and butter that smells like childhood, all warm and rich, filling the kitchen. It’s like a quick hug in edible form, especially when I need a little sweet escape during hectic days.
- Getting this recipe right feels like a small victory—perfectly chewy, not too sticky, with that deep chocolate flavor that lingers. It’s a reminder that simple ingredients can create moments of genuine pleasure.
The story behind this recipe
- This recipe came out of a messy weekend, when I was desperate for something sweet but had no energy to turn on the oven. I remembered a quick, no-bake treat my grandma used to make—something fudgy and rich, but simple enough to whip up in minutes. That memory stuck with me, and I started tweaking it with what I had in the pantry, turning it into these chewy chocolate bites.
- Every time I make these, I think of how food doesn’t need to be fancy to be comforting. It’s really about those small moments—licking the spoon, feeling the sticky chocolate on fingers, the smell of cocoa filling the kitchen. They’re a reminder that sometimes, the best recipes are born from chaos or a little bit of nostalgia.
- heading
- story_type
Trivia and Historical Tidbits
- This recipe traces back to 1960s no-bake dessert trends, where convenience and rich flavor were key.
- It’s inspired by childhood memories of my grandmother’s quick chocolate treats—rich, chewy, and no oven needed.
- The combination of oats and chocolate was a clever way to make a filling snack that feels indulgent but isn’t overly sweet.
Ingredient breakdown
- Dark chocolate: I love using high-quality dark chocolate—melts smoothly and makes the chewies intensely rich. Feel free to swap for semi-sweet if you want less bitterness.
- Butter: Creamy, melts quickly, giving the chewies their fudgy texture. If you want a dairy-free version, coconut oil works, but it’ll add a subtle coconut aroma.
- Sweetened condensed milk: It’s the glue that keeps everything together and adds a luscious sweetness. You can try evaporated milk mixed with a little sugar for a lighter twist.
- Rolled oats: They give structure and chew. To boost flavor, toast the oats lightly before mixing; skip if you prefer a softer bite.
- Vanilla extract: Adds depth and rounds out the chocolate. A splash of almond extract can give a different aromatic punch—use sparingly.
- Cocoa powder: For that deep, smoky chocolate flavor. Dutch-processed cocoa will make it mellower, while natural cocoa keeps it more intense and bright.
- Optional add-ins: Nuts, dried fruit, or a pinch of sea salt—these can elevate the chewies, adding texture and contrast against the dense chocolate.
Spotlight on key ingredients
Dark chocolate:
- I love using high-quality dark chocolate—melts smoothly and makes the chewies intensely rich. Feel free to swap for semi-sweet if you want less bitterness.
- Butter: Creamy, melts quickly, giving the chewies their fudgy texture. If you want a dairy-free version, coconut oil works, but it’ll add a subtle coconut aroma.
- Sweetened condensed milk: It’s the glue that keeps everything together and adds a luscious sweetness. You can try evaporated milk mixed with a little sugar for a lighter twist.
Rolled oats and cocoa powder:
- Rolled oats: They give structure and chew. To boost flavor, toast the oats lightly before mixing; skip if you prefer a softer bite.
- Cocoa powder: For that deep, smoky chocolate flavor. Dutch-processed cocoa will make it mellower, while natural cocoa keeps it more intense and bright.
Notes for ingredient swaps
- Dairy-Free: Swap butter for coconut oil. It melts easily and adds a slight coconut aroma, but may alter the fudgy richness.
- Vegan Chocolate: Use dark vegan chocolate and coconut condensed milk. Expect a slightly different melt and flavor profile.
- Sweetener: Substitute sweetened condensed milk with coconut condensed milk or a thick coconut cream for a dairy-free, equally sticky result.
- Oats: For gluten-free, choose certified gluten-free oats. They’ll still give structure but with a different texture if you prefer softer chew.
- Cocoa Powder: Dutch-processed cocoa makes for a mellower, smoother flavor, natural cocoa keeps it more bright and intense.
- Add-ins: Nuts, dried fruit, or sea salt can be omitted or replaced with seeds or crispy rice for different textures and flavors.
- Chocolate Type: Feel free to experiment with milk chocolate for a sweeter, creamier chew, though it will be less intense.
Equipment & Tools
- Medium saucepan: To melt chocolate and butter gently.
- Mixing bowl: To combine ingredients smoothly.
- Spatula: For mixing and spreading the mixture.
- Parchment paper: To prevent sticking and make removal easy.
- Knife: To cut the chilled chewies into squares.
Step-by-step guide to no bake chewies
- Gather your equipment: a medium saucepan, a mixing bowl, a spatula, and a baking dish (about 20x20cm or 8×8 inches). Line the dish with parchment paper for easy removal.
- Chop 200g of dark chocolate into small pieces. This helps it melt evenly. Measure out 50g of butter, a can of sweetened condensed milk (about 1/2 cup), 1 teaspoon vanilla, and 1 1/2 cups rolled oats. Keep your cocoa powder handy.
- In the saucepan over low heat (around 50°C / 122°F), melt the butter and chopped chocolate together. Stir constantly until smooth. This should take about 3-5 minutes and fill your kitchen with that intense, sweet cocoa aroma.
- Once melted, remove from heat. Mix in the sweetened condensed milk and vanilla. Whisk until fully combined, smooth and glossy. If it looks a little thick, warm it gently for a few seconds but don’t overheat.
- Add the oats and cocoa powder to the chocolate mixture. Stir vigorously until all the oats are coated and the mixture is thick and fudgy. It should be slightly sticky but manageable.
- Pour the mixture into your prepared dish. Use a spatula to spread it evenly and press it down firmly. The surface should be smooth with a slight sheen. Chill in the fridge for at least 2 hours or until firm.
- Once set, lift the block out of the dish using the parchment paper. Slice into squares or rectangles, about 2 inches each. For cleaner cuts, wipe your knife with a damp cloth between slices.
- Optional: For extra flair, sprinkle sea salt or chopped nuts on top before chilling. Serve straight from the fridge for the best chewy, fudgy texture.
Chill the mixture in the fridge for at least 2 hours until firm. Slice into squares and serve directly, or store in an airtight container for up to a week. Keep refrigerated for best chewy, fudgy texture.
How to Know It’s Done
- Chocolate mixture is glossy and smooth after melting.
- Mixture holds together when pressed into the dish.
- Chewy, firm texture when sliced after chilling.
No-Bake Chocolate Chewies
Ingredients
Equipment
Method
- Line a square baking dish with parchment paper to make removing the chewies easier later.
- Chop the dark chocolate into small, even pieces to ensure it melts smoothly and quickly.
- In a medium saucepan over low heat, melt the butter and chopped chocolate together, stirring constantly until the mixture is glossy and smooth.
- Remove the saucepan from heat and stir in the sweetened condensed milk and vanilla extract until well combined and silky.
- Add the rolled oats and cocoa powder to the chocolate mixture. Mix vigorously with a spatula until all the oats are coated and the mixture is thick and fudgy.
- Pour the mixture into the prepared dish, using your spatula to spread it evenly. Press down firmly to compact it for a dense, chewy texture.
- Place the dish in the fridge and chill for at least 2 hours, or until the mixture is firm and set.
- Once chilled, lift the block out of the dish using the parchment paper and transfer to a cutting board. Slice into 12 equal squares with a sharp knife, wiping the blade with a damp cloth between cuts for clean slices.
- Serve immediately for a chewy, fudgy treat, or store in an airtight container in the refrigerator for up to a week.
Pro tips for perfect chewies
- Bolded mini-head: Use low heat → Melts chocolate and butter gently, preventing scorching and ensuring smoothness.
- Bolded mini-head: Stir continuously → Keeps the mixture uniform, avoiding lumps and burnt spots, especially when melting.
- Bolded mini-head: Chill in stages → Slightly refrigerate the mixture before pressing into the dish for better handling and even setting.
- Bolded mini-head: Press firmly → Compact the mixture evenly in the dish to prevent cracks and ensure clean cuts.
- Bolded mini-head: Use a sharp knife → Slice with a warm, damp blade for clean, smooth edges and less sticking.
- Bolded mini-head: Don’t skip the resting → Chill for at least 2 hours; patience makes for chewy, fudgy bites.
- Bolded mini-head: Add a pinch of sea salt → Enhances the chocolate flavor and balances sweetness, especially if using very sweet chocolate.
Common mistakes and how to fix them
- FORGOT to fold in oats thoroughly → Fold gently to avoid breaking oats.
- DUMPED chocolate too hot → Let it cool slightly before mixing to prevent seizing.
- OVER-TORCHED mixture → Remove from heat immediately, cool slightly, then stir in other ingredients.
- MISSED chilling time → Chill at least 2 hours for proper set and chewy texture.
Quick fixes and pantry swaps
- If mixture is too thick, splash in a tiny bit of hot water to loosen it.
- When chocolate seizes, dump in a spoon of warm milk and stir until smooth.
- Patch uneven edges by warming the knife blade before slicing.
- Shield over-dried chewies with a quick drizzle of melted chocolate.
- Splash a pinch of sea salt on top to enhance deep chocolate aroma.
Prep, store, and reheat tips
- Prepare the mixture ahead of time by melting chocolate and butter. It can be stored in the fridge for up to 24 hours, but expect it to firm up more and require softening slightly before mixing with oats.
- Once the chewies are pressed into the dish, cover tightly with plastic wrap. They can be refrigerated for up to 5 days, maintaining their chewy, fudgy texture and rich aroma.
- For longer storage, freeze the cut squares in an airtight container for up to 3 months. Let them thaw in the fridge for a softer bite or at room temperature for a more melt-in-your-mouth feel.
- Reheat individual chewies gently in the microwave at 10–15 second intervals. Expect a warm, gooey chocolate aroma and a slightly softer texture that’s ideal for an instant treat.
Top questions about no bake chewies
1. How do I melt chocolate without burning it?
Use a microwave-safe bowl and heat in short bursts, stirring in between, until smooth and glossy. Be cautious not to overheat, which can cause seizing.
2. When is my no bake mixture ready to cut?
Chill the mixture until it’s firm and set, usually about 2 hours. You’ll know it’s ready when it’s firm enough to slice cleanly.
3. How should I store leftovers?
Store in an airtight container in the fridge for up to a week. For longer storage, freeze individual squares in a sealed bag for up to 3 months.
4. Can I use different types of chocolate?
Yes, you can swap dark chocolate for semi-sweet or milk chocolate for a sweeter flavor. Adjust the sweetness to taste, but expect a slightly different texture.
5. Can I add toppings?
Adding a pinch of sea salt on top before chilling enhances the chocolate flavor and balances the sweetness beautifully.
6. Can I omit the oats?
Yes, toasted oats add a richer flavor and crunch, but you can skip to keep the chewies softer and more fudgy.
7. What if my mixture is too sticky or dry?
If your mixture is too sticky, sprinkle in a little extra oats or chill it longer. Too dry? Add a tiny splash of warm milk and stir gently.
8. How do I get clean slices?
Using a sharp, warm knife makes slicing easier and cleaner. Wipe the blade with a damp cloth between cuts for neat edges.
9. Are there dairy-free options?
For a dairy-free version, use coconut oil instead of butter and coconut condensed milk. Expect a slightly different, more tropical flavor.
10. Can I reheat or warm them up?
Reheat a single chewie in the microwave for about 10 seconds until warm and gooey, releasing rich chocolate aroma that’s irresistible.
Making these no bake chocolate chewies is a quick way to satisfy that sudden chocolate craving without any fuss. They’re a small, imperfect triumph that can turn a chaotic day into a moment of sweet relief. Sometimes, it’s those simple, honest recipes that stick with you the longest, especially when they come together in just minutes.’] }\n
maxItems

Hi, I’m Mia Bennett, the chef and storyteller behind Grounding in Tradition. I’m so glad you’re here. This blog is my way of preserving the flavors, techniques, and rituals that shaped me as both a cook and a professional chef. Grounding in Tradition is not about trends or shortcuts. It is about honoring where food comes from, understanding the hands that prepare it, and carrying forward recipes that deserve to be remembered.


Leave a Reply