
This no-bake chocolate biscuit bars recipe is my go-to for those days when I crave something sweet but don’t want to turn on the oven. It’s like a quick hug in dessert form—rich, fudgy, and surprisingly versatile. I love how you can tweak it with different nuts or dried fruits, depending on what’s in your pantry.
What makes this recipe special isn’t just how fast it comes together, but how it taps into those childhood memories of weekend treats and school lunchbox favorites. It’s perfect for busy weeknights or spur-of-the-moment gatherings when you need something homemade but don’t have the time or energy for complicated baking. Plus, it’s a total pantry saver, calling on simple ingredients most of us always have around.
This recipe taps into childhood nostalgia but with a twist—using only pantry staples and no oven, making it a perfect last-minute treat or a simple, comforting dessert for busy days.
The story behind this recipe
- This recipe was born out of a lazy afternoon when I found a nearly empty jar of biscuits and a bar of chocolate lurking in the pantry. I wanted something sweet but didn’t want to turn on the oven or fuss over complicated steps. It’s become a go-to because it’s honest, simple, and satisfies that chocolate craving without much effort.
- Every time I make these bars, I remember childhood afternoons when my mom would whip up similar treats with whatever was on hand. It’s funny how such a humble combination can carry so much nostalgia and comfort. Now, I pass it on to friends and family, tweaking the ingredients here and there, but always with that same quick, messy joy.
- heading: ‘The story behind this recipe’
Ingredient breakdown: key components
- Digestive biscuits: I love how their slightly sweet, nutty flavor and crumbly texture make the base rich and satisfying—feel free to swap for graham crackers if you want a different crunch.
- Butter: I use melted unsalted butter for that glossy, fudgy feel—if you want a vegan option, coconut oil works but will add a subtle coconut aroma.
- Chocolate: I prefer dark chocolate for a bittersweet punch, but milk or semi-sweet bars can lighten the flavor—look for one with a shiny, smooth surface when melting.
- Sweetener: I often add a spoonful of honey or golden syrup for depth—if you’re avoiding sugar, mashed bananas can provide moisture and sweetness, but will influence the texture slightly.
- Add-ins: Nuts, dried fruits, or even crushed peppermint can turn these bars into personalized treats—choose ones with contrasting textures to keep it interesting.
- Optional cocoa powder: I stir in a teaspoon for an extra chocolate boost—if you don’t have any, a splash of espresso can deepen the chocolate flavor instead.
- Vanilla extract: A teaspoon adds warmth and complexity—skip if you want a more intense chocolate focus, but don’t skip it if you love that aromatic touch.
Spotlight on key ingredients
Digestive biscuits:
- I love how their slightly sweet, nutty flavor and crumbly texture make the base rich and satisfying—feel free to swap for graham crackers if you want a different crunch.
- Butter: I use melted unsalted butter for that glossy, fudgy feel—if you want a vegan option, coconut oil works but will add a subtle coconut aroma.
Chocolate:
- I prefer dark chocolate for a bittersweet punch, but milk or semi-sweet bars can lighten the flavor—look for one with a shiny, smooth surface when melting.
- Sweetener: I often add a spoonful of honey or golden syrup for depth—if you’re avoiding sugar, mashed bananas can provide moisture and sweetness, but will influence the texture slightly.
Notes for ingredient swaps
- Dairy-Free: Use coconut oil instead of butter for a rich, vegan-friendly base—expect a slight coconut aroma that complements the chocolate.
- Gluten-Free: Swap digestives for gluten-free graham crackers or gluten-free digestive biscuits—same crumbly texture, but check labels for added ingredients.
- Sweetener: Replace honey or golden syrup with maple syrup or agave nectar—these will add a different sweetness profile but keep the bars moist.
- Chocolate: Use dairy-free dark chocolate or vegan chocolate bars—tastes slightly different, but the glossy finish remains intact.
- Add-ins: Incorporate chopped dried fruits, seeds, or allergy-friendly nuts—choose what adds crunch and flavor, but keep in moderation to avoid sogginess.
- Cocoa Powder: Mix in a teaspoon of cocoa powder for a deeper chocolate flavor—if you don’t have it, a splash of espresso water enhances richness.
- Sweetener: For a less sweet version, cut back on the chocolate or skip extra sweetening—your taste buds will thank you for the bittersweet balance.
Equipment & Tools
- 20cm (8-inch) square baking dish: Holds the mixture and facilitates easy removal.
- Parchment paper: Prevents sticking and makes lifting out the set bars easier.
- Microwave-safe bowl: Melts butter and chocolate evenly without overcooking.
- Spatula: Folds ingredients and spreads the mixture evenly.
- Knife or pizza cutter: Slices the set bars cleanly.
Step-by-step guide to no-bake bars
- Gather all equipment and ingredients. Use a 20cm (8-inch) square baking dish lined with parchment paper for easy removal.
- Break the biscuits into small, uneven chunks. No need for perfect pieces—this adds texture.
- Melt the butter and chocolate together. Use a microwave-safe bowl; heat in 30-second bursts, stirring in between, until smooth. Smell that rich cocoa aroma filling the kitchen.
- Pour the melted mixture over the biscuit chunks. Gently fold to coat everything evenly, avoiding breaking the biscuits further.
- Transfer the mixture into the prepared dish. Spread it out with a spatula, pressing down firmly to compact. You want a dense, even layer.
- Optional: sprinkle with chopped nuts, dried fruits, or a pinch of sea salt for extra flavor. Press them lightly into the top.
- Chill in the fridge for at least 2 hours. The mixture should set firm, with a glossy top that catches the light.
- Once chilled, lift the bars out using the parchment paper. Slice into rectangles or squares as preferred.
- Serve immediately or store in an airtight container. Keep in the fridge for up to a week, or freeze for longer storage.
- For best texture, let the bars come to room temperature before slicing if refrigerated overnight.
Chill the bars for at least 2 hours until firm. Slice into pieces and serve directly or store in an airtight container in the fridge. For best texture, bring to room temperature before eating.
How to Know It’s Done
- Chocolate and butter are fully melted, shiny, and smooth before mixing.
- The mixture is thick and holds together when pressed into the dish.
- Bars are firm and set after chilling, with a glossy, crackly top.
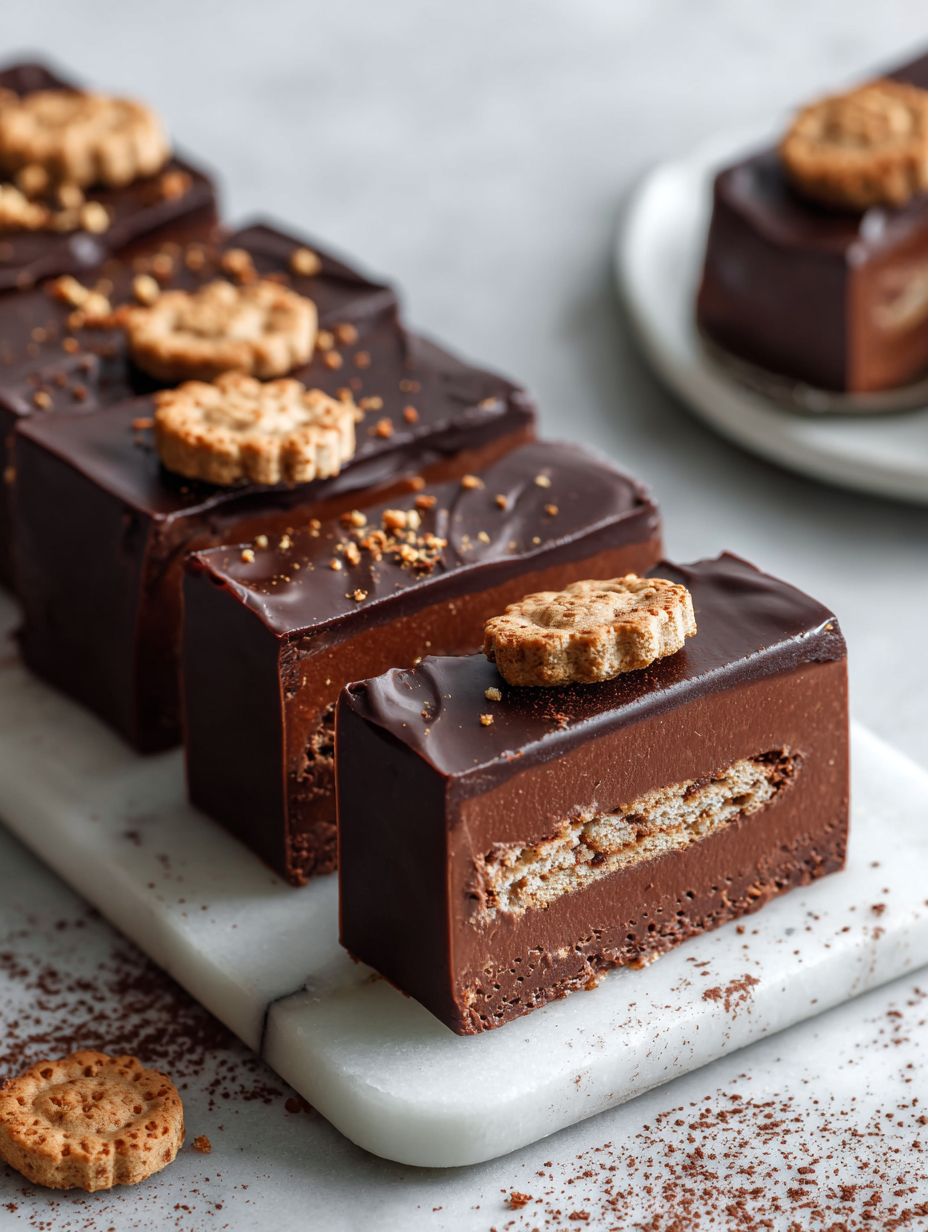
No-Bake Chocolate Biscuit Bars
Ingredients
Equipment
Method
- Line your baking dish with parchment paper, leaving some overhang for easy removal.
- Place the digestive biscuits in a large bowl and roughly crush them into uneven chunks—this adds a rustic texture to the bars.
- In a microwave-safe bowl, melt the dark chocolate and butter together in short 30-second bursts, stirring each time until smooth and glossy—your kitchen will fill with a rich, chocolaty aroma.
- Pour the melted chocolate mixture over the crushed biscuits, then gently fold with a spatula until all the biscuit pieces are coated evenly with the shiny chocolate—this mixture should feel thick and sticky.
- Transfer the mixture into the prepared dish, pressing down firmly with the back of a spatula or a small glass to create an even, compact layer—this step helps the bars hold together well.
- Optional: sprinkle chopped nuts, dried fruits, or a pinch of sea salt over the top, then press them gently into the surface for added crunch and flavor.
- Cover the dish with plastic wrap or a lid and refrigerate for at least 2 hours, allowing the mixture to set and develop a glossy, firm finish.
- Once set, lift the bars out of the dish using the overhanging parchment paper and place on a cutting board.
- Use a sharp knife dipped in hot water to slice into neat rectangles or squares, pressing down firmly to get clean edges.
- Serve immediately or store in an airtight container in the fridge for up to a week; enjoy the rich, fudgy texture with a glossy finish.
Tips for perfect bars
- Bolded mini-head: Use room temperature butter for a smoother melt and glossy finish—cold butter clumps and delays melting.
- Bolded mini-head: Melt chocolate slowly over low heat or in short bursts in the microwave—avoid scorching and develop a shiny, velvety texture.
- Bolded mini-head: Gently fold ingredients to keep the mixture light and prevent breaking the biscuits—overmixing can turn the bars crumbly.
- Bolded mini-head: Press the mixture firmly into the pan to create a dense, even layer—use the back of a spatula or a small glass to pack it down.
- Bolded mini-head: Chill the bars for at least 2 hours until they’re firm and glossy—skipping this step results in softer, messier slices.
- Bolded mini-head: Use a sharp knife dipped in hot water to cut clean slices—this helps prevent cracking and sticking.
- Bolded mini-head: For extra shine, briefly warm the knife before slicing—smooths out the edges and gives a polished look.
Common mistakes and how to fix them
- FORGOT to chill the mixture → Chill for at least 2 hours for proper setting.
- DUMPED too much chocolate → Use the right amount, or bars may become greasy and hard to cut.
- OVER-TORCHED the chocolate → Melt slowly over low heat or short microwave bursts to prevent burning.
- MISSED to line the pan with parchment → Use parchment for easy removal and clean slices.
Quick fixes and pantry swaps
- When chocolate seizes, splash in a teaspoon of hot milk to smooth it out.
- If mixture is too dry, add a drizzle of melted butter or a splash of cream.
- DUMPED too many nuts? Patch with a thin layer of chocolate and press them in again.
- When bars crack during slicing, chill longer or warm the knife blade beforehand.
- Splash a little vanilla or sea salt on top for an instant flavor boost when the texture feels dull.
Prep, store, and reheat tips
- Prepare the mixture and line your pan ahead of time; it speeds up the process and keeps things simple.
- Bars can be stored in an airtight container in the fridge for up to a week, maintaining their firm, glossy texture.
- For longer storage, freeze the bars wrapped tightly in parchment and foil—best enjoyed within a month for optimal freshness.
- Reheat slightly at room temperature for a softer bite or leave in the fridge for a firm, chewy texture—sensory cues include a shiny top and a firm snap.
Top questions about no bake bars
1. Can I substitute the biscuits with something else?
Use crushed digestive biscuits or graham crackers for a familiar, crumbly base. Feel free to experiment with different textures.
2. Is microwave melting necessary?
Yes, you can melt the chocolate in a double boiler if you prefer. Just watch the heat to avoid burning.
3. How long should I chill the bars?
Chill for at least 2 hours until the bars are firm and glossy. This ensures clean cuts and proper texture.
4. Can I leave out the add-ins?
You can skip nuts or dried fruits if you prefer a simpler, more chocolatey taste. They add crunch and extra flavor.
5. Are there vegan options?
Yes, use coconut oil instead of butter for a vegan version. It will add a slight coconut aroma but keep the texture rich.
6. How should I store the bars?
Store in an airtight container in the fridge for up to a week or freeze for longer. Let them come to room temp before slicing.
7. How do I get clean slices?
Use hot water to soften your knife before slicing. It helps prevent cracking and gives cleaner edges.
8. My mixture is too dry—what now?
If the mixture is too dry, add a little melted butter or a splash of cream to loosen it up.
9. How do I melt chocolate without burning it?
When melting the chocolate, do it slowly over low heat or in short bursts in the microwave to avoid scorching.
10. Can I enhance the flavor with extras?
Yes, adding a pinch of sea salt or vanilla extract can enhance the chocolate flavor and add complexity.
These no-bake chocolate biscuit bars are the kind of treat you don’t overthink—just assemble, chill, and enjoy that rich, fudgy bite. They’re perfect for those moments when you need something sweet, quick, and honest, with a nostalgic feel that’s hard to beat.
Whenever I make these, I’m reminded how simple ingredients can come together to create comfort and joy. No fuss, no oven, just good flavors and a bit of messy fun. Sometimes, that’s all you really need.

Hi, I’m Mia Bennett, the chef and storyteller behind Grounding in Tradition. I’m so glad you’re here. This blog is my way of preserving the flavors, techniques, and rituals that shaped me as both a cook and a professional chef. Grounding in Tradition is not about trends or shortcuts. It is about honoring where food comes from, understanding the hands that prepare it, and carrying forward recipes that deserve to be remembered.


Leave a Reply