
On those chaos-filled weeknights when the last thing I want is to fuss over a complicated dessert, these no bake caramel bars come to the rescue. They’re a rare kind of sweet treat that feels indulgent but comes together in no time, using ingredients I usually have lurking in the pantry. It’s that perfect, lazy comfort with a hint of nostalgia, reminding me of childhood caramel squares but with a modern, fuss-free twist.
The beauty of this recipe is how forgiving it is—no oven, no stovetop, just a little melting and pressing. I love the texture contrast: the buttery crust, the gooey caramel layer, and the crunchy topping all in one bite. They’re honest, straightforward, and honestly, I find myself craving them more often than I’d like to admit, especially when I need a quick fix for sweet cravings that doesn’t involve ordering out or waiting for a delivery.
This recipe is inspired by the chaos of a busy weeknight, where I needed something sweet but didn’t want to turn on the stove. It’s all about quick comfort, using ingredients I always have on hand, and still feeling like I made something homemade.
The story behind this recipe
This recipe came about during a particularly hectic weekend when I had a sweet tooth but zero patience for baking. I was craving that rich, caramel-y goodness without the fuss of turning on the oven or waiting for layers to cool. It’s become my go-to when I want something indulgent, fast, and satisfying, especially on lazy afternoons or when friends drop by unexpectedly. Every time I make them, I remember how a simple idea can turn into a little moment of joy.
Ingredient breakdown
- Unsalted butter: I love how it melts smoothly, giving the crust a rich, tender base. Swap with coconut oil if you want dairy-free, but it’ll lose some creaminess.
- Graham cracker crumbs: They create that familiar, buttery crunch I crave. For a nutty twist, try digestive biscuits—just crush them fine and watch the texture stay satisfying.
- Sweetened condensed milk: It’s like the glue that holds everything together, sweet and gooey. If you want a lighter version, try evaporated milk with a little sugar, but it won’t be as thick.
- Caramel sauce: I prefer a thick, smoky caramel for depth. Use homemade or store-bought, but warm it slightly so it drizzles easily—nothing worse than stiff caramel.
- Sea salt: Just a pinch enhances that caramel flavor. Go for flaky sea salt if you want a bit of crunch and that shimmer of salt crystals in every bite.
- Chocolate chips: I scatter them on top for melty bursts. Dark or milk, your call—just toss them on while warm for that glossy, inviting sheen.
- Chopped nuts: Optional but adds a satisfying crunch. Pecans or walnuts work well—toast them first to boost their aroma and flavor.
Spotlight on key ingredients
Sweetened condensed milk:
- I love how it transforms into a luscious, sticky caramel when heated. If you skip it, you’ll need a different thickener, but it won’t have that same gooey richness.
- Caramel sauce: The smoky, buttery flavor is what makes these bars special. A good quality store-bought works, but homemade caramel adds a depth you can’t replicate with jarred sauce.
Chocolate chips:
- Graham cracker crumbs: They create that nostalgic buttery crunch. If you use digestive biscuits, crush them fine and expect a slightly nutty, richer flavor.
- Melty, glossy, and sweet—these top the bars with a shiny, inviting finish. Use dark or milk based on your mood, but toss them on while warm for best melting.
Notes for ingredient swaps
- Dairy-Free: Swap butter for coconut oil or vegan butter. Expect a slightly different richness and a hint of coconut aroma.
- Gluten-Free: Use gluten-free graham cracker crumbs or crushed gluten-free cookies. Keep in mind, texture might be a tad crumblier.
- Vegan Caramel: Substitute sweetened condensed milk with coconut condensed milk or a thick coconut cream mixed with sugar. It won’t be as sticky but still sweet.
- Sugar-Free: Try sugar-free caramel sauce or make your own with natural sweeteners like maple syrup or agave. Flavour will be a bit different, less caramelly.
- Chocolate: Use dairy-free dark chocolate or white chocolate chips, depending on your preference. Be mindful of melting times and texture.
- Nuts: Omit or replace with seeds like pumpkin or sunflower for crunch. Toast nuts first for extra flavor, or skip for allergy-friendly bars.
- Caramel Sauce: Use homemade caramel made with brown sugar and butter, or a thick honey drizzle for a different sweet note.
Equipment & Tools
- 9×9 inch pan: To assemble and chill the bars.
- Parchment paper: For easy removal and clean edges.
- Microwave or saucepan: To melt butter and chocolate.
- Spatula: To spread and smooth layers.
- Knife: To cut into squares.
Step-by-step guide to caramel bars
- Gather all your ingredients and equipment. Line a 9×9 inch pan with parchment paper, leaving overhang for easy removal.
- For the crust, melt 1/2 cup (113g) unsalted butter in a microwave-safe bowl or on the stovetop over low heat. About 30 seconds in microwave should do. Stir in 1 1/2 cups (150g) graham cracker crumbs until evenly coated and slightly sticky.
- Press the buttery crumbs into the prepared pan, spreading evenly with the back of a spoon or a flat-bottomed glass. Chill in the fridge for 15 minutes to set.
- Meanwhile, warm 1 can (14 oz) of sweetened condensed milk and 1/4 cup (60ml) caramel sauce together in a saucepan over low heat, stirring constantly. This should take about 3-4 minutes until smooth and glossy. If it bubbles too much or clings to the pan, lower the heat.
- Once the mixture is smooth, pour it over the chilled crust. Use a spatula to spread evenly. Return to fridge and chill for at least 2 hours, or until firm and set.
- When the caramel layer is firm, melt 1/2 cup (90g) chocolate chips in small bursts in the microwave at 20-second intervals, stirring in between, until smooth. Drizzle or spread over the caramel layer.
- Sprinkle with chopped nuts or sea salt if desired. Gently press them into the chocolate for best adhesion.
- Let the bars sit in the fridge for another 30 minutes to set the chocolate. Then, lift out using the parchment overhang and cut into squares with a sharp knife.
- Serve immediately or store in an airtight container in the fridge for up to 5 days. For best texture, enjoy at room temperature after refrigeration.
Chill the assembled bars in the fridge for at least 2 hours or until fully set. Cut into squares and serve directly from the fridge or at room temperature for softer texture. Keep leftovers stored in an airtight container in the fridge for up to 5 days.
How to Know It’s Done
- Crust should be firm and crumbly, not greasy or soggy.
- Caramel layer should be glossy and set, not sticky or runny.
- Chocolate topping should be shiny and firm, not dull or soft.
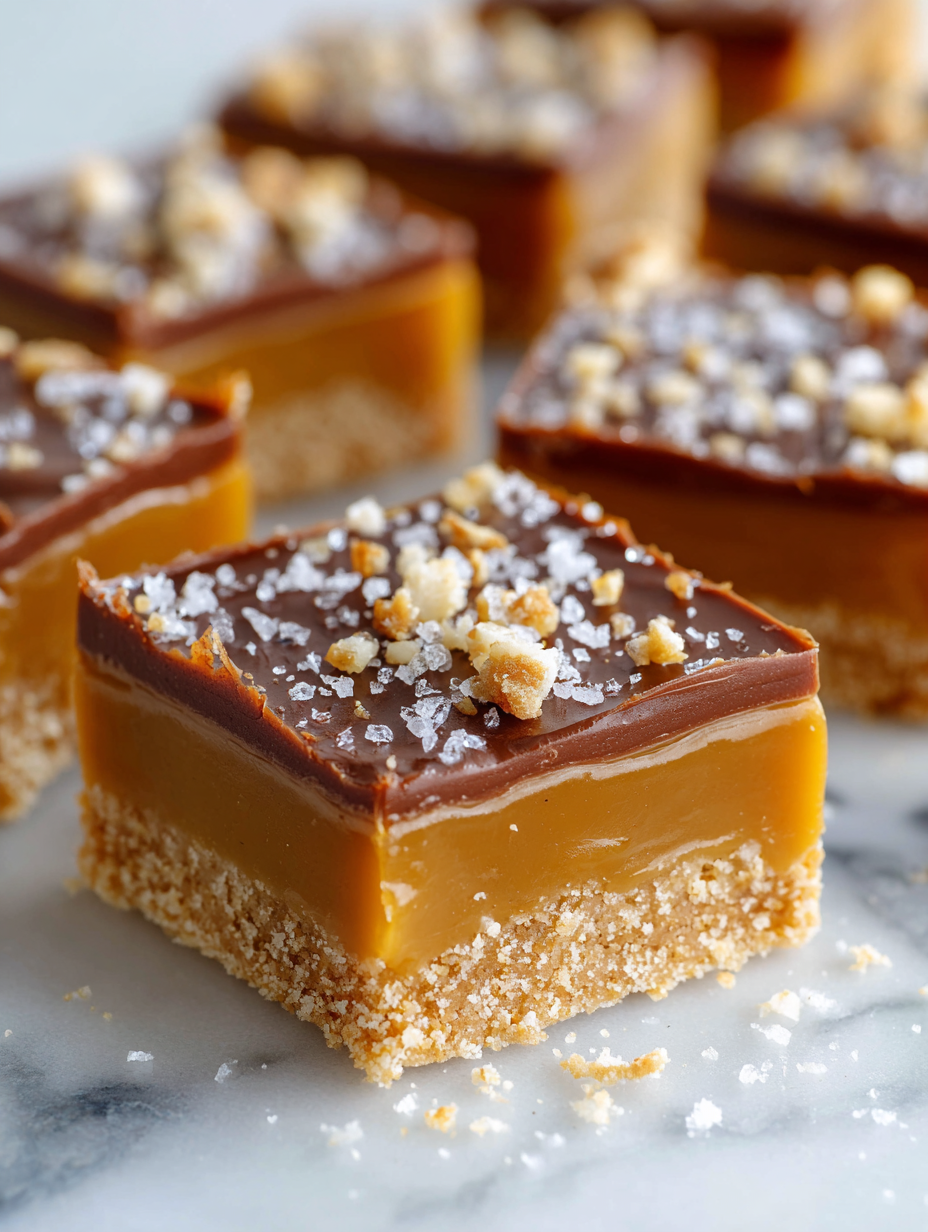
No Bake Caramel Bars
Ingredients
Equipment
Method
- Line your 9×9 inch pan with parchment paper, leaving some overhang for easy removal.
- Melt the butter in a microwave-safe bowl or small saucepan until it’s just bubbling and fragrant.
- Pour the graham cracker crumbs into the melted butter and stir until the mixture is evenly coated and starts to stick together.
- Press this buttery crumb mixture firmly into the prepared pan to create an even crust. Chill in the fridge for 15 minutes to set.
- Meanwhile, gently warm the sweetened condensed milk and caramel sauce together in a saucepan or microwave until smooth and glossy, about 3-4 minutes. Stir frequently to prevent sticking.
- Pour this caramel mixture over the chilled crust, spreading evenly with a spatula. Return the pan to the fridge and chill for at least 2 hours, or until the caramel is firm and set.
- Once the caramel layer is firm, melt the chocolate chips in short bursts in the microwave, stirring in between, until smooth and shiny.
- Spread or drizzle the melted chocolate over the caramel layer, smoothing out with a spatula for a glossy finish. Sprinkle with sea salt or chopped nuts if using.
- Gently press nuts into the chocolate if desired, then refrigerate for another 30 minutes to set everything completely.
- Using the parchment overhang, lift the bars out of the pan and cut into squares with a sharp knife. Serve immediately or store in an airtight container in the fridge for up to 5 days.
Notes
Tips and tricks for perfect bars
- Bolded mini-head: Use room temperature butter for a smoother, more evenly spreading crust.
- Bolded mini-head: Chill the crust before adding caramel to prevent sliding or spreading.
- Bolded mini-head: Warm the caramel mixture gently to keep it glossy and pourable, avoiding cracks.
- Bolded mini-head: Use a silicone spatula for an even spread of caramel without tearing the crust.
- Bolded mini-head: Chill each layer thoroughly—at least 15 minutes—to help layers set properly before adding the next.
- Bolded mini-head: Melt chocolate in short bursts and stir frequently to avoid burning and achieve a shiny finish.
- Bolded mini-head: For crispier nuts, toast them first and let cool completely before chopping and sprinkling.
Common mistakes and how to fix them
- FORGOT to level ingredients → Use a scale for accuracy, especially with crumbs and sugar.
- DUMPED caramel too quickly → Pour slowly and evenly to avoid cracks or uneven layers.
- OVER-TORCHED chocolate → Melt on low power, stir frequently, and stop before burnt smell appears.
- MISSED chilling time → Ensure proper chilling for firm, clean-cut bars; rushing results in messy slices.
Quick fixes and pantry swaps
- When caramel is too thick, splash a little warm milk to loosen it up.
- If bars crack when cutting, briefly dip your knife in hot water and wipe dry.
- DUMPED chocolate chips into cold caramel → Melt again in short bursts, stirring continuously.
- Over-torched chocolate → Lower heat or microwave in shorter intervals, stirring well.
- Splash a pinch of sea salt if caramel feels bland or dull in flavor.
Prep, store, and reheat tips
- Prepare the crust and caramel mixture a day ahead; keep chilled in separate airtight containers. The caramel develops a richer flavor overnight.
- Store assembled bars, covered tightly with plastic wrap, in the fridge for up to 5 days. The flavors meld and the texture stays firm but tender.
- For longer storage, freeze the bars wrapped in foil and then in a zip-top bag for up to 2 months. Thaw in the fridge before serving.
- Reheat at room temperature or in a low oven (around 80°C/175°F) for 5-10 minutes if you prefer the caramel slightly softer and to restore gloss. Watch for melting or bubbling.
Top questions about no bake caramel bars
1. Can I use a different sweetener instead of caramel sauce?
Yes, you can swap honey or maple syrup for caramel sauce, but it will change the texture and flavor slightly, making it less gooey and more syrupy.
2. Can I make these vegan or dairy-free?
Absolutely. If you’re dairy-free, coconut condensed milk or coconut cream can replace the sweetened condensed milk, though expect a lighter, less sticky result.
3. How long do no bake caramel bars last in the fridge?
Yes, you can refrigerate the bars in an airtight container for up to 5 days. For longer storage, freeze them for up to 2 months, wrapped tightly.
4. My caramel layer is too soft or runny, what do I do?
If the caramel is too runny, chill it longer or add a little more condensed milk to thicken. If it’s too thick, gently warm it to loosen before pouring.
5. How do I cut neat squares without cracking the bars?
Use a sharp, warm knife to cut the bars. Dipping the knife in hot water and wiping dry helps achieve clean slices without cracking.
6. Can I customize the toppings or add extras?
You can add chopped nuts, sea salt, or even a drizzle of chocolate on top. Just sprinkle or drizzle while the layers are still slightly soft for best adhesion.
7. Can I add chocolate or other toppings?
Yes, you can melt the chocolate separately and spread it over the caramel, or sprinkle mini chocolate chips before the caramel sets for a melty finish.
8. How do I melt chocolate without burning it?
Use a sturdy pan and avoid over-melting chocolate to prevent burning or a dull finish. Melt in short bursts and stir frequently.
9. Can I prepare parts of the recipe in advance?
Yes, you can prepare the crust and caramel layer ahead of time. Just keep them refrigerated separately until ready to assemble.
10. The caramel layer is too thick to spread, how can I fix it?
If the caramel becomes too thick to spread, warm it gently or add a splash of warm milk to loosen it up for easier spreading.
These no bake caramel bars are a reminder that sometimes, the simplest ingredients can create the most satisfying treats. They’re perfect for spontaneous cravings or when you want something sweet without the fuss. Sharing them feels like passing along a little piece of comfort, quick and unpolished but honest.
They’re not about perfection, just about that rich, gooey caramel and crunchy bites that make every bite special. In the chaos of busy days or lazy weekends, these bars hold a quiet, sweet spot—easy to make, impossible to forget.

Hi, I’m Mia Bennett, the chef and storyteller behind Grounding in Tradition. I’m so glad you’re here. This blog is my way of preserving the flavors, techniques, and rituals that shaped me as both a cook and a professional chef. Grounding in Tradition is not about trends or shortcuts. It is about honoring where food comes from, understanding the hands that prepare it, and carrying forward recipes that deserve to be remembered.


Leave a Reply