
Reclaiming childhood comfort with an adult twist, these no bake fudge bars are my go-to whenever I need a quick, satisfying treat. They’re rich, chocolatey, and come together faster than I can say ‘sweet tooth.’ No oven, no fuss—just simple ingredients that deliver serious nostalgia with a modern edge.
What makes this recipe special isn’t just the ease—it’s the way it turns humble pantry staples into a decadently creamy bar that feels like a warm hug. Perfect for last-minute cravings or when I want something sweet without the cleanup. It’s a bit chaotic but always worth it, especially when topped with a sprinkle of sea salt or a dash of vanilla.
This recipe is about reclaiming the comfort of childhood snacks with a grown-up twist, using simple ingredients to craft a rich, nostalgic treat that requires no oven and comes together in minutes.
The story behind this recipe
- This recipe came about one rainy afternoon when I was digging through my pantry, looking for something sweet but quick. I remembered how my grandmother used to make fudge with whatever she had on hand—simple, no-fuss, and deeply satisfying. That nostalgic pull pushed me to tweak her method into a treat I could whip up in minutes, no oven required.
- Every time I make these fudge bars, I think of those lazy weekends spent in her kitchen, the smell of melting chocolate filling the air, and the rush of joy that came from a sweet reward without much effort. It’s funny how a handful of ingredients can bring back such vivid memories, especially when life gets busy and I need a comforting fix.
- heading: The story behind this recipe
Ingredient breakdown: key components
- Butter: I opt for unsalted butter because it gives me better control over the saltiness—plus, it melts smoothly and smells rich as it heats up, turning my kitchen into a cozy chocolate haven. Feel free to swap with coconut oil for a subtle tropical note, but watch the texture—coconut oil can make the bars a little softer.
- Dark Chocolate: I love using high-quality dark chocolate because it melts with a glossy finish and a deep, smoky aroma. If you prefer sweeter fudge, a milk chocolate bar works, but the flavor won’t be as intense—less of that oozy, bittersweet punch.
- Sweetened Condensed Milk: This is my secret weapon for that velvety, fudgy texture. It’s sweet and sticky, so if you’re going dairy-free, coconut condensed milk is a good substitute—just expect a slight coconut aroma that blends well with the cocoa.
- Vanilla Extract: I always add a splash of pure vanilla because it amplifies the richness of the chocolate. For a twist, try almond extract, but go easy—too much can overpower the fudge’s deep cocoa scent.
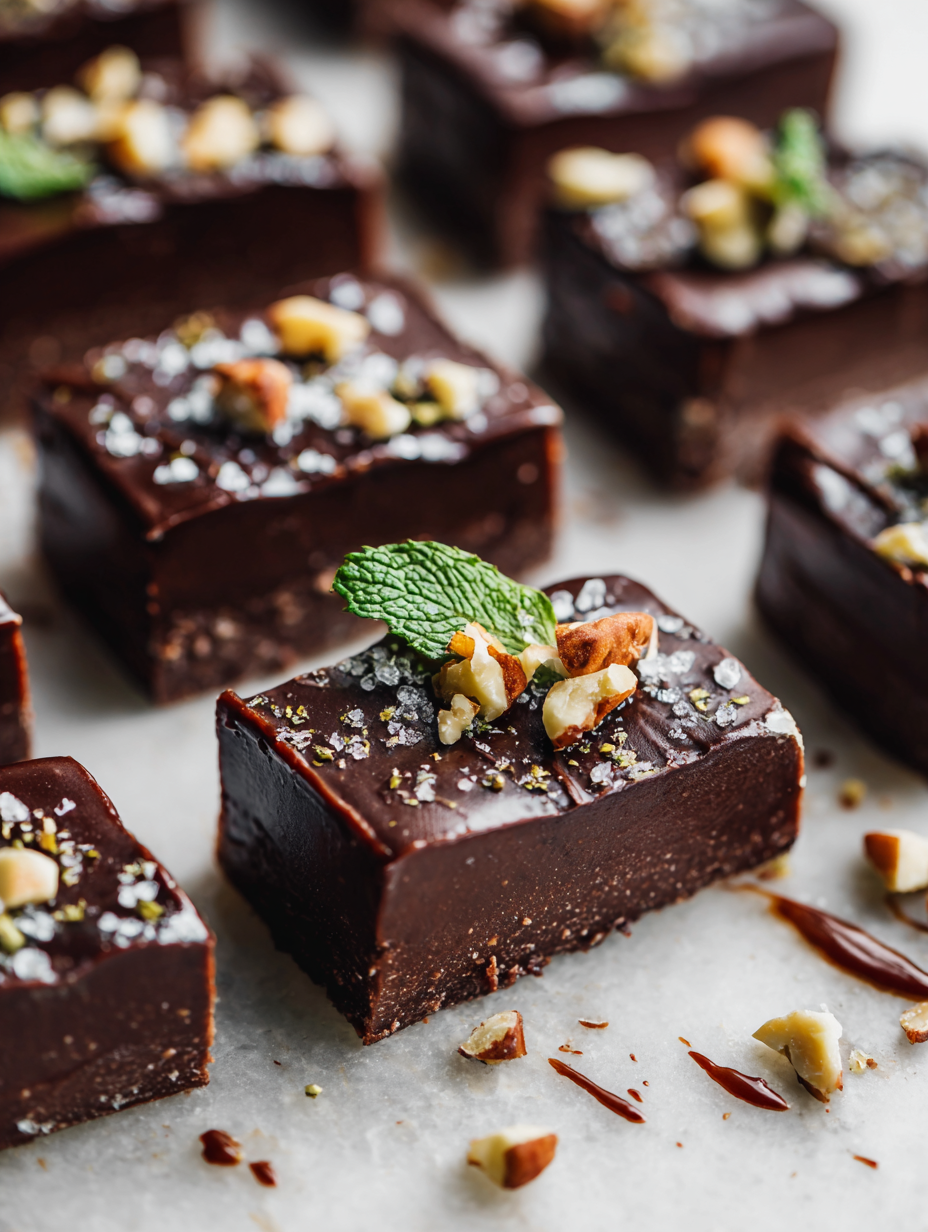
- Optional Toppings: I like sprinkling sea salt or crushed nuts on top while the mixture is still warm. The salt crackles and balances the sweetness, while nuts add crunch and a nutty aroma—skip if you prefer a pure chocolate hit.
- Salt: Just a pinch enhances all the flavors and cuts through the richness. I sprinkle a tiny bit on top for a contrast that makes each bite more complex, but I keep it minimal to not overshadow the chocolate.
- Additional Mix-ins: Sometimes I fold in bits of dried fruit or swirl in peanut butter for a personalized touch. These add bursts of flavor and texture, turning a simple fudge into a layered treat—experiment and see what you love.
Spotlight on key ingredients
Dark Chocolate:
- Butter: I opt for unsalted butter because it melts smoothly and smells rich as it heats up, turning my kitchen into a cozy chocolate haven. Feel free to swap with coconut oil for a subtle tropical note, but watch the texture—coconut oil can make the bars a little softer.
- I love using high-quality dark chocolate because it melts with a glossy finish and a deep, smoky aroma. If you prefer sweeter fudge, a milk chocolate bar works, but the flavor won’t be as intense—less of that oozy, bittersweet punch.
Sweetened Condensed Milk:
- This is my secret weapon for that velvety, fudgy texture. It’s sweet and sticky, so if you’re going dairy-free, coconut condensed milk is a good substitute—just expect a slight coconut aroma that blends well with the cocoa.
- Vanilla Extract: I always add a splash of pure vanilla because it amplifies the richness of the chocolate. For a twist, try almond extract, but go easy—too much can overpower the fudge’s deep cocoa scent.
Notes for ingredient swaps
- Dairy-Free: Swap butter with coconut oil or vegan butter. Expect a slightly different melt and aroma, but still rich.
- Chocolate: Use milk chocolate for a sweeter, creamier taste. For a more intense cocoa flavor, dark or even semi-sweet work well.
- Sweetened Condensed Milk: Coconut condensed milk is a good dairy-free alternative. It adds a subtle coconut flavor and maintains the creamy texture.
- Vanilla Extract: Almond or bourbon extract can add a unique twist. Use sparingly to avoid overpowering the chocolate.
- Toppings: Instead of sea salt, sprinkle crushed pretzels or toasted coconut for contrasting textures and flavors.
- Salt: Fine sea salt enhances sweetness and chocolate depth. Kosher salt can be used but in smaller quantities for the same effect.
- Add-ins: Mix in chopped nuts, dried fruit, or swirls of peanut butter for variety. Adjust quantities based on your preference for texture and flavor.
Equipment & Tools
- 8×8 inch square dish: Holds the fudge mixture and helps it set evenly.
- Parchment paper: Prevents sticking and allows easy removal of the fudge block.
- Saucepan: Melts the butter and chocolate gently without scorching.
- Spatula: Spreads the mixture evenly in the dish.
- Sharp knife: Slices the set fudge cleanly into bars.
Step-by-step guide to no bake fudge bars
- Prepare your pan: line an 8×8 inch square dish with parchment paper, leaving overhang for easy removal. Set aside.
- Melt the butter: in a medium saucepan over low heat, gently melt 1/2 cup (115g) unsalted butter. Stir occasionally, smell should turn rich and buttery, about 2 minutes.
- Add chocolate: once butter is melted, stir in 1 cup (170g) chopped dark chocolate. Keep heat low, melt until smooth and glossy, about 3 minutes. If mixture seizes or burns, lower heat or add a splash of milk to loosen.
- Mix in condensed milk: remove from heat, stir in 1 cup (300g) sweetened condensed milk until fully incorporated and smooth. The mixture will turn velvety and thick, smell sweet and chocolatey.
- Flavor boost: add 1 teaspoon vanilla extract and a pinch of salt. Mix well, smell should deepen with aromatic vanilla and salt enhancing the chocolate.
- Pour and spread: transfer the mixture into your prepared dish. Use a spatula to spread evenly, pressing gently to smooth the top. The mixture should feel thick but spreadable, about 2-3 minutes.
- Chill: place in the fridge uncovered for at least 2 hours, or until firm. For quicker setting, freeze for 30-45 minutes, checking for a firm, slightly crackly surface when tapped.
- Finish and cut: once set, lift the fudge block out using the parchment overhang. Slice into bars or squares with a sharp knife. For clean edges, warm the knife slightly under hot water and wipe dry between cuts.
- Optional toppings: before chilling, sprinkle sea salt, crushed nuts, or mini chocolate chips on top for extra texture and flavor. Press lightly to set into the surface.
- Serve: enjoy these fudge bars straight from the fridge for a firm bite, or let sit at room temperature for 5-10 minutes for a softer, melt-in-mouth experience.
Chill uncovered in the fridge for at least 2 hours until firm. Slice into bars, add toppings if desired, and serve directly from the fridge or at room temperature for a softer bite.
How to Know It’s Done
- The mixture is glossy and smooth after melting, indicating proper emulsion.
- The fudge feels firm but slightly yielding when pressed, not sticky or soft.
- Top is crackly and set after chilling, with a slight sheen from the chocolate.
No-Bake Chocolate Fudge Bars
Ingredients
Equipment
Method
- Line your 8×8 inch dish with parchment paper, leaving overhang on the sides for easy removal.
- Gently melt the butter in a saucepan over low heat, stirring occasionally until it’s just melted and smells rich and buttery, about 2 minutes.
- Add the chopped dark chocolate to the melted butter and stir continuously over low heat until the mixture is smooth, glossy, and fully melted, about 3 minutes.
- Remove the saucepan from heat and stir in the sweetened condensed milk until the mixture is velvety and well combined, about 1 minute. It will become thick and glossy.
- Stir in the vanilla extract and a pinch of sea salt, blending well to enhance the chocolate flavor and add a savory contrast.
- Pour the fudgy mixture into your prepared dish, spreading it evenly with a spatula and pressing gently to smooth the surface.
- If desired, sprinkle a tiny pinch of sea salt or chopped nuts on top for extra flavor and texture, pressing lightly into the surface.
- Place the dish in the refrigerator uncovered and chill for at least 2 hours, or until the fudge is firm to the touch and has a shiny, crackly surface.
- Once set, lift the fudge block out of the dish using the parchment overhang and transfer to a cutting board.
- Use a sharp knife warmed in hot water to slice the fudge into even bars or squares, wiping the knife dry between cuts for clean edges.
- Serve immediately or store in an airtight container in the refrigerator for up to a week. Enjoy these rich, creamy fudge bars straight from the fridge or at room temperature for a softer bite.
Pro tips for perfect fudge bars
- Use high-quality chocolate for a glossy, rich finish. It melts smoothly and adds depth to every bite.
- Chill the fudge until just firm—about 2 hours in the fridge—so it slices cleanly without crumbling.
- When melting chocolate and butter, keep heat low and stir constantly to prevent seizing or burning.
- For neat edges, warm your knife in hot water before slicing. Wipe dry for a clean cut every time.
- Sprinkle sea salt or nuts immediately after pouring—while the mixture is still warm—to ensure they set into the surface.
- If the mixture feels too thick to pour, add a tiny splash of milk or cream to loosen it up without losing richness.
- For an extra fudgy texture, slightly under-chill the bars; they’ll be softer but intensely creamy.
Common mistakes and how to fix them
- FORGOT to temper chocolate → Use high-quality melting chocolate for smooth bars.
- DUMPED mixture too quickly → Pour slowly, spreading evenly to prevent cracks.
- OVER-TORCHED the chocolate → Remove from heat as soon as it melts smoothly.
- FAILED to line pan properly → Use parchment for easy removal and clean cuts.
Quick fixes and pantry swaps
- When mixture is too thick to pour, splash in a little milk to loosen it.
- If fudge cracks when cutting, briefly warm the knife for smooth slices.
- Splash a tiny bit of oil if chocolate seizes during melting, then stir until smooth.
- Patch a crumbly fudge by pressing it back into the pan and chilling again.
- Shield the mixture from excess humidity; keep it covered to prevent blooming or sweating.
Prep, store, and reheat tips
- Prepare the fudge mixture ahead: melt and mix the ingredients, then pour into the pan. It firms up faster in the fridge, saving time later.
- Store the bars in an airtight container in the refrigerator for up to 1 week; the cool keeps them firm and preserves flavor.
- For longer storage, freeze the bars for up to 1 month, wrapped tightly in plastic wrap and then placed in a freezer bag. Thaw in the fridge before slicing.
- Reheating isn’t necessary—these are best served chilled or at room temperature. If you prefer softer fudge, let a slice sit at room temp for 5-10 minutes, and it’ll melt in your mouth.
Top questions about no bake fudge bars
1. Can I make these fudge bars vegan?
Yes, using dairy-free chocolate and coconut condensed milk makes them suitable for vegans, but expect a slightly different texture and flavor profile.
2. Can I use other types of chocolate?
Absolutely, you can substitute dark chocolate with semi-sweet or milk chocolate for a sweeter, creamier fudge experience.
3. My fudge mixture is too runny, what do I do?
If your mixture isn’t thickening, chill it longer or let it sit at room temperature for a few minutes before pouring.
4. How should I store the fudge bars?
Store these bars in an airtight container in the fridge for up to a week or freeze for longer storage.
5. How do I get perfect clean cuts?
For clean slices, warm your knife in hot water and wipe dry before cutting each bar.
6. Why does my fudge crack apart?
If the fudge cracks when you cut it, briefly warm the knife with hot water to smooth the edges.
7. How long should I chill the fudge?
Chilling the mixture thoroughly ensures it sets properly. About 2 hours in the fridge should do it.
8. Can I add toppings before chilling?
Adding a pinch of sea salt on top before chilling enhances the chocolate flavor and adds a nice crunch.
9. How can I make it softer?
If you want a softer fudge, let it sit at room temperature for 5-10 minutes before serving.
10. Can I customize the ingredients?
Yes, you can add chopped nuts, dried fruit, or swirl in peanut butter for extra flavor and texture.
These no bake fudge bars are a reminder that sometimes the simplest ingredients can create the most satisfying treats. They’re perfect for spontaneous cravings or when you want something sweet without the fuss of baking. Plus, they come together so quickly, I usually have them ready before I even realize I was craving chocolate.
Sharing these bars with friends or family always sparks a little nostalgia—somehow, they bring back childhood memories but with a grown-up richness that feels just right. No matter the occasion, they’re a little bit chaotic, a little bit indulgent, and always a welcome, easy fix for a sweet tooth.

Hi, I’m Mia Bennett, the chef and storyteller behind Grounding in Tradition. I’m so glad you’re here. This blog is my way of preserving the flavors, techniques, and rituals that shaped me as both a cook and a professional chef. Grounding in Tradition is not about trends or shortcuts. It is about honoring where food comes from, understanding the hands that prepare it, and carrying forward recipes that deserve to be remembered.


Leave a Reply