
These no bake nut bars are my go-to when mornings spiral out of control or I need a quick, satisfying snack on the fly. They come together in minutes, no oven required, which feels like a tiny miracle on hectic days. Plus, they pack a punch of crunch and richness that sticks with you long after the first bite.
What I love most is how forgiving this recipe is—swap ingredients based on what’s in the pantry, and still end up with something deliciously comforting. It’s like a little rescue kit for busy mornings or those times when you just need a sweet, nutty fix without the fuss. They’re a reminder that sometimes, simplicity really is the best kind of magic.
Focusing on how these no bake nut bars can be a quick, nutritious rescue for busy mornings or hectic snack emergencies, blending simplicity with comfort.
The story behind this recipe
I first made these bars during a chaotic weekend when I realized I had no time for baking but needed something sweet and nourishing. The idea struck me after rummaging through the pantry—an impulse to combine whatever crunchy nuts and sticky honey I had. The result was more than just a snack; it became a little ritual for quick comfort. Over the years, I’ve tweaked the ingredients, but the core simplicity remains a lifesaver during busy mornings or when I crave something sweet without the fuss.
Key ingredients and tips
- Honey: I love how honey adds a sticky, golden sweetness that binds everything together. If yours is too thick, warm it gently to loosen it up.
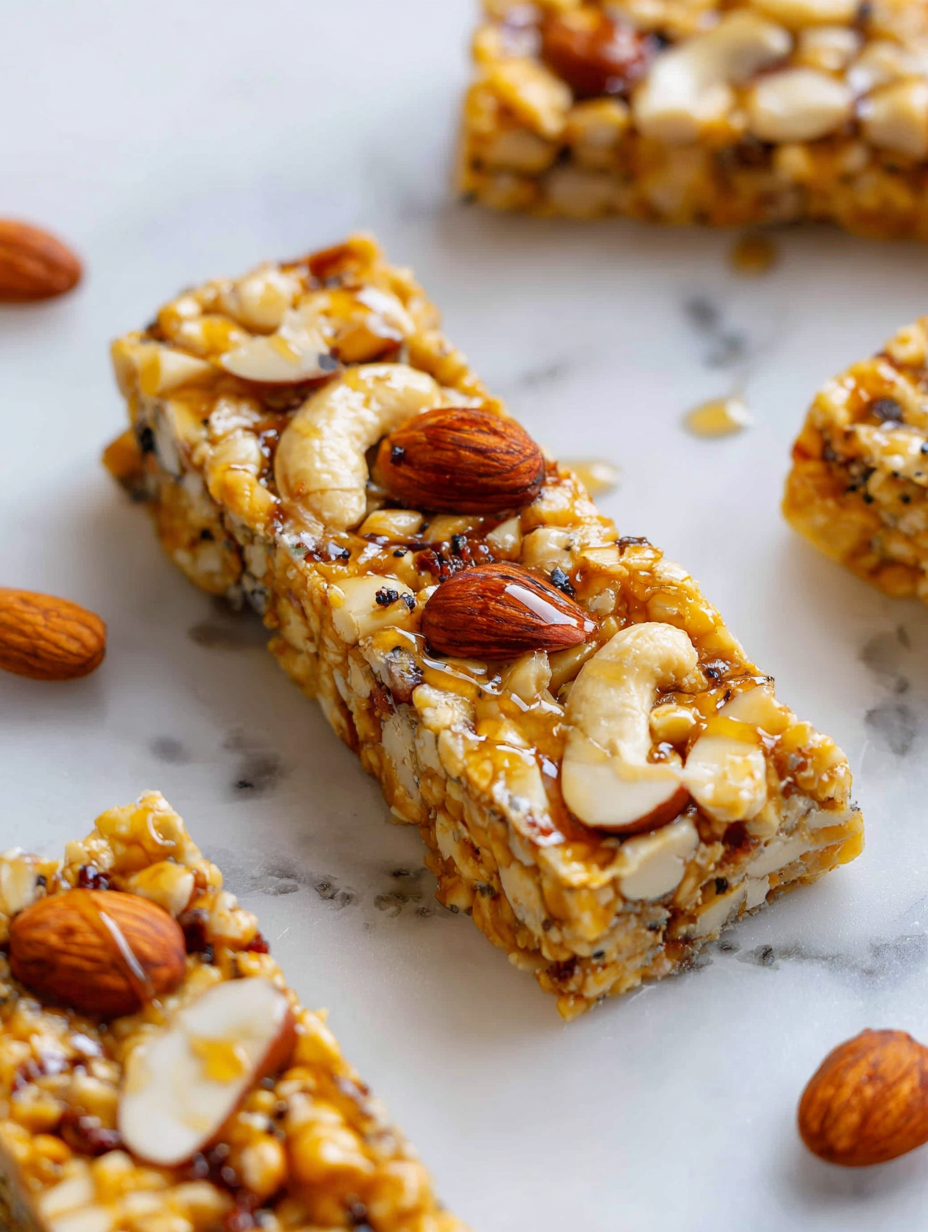
- Mixed Nuts: Crunchy, salty, and rich—pick your favorites, but make sure they’re roasted for maximum flavor. Swap in seeds if you want a different crunch.
- Dried Fruit: I prefer chewy cranberries or apricots; they add a tart burst. Skip if you’re not into sweetness or want a more neutral bar.
- Oats: Use old-fashioned rolled oats for that hearty texture. Quick oats get too mushy and lose that satisfying bite.
- Coconut Oil: It melts into the mix, helping everything set firm. If you want a milder flavor, try a neutral oil like light grapeseed.
- Salt: Just a pinch enhances all the flavors. Too much and it overpowers—remember, nuts are naturally salty already.
- Chocolate (optional): I like dark chocolate chunks for a bitter contrast, but melted milk chocolate makes it more indulgent. Drizzle on top after setting.
Spotlight on key ingredients
Honey:
- I love how honey adds a sticky, golden sweetness that binds everything together. If yours is too thick, warm it gently to loosen it up.
- Mixed Nuts: Crunchy, salty, and rich—pick your favorites, but make sure they’re roasted for maximum flavor. Swap in seeds if you want a different crunch.
Dried Fruit & Oats:
- Dried Fruit: I prefer chewy cranberries or apricots; they add a tart burst. Skip if you’re not into sweetness or want a more neutral bar.
- Oats: Use old-fashioned rolled oats for that hearty texture. Quick oats get too mushy and lose that satisfying bite.
Notes for ingredient swaps
- Dairy-Free: Use coconut butter instead of honey for binding—adds a tropical aroma but less sweetness.
- Nut-Free: Swap nuts for roasted sunflower or pumpkin seeds—still crunchy, with a nutty flavor, minus the allergens.
- Sweetener: Maple syrup can replace honey—brings a different, slightly smoky sweetness and thins out a bit.
- Oil Alternative: Use melted coconut oil instead of coconut oil—adds a coconutty aroma and more richness.
- Chocolate: Dairy-free dark chocolate chips or carob chips—same melt and texture, but dairy-free.
- Add-Ins: Dried cranberries or cherries—offer tartness and chewiness, swap based on your preference.
- Texture Boost: Flaxseed or chia seeds—add a crunch, boost omega-3s, and get a little more fiber into the mix.
Equipment & Tools
- 8×8 inch baking dish: To hold and shape the bar mixture
- Parchment paper: For easy removal and cleanup
- Skillet: To toast nuts for enhanced flavor
- Spatula: To fold ingredients and press mixture evenly
- Knife: To cut the bars into neat squares
- Microwave or double boiler: To melt chocolate or ingredients gently
Step-by-step guide to no bake nut bars
- Gather all your ingredients: nuts, honey, oats, dried fruit, coconut oil, salt, and optional chocolate. Line a baking dish (8×8 inch) with parchment paper for easy removal.
- Chop the nuts roughly, aiming for varied sizes—some big, some small for texture. Toast them lightly in a dry skillet over medium heat until fragrant, about 3-4 minutes. Let cool slightly.
- In a microwave-safe bowl, gently warm honey and coconut oil together for about 20-30 seconds until runny. Stir well to combine, then set aside.
- In a large mixing bowl, combine the toasted nuts, oats, dried fruit, and a pinch of salt. Mix thoroughly to distribute evenly.
- Pour the warm honey and coconut oil mixture over the dry ingredients. Use a spatula to fold everything together until well coated and sticky.
- Transfer the mixture to your prepared dish. Press down firmly with the back of a spatula or your hands to compact the mixture evenly. Aim for a smooth, level surface.
- Place the dish in the fridge for at least 2 hours, or until the mixture is firm enough to cut. For quicker setting, freeze for about 1 hour.
- Once set, lift the whole block out using the parchment paper. Use a sharp knife to cut into bars or squares, about 1 inch thick. For a cleaner cut, wipe the knife with a damp cloth between slices.
- If using chocolate, melt and drizzle over the bars now. Let the chocolate set for about 30 minutes in the fridge before serving.
Once cut, store bars in an airtight container in the fridge for up to a week. For longer storage, freeze and thaw slightly before serving. Serve chilled or at room temperature for best texture.
How to Know It’s Done
- Nuts should be fragrant and slightly toasted, not burnt.
- Mixture should be sticky and hold together when pressed.
- Bars should be firm but not hard, with a slight jiggle when gently shaken.
No Bake Nut Bars
Ingredients
Equipment
Method
- Chop the mixed nuts roughly and toast them in a dry skillet over medium heat until fragrant and golden, about 3-4 minutes. Let cool slightly.
- Gently warm honey and melted coconut oil together in the microwave for about 20-30 seconds until they become runny and well combined. Stir to blend evenly.
- In a large mixing bowl, combine the toasted nuts, dried fruit, oats, and a pinch of salt. Mix thoroughly to distribute all ingredients evenly.
- Pour the warm honey and coconut oil mixture over the dry ingredients. Use a spatula to fold everything together until the mixture is sticky and well coated.
- Line your 8×8 inch baking dish with parchment paper and transfer the mixture into it. Press down firmly with the back of a spatula or your hands to create an even, compact layer.
- Place the dish in the fridge and chill for at least 2 hours, or until the mixture is firm enough to cut cleanly. For quicker setting, freeze for about 1 hour.
- Once set, lift the entire block out of the dish using the parchment paper. Use a sharp knife to cut into squares or bars, about 1 inch thick. Wipe the knife with a damp cloth between cuts for a clean edge.
- If desired, melt dark chocolate chunks in short bursts in the microwave and drizzle over the bars. Chill again for about 30 minutes until the chocolate sets.
- Enjoy these chewy, crunchy nut bars as a quick energizing snack or a satisfying treat. Store leftovers in an airtight container in the fridge for up to a week.
Pro tips for perfect bars
- Boldly press: Use the back of a spatula to firmly pack the mixture into the pan—firm pressure creates clean cuts.
- Chill thoroughly: Let the bars rest in the fridge for at least 2 hours; patience ensures they set firm and hold shape.
- Watch the toast: Nuts should smell fragrant and turn golden; over-toasting can cause bitterness—keep an eye on them.
- Temperature check: Honey and coconut oil should be warm and runny, but not hot enough to splatter—test with your finger.
- Layer evenly: Spread ingredients in a uniform layer, pressing down to prevent air pockets that weaken the bars.
- Chocolate tip: Melt chocolate in short bursts, stirring often—avoid scorching and get a glossy, smooth finish.
- Use parchment: Line your dish with parchment for easy removal and a clean cut—no sticking and no fuss.
Common mistakes and how to fix them
- FORGOT to toast nuts? Lightly toast again to bring out flavor and crunch.
- DUMPED in too much salt? Rinse nuts briefly to reduce saltiness before mixing.
- OVER-TORCHED the mixture? Lower heat and stir constantly to prevent burning.
- MISSED the pressing step? Press firmly to ensure bars hold together properly.
Quick fixes and pantry swaps
- If mixture is too sticky, splash in a little warm water to loosen it.
- When bars crumble, patch with a little melted chocolate to bind.
- Splash some hot water on the knife for cleaner cuts.
- When nuts are under-toasted, quick-toast again in a dry skillet—smell the fragrant nuttiness.
- Patch a cracked bar with a quick drizzle of chocolate and a brief chill.
Prep, store, and reheat tips
- Prepare the nut mixture and press into the pan up to a day in advance; keep covered in the fridge for a fresh, firm texture.
- Bars can be stored in an airtight container at room temperature for up to 3 days, with a slight crunch still intact.
- For longer storage, wrap bars tightly in plastic wrap and freeze for up to 1 month; thaw in the fridge before serving.
- Reheat by letting chilled bars sit at room temperature for 10 minutes to regain a softer, chewable texture—avoid microwave to prevent melting.
Top questions about no bake nut bars
1. Can I substitute honey with something else?
Use honey or maple syrup as a sticky binder that sets well without baking, giving a natural sweetness.
2. How long should I chill the bars?
Chilling for at least 2 hours ensures the bars are firm enough to cut without crumbling.
3. How do I toast nuts properly?
Toast nuts until fragrant and golden, about 3-4 minutes over medium heat, for the best crunch and flavor.
4. Can I use quick oats instead of rolled oats?
Use rolled oats for a hearty texture; quick oats can turn mushy and lose that satisfying bite.
5. Can I leave out the dried fruit?
Add dried cranberries or apricots for tartness; skip if you prefer a more neutral, plain bar.
6. How should I store these nut bars?
Store bars in an airtight container in the fridge for up to a week, or freeze for longer keeping.
7. The mixture is too sticky, what do I do?
If the mixture is too sticky, lightly spray your hands or spatula with oil to press down evenly.
8. How do I cut the bars smoothly?
Use a sharp knife wiped with a damp cloth for clean, neat cuts and to prevent sticking.
9. How do I melt chocolate without burning it?
Melting chocolate slowly in short bursts prevents scorching and gives a glossy, smooth drizzle.
10. My bars are crumbling, what went wrong?
If bars crumble when you cut them, let them chill longer or press more firmly during assembly.
These no bake nut bars are a little miracle in a pinch—crunchy, sticky, and just sweet enough to satisfy that craving. They remind me that sometimes the simplest ingredients, thrown together with a bit of patience, make the best treats. Plus, they’re quick enough to whip up when chaos hits and you need something nourishing fast.
Storing them in the fridge keeps that satisfying crunch intact, and they’re a lifesaver when you want a snack that feels homemade but didn’t demand hours in the kitchen. Honestly, I keep a batch tucked away for mornings when everything feels overwhelming or afternoons that need a little sweet rescue. No fuss, just good, honest bites.

Hi, I’m Mia Bennett, the chef and storyteller behind Grounding in Tradition. I’m so glad you’re here. This blog is my way of preserving the flavors, techniques, and rituals that shaped me as both a cook and a professional chef. Grounding in Tradition is not about trends or shortcuts. It is about honoring where food comes from, understanding the hands that prepare it, and carrying forward recipes that deserve to be remembered.


Leave a Reply