
This no-bake chocolate cornflake bars recipe is the kind of treat I keep in my back pocket for those hectic afternoons when time feels tight but I still crave something sweet and familiar. There’s something about the way the melted chocolate clings to the crunchy cornflakes, creating a sticky, chocolatey mess that’s just right. It’s a simple, almost primal pleasure to throw together without turning on the stove or oven.
I love how versatile and forgiving this recipe is—it’s a perfect canvas for tweaking with whatever you’ve got on hand. Sometimes I toss in a handful of dried fruit or a sprinkle of sea salt to elevate the flavor. It’s honest, unpretentious, and honestly a bit nostalgic—reminding me of school bake sales or lazy weekend afternoons in the kitchen, just mixing and laughing over a bowl.
This recipe is my secret weapon for busy afternoons when I need a sweet fix that’s quick, no-fuss, and nostalgic. I love how it transforms humble pantry staples into something rich and satisfying without turning on the stove. It’s my go-to for those chaotic moments when I crave a treat that’s almost instinctive to make.
The story behind this recipe
- This recipe came about during a chaotic weekend when I needed something quick, satisfying, and nostalgic. I remember rummaging through the pantry, finding cornflakes and a half-open bag of chocolate, and thinking, why not? The way the melted chocolate sticks to the crispy flakes instantly takes me back to childhood afternoons, simple and sweet.
- It became a go-to whenever I wanted a treat that’s honest, no-fuss, and forgiving. No baking, no waiting—just melting, mixing, and setting. It’s one of those recipes that feels like a small rebellion against the modern obsession with perfection, a reminder that sometimes, simple is best.
- heading
- story_type
Ingredient breakdown: key components
- Chocolate: I prefer a good-quality dark chocolate, the kind that melts smoothly and leaves a rich, slightly bitter punch. If you only have milk chocolate, it’ll still work but will be sweeter and less intense.
- Cornflakes: Fresh, crispy cornflakes give that satisfying crunch. If yours are a bit stale, toast them lightly in a 180°C (350°F) oven for 3-4 minutes to revive their crunch.
- Butter: I use salted butter for a richer flavor, but unsalted works fine if you prefer control over the salt. Melt it gently so it doesn’t brown or burn, just a warm, glossy melt.
- Sweetener: Sometimes I add a spoonful of honey or golden syrup for extra gloss and a hint of caramel. Skip it if you want a cleaner, simpler chocolate flavor.
- Extras: Dried fruit, nuts, or even a pinch of sea salt can elevate these bars. Keep in mind, too many add-ins might make slicing trickier, so add with balance.
- Optional: A splash of vanilla extract can deepen the flavor, especially if your chocolate isn’t quite as rich. Just a few drops stirred into the melted chocolate makes a subtle, fragrant difference.
- Pan: I line my 20x20cm (8×8 inch) pan with parchment for easy removal. A non-stick pan works too, but parchment helps with clean, tidy slices every time.
Spotlight on key ingredients
Chocolate & Cornflakes:
- Chocolate: I prefer a good-quality dark chocolate, the kind that melts smoothly and leaves a rich, slightly bitter punch. If you only have milk chocolate, it’ll still work but will be sweeter and less intense.
- Cornflakes: Fresh, crispy cornflakes give that satisfying crunch. If yours are a bit stale, toast them lightly in a 180°C (350°F) oven for 3-4 minutes to revive their crunch.
Notes for ingredient swaps
- Chocolate: I prefer a good-quality dark chocolate, the kind that melts smoothly and leaves a rich, slightly bitter punch. If you only have milk chocolate, it’ll still work but will be sweeter and less intense.
- Cornflakes: Fresh, crispy cornflakes give that satisfying crunch. If yours are a bit stale, toast them lightly in a 180°C (350°F) oven for 3-4 minutes to revive their crunch.
- Butter: I use salted butter for a richer flavor, but unsalted works fine if you prefer control over the salt. Melt it gently so it doesn’t brown or burn, just a warm, glossy melt.
- Sweetener: Sometimes I add a spoonful of honey or golden syrup for extra gloss and a hint of caramel. Skip it if you want a cleaner, simpler chocolate flavor.
- Extras: Dried fruit, nuts, or even a pinch of sea salt can elevate these bars. Keep in mind, too many add-ins might make slicing trickier, so add with balance.
- Optional: A splash of vanilla extract can deepen the flavor, especially if your chocolate isn’t quite as rich. Just a few drops stirred into the melted chocolate makes a subtle, fragrant difference.
- Pan: I line my 20x20cm (8×8 inch) pan with parchment for easy removal. A non-stick pan works too, but parchment helps with clean, tidy slices every time.
Equipment & Tools
- Microwave or double boiler: To melt chocolate gently and evenly.
- Small saucepan: To melt butter without scorching.
- Mixing bowl: To combine ingredients easily.
- Spatula: To fold ingredients and press mixture into the pan.
- Paring or sharp knife: To slice the set bars cleanly.
- 20x20cm (8×8 inch) pan: To hold the mixture as it sets.
- Parchment paper: To prevent sticking and make removal easy.
Step-by-step guide to no bake bars
- Gather all your ingredients: chocolate, cornflakes, butter, optional extras, and a pan lined with parchment paper. Have a spatula and a mixing bowl ready.
- Chop the chocolate into small pieces for easier melting. Set aside.
- In a microwave-safe bowl, melt the chocolate in 30-second bursts, stirring after each until smooth. Be careful not to overheat; chocolate can seize if too hot.
- In a small saucepan over low heat (about 90°C / 194°F), melt the butter gently. Once melted, add the chocolate and stir until fully combined, forming a glossy mixture. The smell should be rich and cocoa-y.
- Pour the melted chocolate and butter mixture into a large mixing bowl. Add the cornflakes and any extras (nuts, dried fruit). Gently fold with a spatula until evenly coated. Be gentle to keep the flakes crunchy.
- Transfer the mixture into your prepared pan. Use the back of a spatula or a spoon to press it into an even layer, about 1.5 inches thick. Press firmly but carefully to avoid crushing the flakes.
- Let the bars set at room temperature for at least 2 hours, or refrigerate for 1 hour for quicker setting. The chocolate should firm up, and the surface will look shiny and slightly crack when ready.
- Once set, lift the bars out of the pan using the parchment paper. Slice into squares or rectangles with a sharp knife. The edges should be clean and the chocolate firm to the touch.
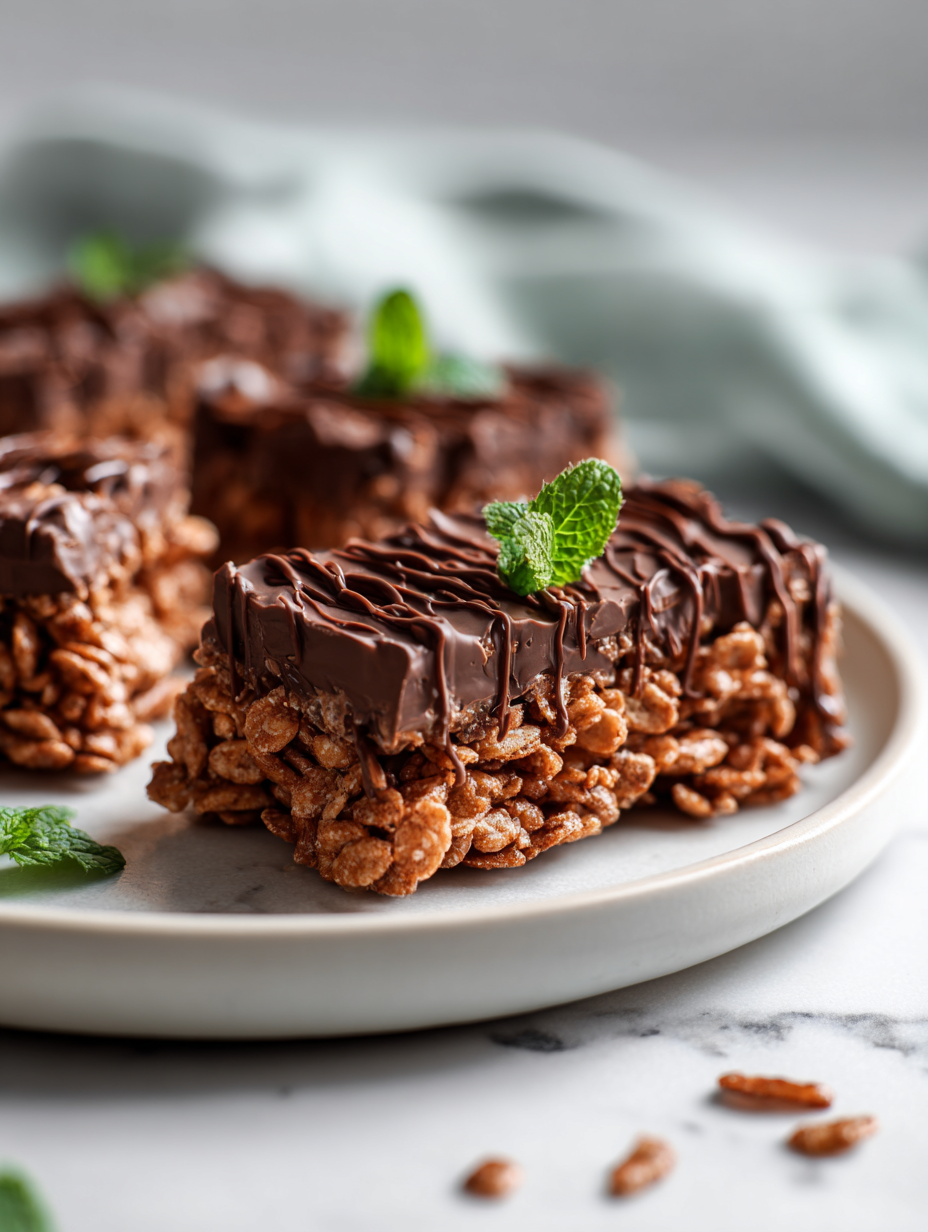
- Finish by plating on a tray or dish. If desired, drizzle with extra melted chocolate or sprinkle a pinch of sea salt for contrast. Serve at room temperature for the best crunch and flavor.
Let the bars rest at room temperature for 2 hours or chill for 1 hour until firm. Slice with a sharp knife. Serve directly or store in an airtight container.
How to Know It’s Done
- Chocolate mixture is smooth and glossy after melting.
- Cornflakes are fully coated and not crushed.
- Bars are firm and shiny after setting, with clean edges when sliced.
No-Bake Chocolate Cornflake Bars
Ingredients
Equipment
Method
- Place the chopped chocolate in a microwave-safe bowl or double boiler. Microwave in 30-second bursts, stirring after each, until smooth and glossy. The chocolate should be silky and fragrant.
- Gently melt the butter in a small saucepan over low heat, just until it’s warm and melted without browning, then pour it into the chocolate and stir until combined. The mixture will be rich and shiny.
- Add the honey or golden syrup and vanilla extract to the chocolate mixture if using, stirring well to incorporate. This adds a subtle sweetness and depth of flavor.
- Pour the melted chocolate and butter mixture over the cornflakes in a large mixing bowl. Gently fold with a spatula until the flakes are evenly coated without crushing them, maintaining their crunch.
- Line your 20x20cm pan with parchment paper, leaving overhang for easy removal. Transfer the mixture into the pan and press down firmly with the back of a spatula or spoon, creating an even, compact layer.
- Let the bars set at room temperature for about 2 hours, or refrigerate for 1 hour until the chocolate is firm and shiny. You’ll notice the surface crack slightly when ready.
- Once set, lift the entire block out of the pan using the parchment overhang. Use a sharp knife to cut into squares or rectangles, wiping the blade clean after each cut for neat edges.
- Arrange the bars on a plate or tray. For an extra touch, drizzle with melted chocolate or sprinkle a pinch of sea salt on top before serving.
Pro tips for perfect bars
- Bolded mini-head: Use gentle heat → Melt chocolate slowly in short bursts to prevent seizing and ensure silky smoothness.
- Bolded mini-head: Mix with care → Fold cornflakes gently into the chocolate to keep the crunch intact, avoiding breakage.
- Bolded mini-head: Press firmly → When transferring to the pan, press the mixture down with the back of a spatula for an even, compact layer.
- Bolded mini-head: Chill adequately → Let the bars set at room temperature or in the fridge until the chocolate is firm and shiny, about 1-2 hours.
- Bolded mini-head: Slice with sharp tools → Use a sharp knife warmed slightly or wiped clean for clean, crisp edges when cutting.
- Bolded mini-head: Add extras last → Sprinkle dried fruit or nuts on top just before setting for better adhesion and presentation.
- Bolded mini-head: Adjust sweetness → Taste the melted chocolate before pouring; add a pinch of salt or vanilla for enhanced depth.
Common mistakes and how to fix them
- FORGOT to check chocolate temperature → Use low heat to prevent seizing.
- DUMPED the mixture before it set → Press firmly for an even layer.
- OVER-TORCHED the chocolate → Remove from heat immediately, stir quickly.
- FAILED to line pan with parchment → Use parchment for easy removal and clean slices.
Quick fixes and pantry swaps
- When mixture is too stiff → Splash in a tiny bit of warm water to loosen.
- If bars crack when cutting → Chill longer or warm the knife slightly before slicing.
- When chocolate seizes → DUMP in a spoonful of vegetable oil and stir until smooth.
- Splash a few drops of vanilla → Enhance flavor if chocolate tastes flat or dull.
- Patch crumbly edges → Press them back into the pan and chill for a quick fix.
Prep, store, and reheat tips
- Prepare the mixture and have it ready in the fridge for up to 24 hours before setting; the coolness helps it firm up faster and makes slicing easier, while the chocolate flavor deepens overnight.
- Store the finished bars in an airtight container at room temperature for up to 3 days; the chocolate remains shiny and the crunch stays crisp if kept away from moisture.
- For longer storage, freeze the bars wrapped tightly in plastic wrap and then in foil for up to 1 month; thaw at room temp for 10-15 minutes, the aroma of chocolate and cornflakes will reawaken.
- Reheating isn’t really necessary—these are best served at room temperature—but if you want to soften slightly, leave at room temp for about 10 minutes, the chocolate will become silky and inviting again.
Top questions about no bake bars
1. Can I use milk chocolate instead of dark?
Use high-quality dark chocolate for a richer flavor; milk chocolate works but is sweeter and less intense.
2. How long should I chill the bars?
Chill the mixture in the fridge for about an hour or at room temperature for 2 hours until firm.
3. My mixture is too stiff, what do I do?
If your mixture is too thick, add a tiny splash of warm water or milk to loosen it.
4. How do I get clean cuts?
Use a sharp knife warmed slightly or wiped with a damp cloth for clean slices.
5. What can I substitute for cornflakes?
You can swap cornflakes with puffed rice or rice cereal for a similar crunch.
6. How long do these bars last?
Storing in an airtight container at room temp keeps them fresh for up to 3 days.
7. My melted chocolate has seized, what now?
If your chocolate seizes, stir in a teaspoon of vegetable oil or butter until smooth.
8. Can I add flavorings?
Adding a pinch of sea salt or a dash of vanilla enhances overall flavor and complexity.
9. Can I freeze the bars?
These bars can be frozen wrapped in plastic for up to a month, thaw at room temp before serving.
10. How do I incorporate extras without crushing them?
Use a spatula to gently fold in extras to keep the cornflakes crunchy and evenly coated.
These no-bake chocolate cornflake bars are a reminder that simple ingredients can create something satisfying and nostalgic. They’re perfect for when time is tight but the craving is real. Plus, they come together with a kind of honest, unpolished charm that’s hard to beat.
Sharing this recipe feels like passing along a little secret—something that’s both comforting and a bit rebellious against the modern need for perfection. They’re a humble treat, but one that makes any day feel a bit more manageable and a lot more delicious.

Hi, I’m Mia Bennett, the chef and storyteller behind Grounding in Tradition. I’m so glad you’re here. This blog is my way of preserving the flavors, techniques, and rituals that shaped me as both a cook and a professional chef. Grounding in Tradition is not about trends or shortcuts. It is about honoring where food comes from, understanding the hands that prepare it, and carrying forward recipes that deserve to be remembered.


Leave a Reply