
These chocolate peanut butter truffles are a little nod to childhood, but with a grown-up twist. I love how they bring back that nostalgic rush of peanut butter and chocolate, but in a way that feels indulgent rather than just snacky. Making them is like a small act of comfort—something you can do on a lazy afternoon when you need a sweet boost.
What’s special about these truffles isn’t just their flavor, but how surprisingly easy they are to pull together. No fancy equipment, just good ingredients and a bit of patience in the freezer. They’re perfect for when you want something rich and satisfying, but also want to keep it simple enough to make on a whim. Honestly, I’ve found myself craving these more often than I care to admit.
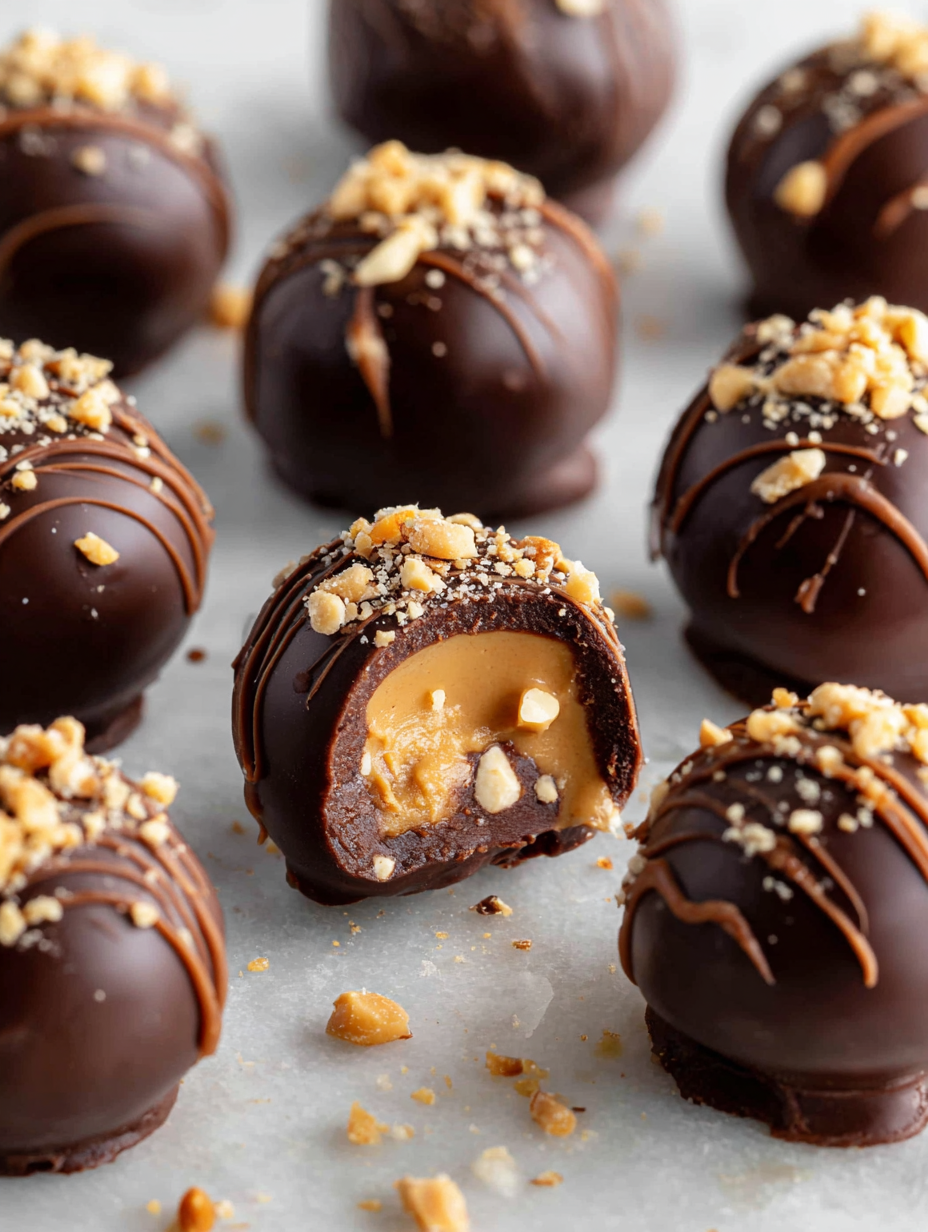
Focusing on the nostalgic comfort of childhood snacks, this recipe elevates the simple peanut butter and chocolate combo into elegant, bite-sized truffles that feel like a treat both for the soul and the palate.
A Nostalgic Bite of Childhood
- Biting into these truffles takes me straight back to my grandma’s kitchen, the smell of cocoa and peanut butter filling the air.
- I get a little proud every time I make a batch; they disappear faster than I expect, and that sweet chaos makes me smile.
- Sharing these with friends always sparks a nostalgic conversation about childhood snacks turned elegant treats.
- There’s a quiet satisfaction in folding the peanut butter into the chocolate — it’s like a small, indulgent secret.
- Sometimes I add a pinch of sea salt on top, and that contrast makes each bite feel unexpectedly sophisticated.
A Personal Connection to Comfort
Making these truffles has always been my go-to when I want to turn a simple treat into something a little more special. I remember the first time I combined rich dark chocolate with smooth peanut butter, and how that moment felt like rediscovering a favorite childhood snack, but with a grown-up twist. It’s funny how a small, messy kitchen experiment can turn into a little ritual I look forward to. The best part? Sitting with a handful of these, feeling that perfect balance of sweet, salty, and creamy, makes everything seem a bit brighter.
Trivial Tales and Heritage
- These truffles draw inspiration from classic American candy bars, blending childhood nostalgia with elegant bite-sized treats.
- Peanut butter and chocolate pairing dates back to the early 20th century, popularized by brands like Reese’s, which started in the 1920s.
- The concept of truffles originated in France, named after the earth mushroom due to their rounded, rustic look.
- Adding a pinch of sea salt on these sweets is a modern twist, enhancing flavor contrast and elevating the simple ingredients.
Ingredient Breakdown
- Chocolate: I prefer a good quality dark chocolate; it melts smoothly and has that deep, slightly bitter flavor that balances sweetness. Swap with milk chocolate if you want milder, but you’ll lose some richness.
- Peanut Butter: Creamy peanut butter is my go-to for a silky truffle interior, but if you like a bit more texture, try crunchy. Just watch out for oil separation—stir it well before mixing.
- Butter: I use unsalted butter for richness and to control salt levels. For a dairy-free version, coconut oil works well, though it adds a slight coconut aroma and a softer bite.
- Sweetener: I stick with powdered sugar for easy blending and a smooth finish. Honey or maple syrup can be used for a different sweetness note, but they may alter the texture slightly.
- Heavy Cream: It helps the chocolate come together without being greasy. If you want a lighter version, full-fat coconut milk can be a good substitute, but expect a hint of coconut flavor.
- Cocoa Powder: Unsweetened cocoa is essential for that rich, bitter punch. Dutch-processed cocoa will give a smoother, milder flavor, while natural cocoa adds brightness and acidity.
- Sea Salt: A sprinkle on top enhances all flavors—don’t skip it. For a smoky twist, try smoked sea salt for a subtle depth.
Spotlight on key ingredients
Chocolate:
- I prefer a rich, dark variety; it melts into a glossy, smooth coating that’s slightly bitter and balances sweetness. Swap with milk chocolate if you want a milder, creamier taste, but it will be less intense.
- Peanut Butter: Creamy peanut butter gives the truffles a silky, dense interior, but crunchy adds a delightful texture. Watch for oil separation—stir it well before mixing to keep the filling smooth and cohesive.
Peanut Butter:
- The creamy, nutty aroma hits the nose immediately, its velvety texture melts on the tongue. If you use natural peanut butter, stir in the oil for even consistency, and expect a slight saltiness that enhances the sweetness.
- Chocolate: When melting, it develops a fragrant, cocoa-rich smell that fills the kitchen. A good quality chocolate melts smoothly, creating a shiny, crackly shell that’s satisfying to bite into.
Notes for ingredient swaps
- Dairy-Free: Use coconut butter or almond butter instead of regular butter for a rich, nutty flavor without dairy. Keep in mind, coconut butter may add a slight coconut aroma.
- Vegan Chocolate: Swap dark chocolate with a vegan-friendly variety. The flavor remains deep, but the texture might be a tad softer or less glossy.
- Peanut Butter: Crunchy peanut butter adds texture, but if you prefer a smoother truffle, go for creamy. Natural peanut butter can be used, but stir well to incorporate oil.
- Sweetener: Powdered sugar keeps the texture smooth, but honey or agave syrup can replace it. Expect a slightly stickier, softer consistency.
- Cocoa Powder: Dutch-processed cocoa provides a mellower, smoother flavor. Natural cocoa will give a brighter, more acidic punch that can brighten the overall taste.
- Butter: For a dairy-free option, try melted coconut oil. It offers a soft finish and pairs well with chocolate, but expect a subtle coconut note.
- Chocolate: If you’re out of dark, milk chocolate works in a pinch. It’s sweeter and less intense, so consider reducing the added sugar slightly.
Equipment & Tools
- Baking sheet with parchment: To hold and chill the truffles without sticking.
- Small scoop or spoon: To portion uniform-sized balls for even coating.
- Microwave-safe bowl: For melting chocolate evenly.
- Spatula: To stir and fold ingredients smoothly.
- Cooling rack: To set dipped truffles without sticking.
- Fork or toothpick: For dipping and coating the truffles.
Step-by-step guide to making truffles
- Equipment & Tools: line a baking sheet with parchment paper, small scoop or spoon, microwave-safe bowl, spatula, cooling rack, and a small fork or toothpick for dipping.
- Melt the chocolate: chop 200g dark chocolate into small pieces, microwave in 30-second bursts, stirring in between until smooth. Set aside to slightly cool (around 30°C/86°F).
- Mix peanut butter: in a bowl, combine 1 cup creamy peanut butter with 2 tbsp unsalted butter, stirring until smooth and shiny. This helps the mixture set better.
- Combine and fold: add 1/2 cup powdered sugar to the peanut butter mixture. Then gently fold in the melted chocolate until fully incorporated and smooth — don’t overmix or it’ll lose gloss.
- Chill the dough: scoop out small amounts (about 1 tbsp) and roll into balls. Place on prepared sheet. Chill in the freezer for 20–30 minutes until firm but not hard.
- Prepare for dipping: melt remaining 50g chocolate if needed. Prepare a cooling rack with parchment underneath for drizzling and dipping.
- Dip the truffles: using a fork or toothpick, dip each chilled ball into the melted chocolate, letting excess drip off. Place on the cooling rack. Repeat for all.
- Add finishing touches: sprinkle a tiny pinch of sea salt or crushed peanuts on top while the chocolate is still shiny. Let set at room temperature or refrigerate for 15 minutes.
- Rest and store: allow truffles to firm at room temp for about 10 minutes, then store in an airtight container in the fridge for up to a week. Serve slightly chilled or at room temp.
- Checkpoints: the chocolate should be glossy and firm to touch; the truffles should hold shape without cracking; and the filling should be smooth when bitten into.
Let the dipped truffles rest at room temperature for about 10 minutes to fully set. For a firmer finish, refrigerate for 15 minutes. Serve slightly chilled for optimal texture and flavor contrast.
How to Know It’s Done
- Chocolate is glossy and snaps when broken.
- Truffles are firm but not hard, with a smooth interior.
- Chocolate coating is set and shiny, with no sticky spots.
Chocolate Peanut Butter Truffles
Ingredients
Equipment
Method
- Chop the 200g of dark chocolate into small pieces and place it in a microwave-safe bowl. Microwave in 30-second bursts, stirring well in between, until the chocolate is smooth and glossy. Set aside to cool slightly.
- In a mixing bowl, combine the creamy peanut butter and softened unsalted butter. Mix until the mixture is smooth, shiny, and well blended. The aroma of peanut and butter should be inviting.
- Add the powdered sugar to the peanut butter mixture and fold it in gently until fully incorporated and smooth. This will help the mixture set better and enhance sweetness.
- Pour the melted dark chocolate into the peanut butter mixture and fold together carefully. Keep folding until the mixture is uniform, thick, and glossy — it should hold together when rolled.
- Scoop out about 1 tablespoon of the mixture using a small scoop or spoon, then roll gently between your hands to form a smooth ball. Place each ball on a parchment-lined baking sheet. Repeat with the remaining mixture.
- Place the tray of peanut butter balls in the freezer for 20–30 minutes until they are firm but not frozen solid. This makes dipping easier and helps maintain shape.
- Chop the remaining 50g of dark chocolate into small pieces. Melt it using the same microwave method, stirring until smooth. Let it cool slightly but remain pourable and glossy.
- Using a fork or toothpick, dip each chilled peanut butter ball into the melted chocolate, turning to coat completely. Let excess chocolate drip off before placing on a clean parchment-lined rack.
- While the chocolate coating is still shiny, sprinkle a tiny pinch of sea salt on top of each truffle for a flavor contrast. Allow the coated truffles to set at room temperature for about 10 minutes, or refrigerate for 15 minutes for a firmer finish.
- Once the chocolate is fully set and glossy, transfer the truffles to an airtight container. Let them rest at room temperature for a few minutes before serving for optimal texture and flavor. Enjoy these rich, nostalgic bites!
Pro tips for perfect truffles
- Use gentle heat when melting chocolate to prevent seizing and ensure a glossy finish.
- Chill the peanut butter mixture until firm enough to scoop—cold hands make rolling easier.
- When dipping, tap off excess chocolate gently to avoid thick drips and uneven coating.
- Add a pinch of sea salt before the chocolate sets for a flavor contrast that elevates each bite.
- Work quickly during dipping to keep the chocolate from setting before you finish coating all truffles.
- For a smoother shell, melt chocolate in short bursts and stir thoroughly to maintain shine and fluidity.
Common mistakes and how to fix them
- FORGOT to temper the chocolate → Melt slowly and avoid overheating to prevent seizing.
- DUMPED in all ingredients at once → Incorporate ingredients gradually for a smooth, cohesive mixture.
- OVER-TORCHED the chocolate → Remove from heat immediately if it smells burnt or becomes lumpy.
- MISSED chilling time → Ensure mixture is well chilled before rolling for easier handling.
Quick Fixes for Smooth Results
- When chocolate seizes, splash in a teaspoon of vegetable oil to smooth it out.
- If mixture is crumbly, dump in a splash of cream and stir until it comes together.
- Over-torched chocolate? Patch it with a chunk of fresh chocolate and gently melt again.
- Forgot to chill the filling? Rest in the fridge for 15 minutes before rolling.
- When in doubt, swap peanut butter for almond butter for a nuttier, milder flavor.
Prep, store, and reheat tips
- You can prepare the peanut butter mixture and shape the truffles up to 24 hours in advance; keep them covered in the fridge. The flavors meld better after a day, and they’re easier to handle when chilled.
- Store the finished, dipped truffles in an airtight container in the fridge for up to a week. The chocolate coating stays shiny and firm, with no melt or bloom if kept cool.
- For longer storage, freeze the truffles for up to a month. Wrap individually in plastic wrap, then place in a freezer bag. Thaw in the fridge for a few hours before serving.
- Reheat or soften slightly by letting refrigerated truffles sit at room temperature for about 10–15 minutes. The chocolate might soften, releasing that rich, cocoa aroma, and the interior becomes more supple.
Top questions about chocolate peanut butter truffles
1. Can I use milk chocolate instead of dark?
Use a good quality dark chocolate with at least 70% cocoa for the best glossy coating and rich flavor. Swap with milk chocolate if you prefer it sweeter and milder, but the finish might be less shiny.
2. Is crunchy peanut butter okay?
Peanut butter should be smooth and creamy to blend easily. If you prefer crunch, use crunchy peanut butter, but expect a chunkier interior.
3. How long should I chill the truffles before dipping?
Chill the shaped truffles for at least 20 minutes in the freezer before dipping for easier handling and cleaner coating.
4. Can I freeze the truffles?
Yes, you can freeze these truffles for up to a month. Wrap them tightly in plastic wrap and store in an airtight container.
5. How do I shape the truffles evenly?
Use a small spoon or a mini scoop to portion the mixture, which helps keep the size uniform and makes dipping easier.
6. What if my chocolate seizes?
Overheating chocolate causes it to seize and become grainy. Melt it slowly over low heat or in short bursts in the microwave, stirring often.
7. Should I add salt on top?
Adding a pinch of sea salt on top of the dipped truffles enhances the chocolate and peanut butter flavor, adding a nice contrast.
8. How do I melt chocolate properly?
Use a double boiler or microwave in short bursts to melt chocolate gently. Stir frequently to prevent burning and ensure smoothness.
9. How should I store the truffles?
Store the finished truffles in an airtight container in the fridge. They stay fresh for up to a week, maintaining their shine and firmness.
10. My chocolate looks dull, what do I do?
If the chocolate coating is dull or sticky, re-melt with a teaspoon of vegetable oil and give it a quick stir to restore gloss.
These truffles are a reminder that simple ingredients, when handled with care, can turn into something unexpectedly special. Each bite offers a burst of familiar flavors, but with enough finesse to make you pause and savor. As the seasons shift, they feel like a cozy treat to keep around.
Sharing them with friends or just keeping a few for yourself can make a quiet moment feel a little more indulgent. Sometimes, it’s the small, homemade things that bring the most comfort—these truffles included. No matter how many you make, they never last very long.

Hi, I’m Mia Bennett, the chef and storyteller behind Grounding in Tradition. I’m so glad you’re here. This blog is my way of preserving the flavors, techniques, and rituals that shaped me as both a cook and a professional chef. Grounding in Tradition is not about trends or shortcuts. It is about honoring where food comes from, understanding the hands that prepare it, and carrying forward recipes that deserve to be remembered.


Leave a Reply