
Making a chocolate fondant is all about that tiny window of perfection—getting the outside just firm enough while the inside stays luxuriously gooey. It’s a game of timing and temperature, really, not just throwing ingredients together. I’ve learned to watch the clock like a hawk, because one minute too long and it’s just a brownie; one minute too short and you’re left with a molten mess.
This recipe has a way of revealing your kitchen patience—every batch teaches you something new. I love how a simple mix can turn into something so dramatic when it hits the oven at the right moment. It’s almost meditative, waiting for that crackly top to give way to the warm, chocolatey river underneath. The real trick is in the feel of the batter—thick, glossy, and just a little sticky.
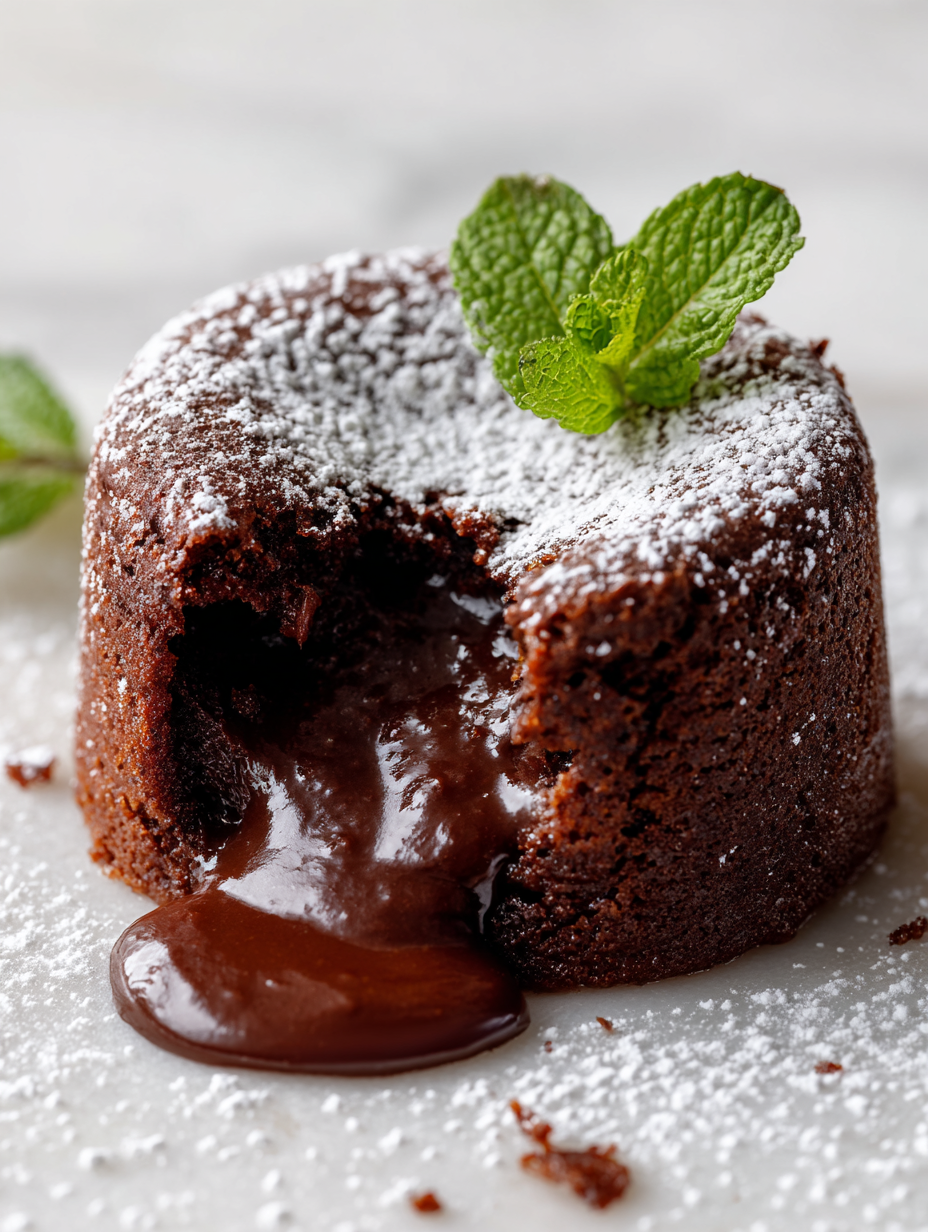
Focusing on the importance of timing and temperature control to achieve the perfect gooey center with a lightly set exterior, emphasizing the delicate balance needed to prevent overbaking or underbaking.
The subtle art of timing and temperature
- Baking this reminds me of childhood summers—those rich, molten centers melting into vanilla ice cream.
- I get a rush every time I see the crackly top give way to that glossy, chocolatey ooze.
- There’s a quiet pride in nailing the timing—when everything aligns and the edges are just a hint firm.
- Sometimes I feel a little chaos in the kitchen, but that perfect fondant makes it all worth it.
- Sharing a warm fondant feels like a small, sweet victory—an indulgence that never gets old.
The story behind this recipe
- This recipe came about after a late night craving for something rich and indulgent, but with a twist—something different from the usual chocolate cake. I wanted that perfect balance of runny and set, and spent a few tries dialing in the timing. Now, it’s become my go-to for when I want a little dramatic flair with minimal fuss.
- I remember the first time I nailed the gooey center—it was like discovering a secret chocolate river hidden inside a cake. That moment of triumph, when the edges are just firm enough and the middle is still molten, keeps me coming back. It’s not just about the dessert, it’s about the thrill of getting it right, every single time.
- heading: The magic of timing and temperature
Chocolate Fondant Trivia
- Chocolate fondant, also known as lava cake, was popularized in France during the 1980s, blending rich chocolate with a molten center.
- The name ‘fondant’ comes from the French word for ‘melting,’ reflecting its signature gooey interior that flows when cut into.
- Early recipes were often a happy accident—chefs trying to make a soufflé but ending up with a semi-liquid core instead.
- In some regions, it’s believed that the secret to perfect fondant lies in the quality of the chocolate—preferably high cocoa content for that intense flavor.
- Modern variations sometimes include infusions like chili, sea salt, or liqueurs, adding layers of complexity to this classic dessert.
Key ingredients breakdown
- Dark chocolate: I prefer a high cacao content, around 70%, for that deep, intense flavor that melts smoothly and creates that irresistible gooey center. Swap for milk chocolate if you want it milder, but expect a creamier, less fudgy result.
- Butter: I use unsalted butter for control over salt levels. It adds richness and helps the chocolate melt into a glossy, silky mixture. You can substitute with margarine in a pinch, but it won’t have quite the same depth of flavor.
- Eggs: Fresh eggs are my go-to—they give structure and help the fondant set just right. For a lighter version, try aquafaba (the chickpea brine) as an egg substitute, but be prepared for a slightly different texture.
- Sugar: I stick with caster sugar for quick dissolution and a smooth batter. Brown sugar adds a caramel note if you like a hint of molasses. Skip or reduce if you’re aiming for a less sweet, more bitter chocolate punch.
- Flour: Just a touch to stabilize the batter, I use plain all-purpose flour. Almond flour can be an interesting swap, adding a nutty aroma and slightly denser crumb, but it may affect baking time.
- Cocoa powder: I use unsweetened, natural cocoa for that punch of chocolate flavor. Dutch-processed can be used for a smoother, less acidic taste, but it might affect the rise slightly.
- Vanilla extract: A splash enhances the chocolate’s richness. You can experiment with orange or peppermint extracts for a seasonal twist, but keep the quantity small—overpowering the chocolate is easy.
Spotlight on key ingredients
Dark chocolate:
- I prefer a high cacao content, around 70%, for that deep, intense flavor that melts smoothly and creates that irresistible gooey center. Swap for milk chocolate if you want it milder, but expect a creamier, less fudgy result.
- Butter: I use unsalted butter for control over salt levels. It adds richness and helps the chocolate melt into a glossy, silky mixture. You can substitute with margarine in a pinch, but it won’t have quite the same depth of flavor.
- Eggs: Fresh eggs are my go-to—they give structure and help the fondant set just right. For a lighter version, try aquafaba (the chickpea brine) as an egg substitute, but be prepared for a slightly different texture.
Butter:
- Dark chocolate: I prefer a high cacao content, around 70%, for that deep, intense flavor that melts smoothly and creates that irresistible gooey center. Swap for milk chocolate if you want it milder, but expect a creamier, less fudgy result.
- I use unsalted butter for control over salt levels. It adds richness and helps the chocolate melt into a glossy, silky mixture. You can substitute with margarine in a pinch, but it won’t have quite the same depth of flavor.
- Eggs: Fresh eggs are my go-to—they give structure and help the fondant set just right. For a lighter version, try aquafaba (the chickpea brine) as an egg substitute, but be prepared for a slightly different texture.
Notes for ingredient swaps
- Dairy-Free: Swap butter for coconut oil or a neutral vegetable oil. Expect a slightly different richness and aroma, but still deliciously moist.
- Vegan Chocolate: Use dark vegan chocolate and a plant-based butter or margarine. The flavor stays deep, but the texture may be a touch lighter.
- Sugar Alternatives: Substitute with coconut sugar or maple syrup. The batter might be a little less glossy, and baking times could vary slightly.
- Gluten-Free: Replace all-purpose flour with almond flour or a gluten-free blend. Be aware of the slightly denser crumb and adjust baking time if needed.
- Lower Cacao Content: Use a milk chocolate version if you prefer a sweeter, creamier fondant. It’ll be less intense but still satisfy the craving.
- Sweetener Boost: Add a pinch of sea salt or a tiny splash of liqueur (like Grand Marnier) to enhance the chocolate flavor and add complexity.
Equipment & Tools
- Ramekins: To shape individual fondants and contain the batter during baking.
- Double boiler or heatproof bowl over saucepan: For gentle melting of chocolate and butter without scorching.
- Whisk: To aerate eggs and sugar, creating a light, fluffy mixture.
- Spatula: To fold ingredients gently without deflating the batter.
- Baking tray: To hold ramekins steady and distribute heat evenly.
- Knife: To loosen the edges for easy unmolding.
Step-by-step guide to baking
- Preheat your oven to 200°C (390°F). Grease 4 ramekins with butter, then dust with cocoa powder—set aside. This ensures easy unmolding and a chocolatey crust.
- Chop 200g dark chocolate (70% cacao works best). Melt with 150g unsalted butter over a double boiler, stirring until smooth and glossy. Smell that rich, cocoa aroma? That’s your cue.
- In a separate bowl, whisk 3 eggs and 75g caster sugar vigorously until light and slightly thickened—about 2 minutes. The mixture should be pale and aerated.
- Pour the melted chocolate and butter into the egg mixture, folding gently to combine. Avoid overmixing; you want a shiny, thick batter. Add 1 teaspoon vanilla extract for depth.
- Sift in 50g all-purpose flour and 15g unsweetened cocoa powder. Gently fold until just combined. The batter should be thick but pourable, with a velvety sheen.
- Divide the batter evenly among the prepared ramekins. Level the tops with a spatula. Place on a baking tray for easy handling. Bake for 10–12 minutes. The edges should be firm, but the center still jiggly.
- Check for doneness: the top should crack slightly, and the edges will pull away from the ramekin. When gently shaken, the center should wobble just a little—this is key.
- Remove from oven and let rest for 1 minute. Then, run a small knife around the edges to loosen. Invert onto plates quickly—serve immediately for that perfect gooey center.
Let the fondants rest for 1 minute after coming out of the oven. Invert onto warm plates immediately, allowing the molten center to spill out. Serve with a dusting of cocoa or a scoop of vanilla ice cream if desired.
How to Know It’s Done
- Cracked top with slight wobble in the center when shaken.
- Edges are firm and slightly pulling away from ramekin.
- A gentle tap reveals a soft, molten core when cut open.
Chocolate Fondant
Ingredients
Equipment
Method
- Preheat your oven to 200°C (390°F). Lightly butter four ramekins and dust them with cocoa powder to prevent sticking.
- Chop the dark chocolate into small pieces and melt it together with the butter in a double boiler or heatproof bowl over simmering water, stirring gently until smooth and glossy, filling your kitchen with that rich cocoa aroma.
- In a separate bowl, whisk the eggs and caster sugar vigorously for about 2 minutes until the mixture is pale, slightly thickened, and aerated, creating a light, fluffy texture.
- Pour the melted chocolate and butter into the egg mixture, gently folding together with a spatula until just combined, keeping the batter smooth and shiny.
- Sift in the flour and cocoa powder, then fold carefully until the batter is thick, velvety, and uniform, being cautious not to deflate the mixture.
- Divide the batter evenly among the prepared ramekins, smoothing the tops with a spatula for an even rise during baking, then place them on a baking tray for stability.
- Bake the fondants in the preheated oven for 10–12 minutes. The tops should crack slightly, and the edges will be firm while the center remains soft and jiggly.
- Once baked, let the fondants rest for about 1 minute, then carefully run a knife around the edges to loosen them.
- Invert each ramekin onto warm plates, gently tapping or shaking to release the fondant, revealing the glossy, molten interior that starts to flow out.
- Serve immediately, perhaps with a dusting of cocoa powder or a scoop of vanilla ice cream, to enjoy the contrast of the crisp exterior and luscious, gooey center.
Pro tips for perfect fondant
- Bolded mini-head: Use room temperature ingredients → Ensures a smooth, glossy batter without lumps.
- Bolded mini-head: Chill the batter briefly → Helps control spreading and improves texture during baking.
- Bolded mini-head: Check oven calibration → Precise heat is crucial; an oven thermometer is a good investment.
- Bolded mini-head: Underbake slightly → The center should wobble when gently shaken for that perfect gooey core.
- Bolded mini-head: Use a timer and set alarms → Prevents overbaking and keeps the timing tight for ideal results.
- Bolded mini-head: Cool briefly before unmolding → Keeps the fondant intact and prevents cracking when turning out.
- Bolded mini-head: Serve immediately → The fondant’s magic fades quickly as it cools; timing is everything.
Common mistakes and how to fix them
- OVERESTIMATED OVEN TEMP: Reduce to 180°C (356°F) if fondants crack or overbake.
- DIDN’T CHECK CENTERS: Gently jiggle; if center wobbles slightly, it’s perfect.
- MISSED REST TIME: Rest for at least 1 minute before unmolding for a clean release.
- OVERBAKED: Remove sooner if edges are firm and center still jiggles, not set.
Quick Fixes for Common Fondant Issues
- If the fondant cracks, splash a little hot water around the edges before unmolding.
- When centers are too firm, reduce baking time by 1 minute and check again.
- Dumped too much flour? Sift again or add a tiny splash of hot water to loosen batter.
- Over-torched? Shield edges with foil and bake for a shorter time next round.
- Rescue a gooey center by gently reheating for 30 seconds in the microwave—smells like molten magic.
Prep, store, and reheat tips
- Prepare the batter up to a day in advance; keep covered in the fridge to prevent skin formation. The flavors meld overnight, making the chocolate even richer.
- Baked fondants can be stored in an airtight container in the fridge for up to 2 days. Reheat gently in a warm oven (around 150°C/300°F) for 5–7 minutes until just warmed through, with a glossy, oozy center intact.
- For best texture, reheat fondants straight from the fridge—avoid microwaving, which can overcook the edges and dull the gooey center’s shine.
- Freeze unbaked ramekins of batter for up to 1 month. Thaw in the fridge overnight before baking, adding an extra minute or two to the baking time. The chilled batter helps achieve a more pronounced molten core.
- Over time, flavors deepen, but the texture may become less velvety. Reheated fondants are best enjoyed immediately—waiting dulls that fresh, decadent feel, and the center can stiffen.
Top questions about chocolate fondant
1. How do I know when it’s done?
A slightly underbaked center should wobble gently when you shake the ramekin, indicating it’s perfect and gooey.
2. What does perfectly baked look like?
The edges should be firm and pulling away from the ramekin, with a cracked top and a jiggle in the center.
3. How long should I bake it?
Bake for 10–12 minutes at 200°C (390°F). Adjust time slightly if your oven runs hot or cold.
4. How should the batter look before baking?
Ensure the batter is thick but pourable and glossy before baking. Overmixing can deflate the batter.
5. What kind of chocolate should I use?
Use high-quality dark chocolate with at least 70% cacao for the deepest flavor. Swap with milk chocolate for milder results.
6. How do I unmold it without breaking?
Let the fondant rest for 1 minute after baking, then invert onto a warm plate immediately to serve.
7. What if my fondant is overbaked?
If the center is too firm, bake a minute less next time. If overbaked, reduce oven temperature slightly.
8. Can I prepare it ahead?
Chill the batter in the fridge for up to a day or bake and reheat gently to preserve gooeyness.
9. How do I reheat leftovers?
Reheat in a warm oven for 5–7 minutes for best texture. Avoid microwaving to prevent overcooking edges.
10. My fondant is stuck in the ramekin, what now?
If the edges stick, run a knife around before inverting. Use a light coating of butter and cocoa powder for easy release.
Getting that perfect chocolate fondant is a small act of patience—each batch teaches you something new, whether it’s timing or temperature. When it works, that warm, oozing center paired with a crisp top is a quiet, decadent reward. It’s not just about dessert; it’s about trusting your instincts and the rhythm of your oven.
In a world rushing past, a fondant reminds me to slow down and savor the moment—watching that glossy chocolate spill out is oddly satisfying. It’s a reminder that sometimes, the simplest ingredients, handled with care, create something surprisingly special. And honestly, that’s what keeps me coming back to this humble, gooey treat.

Hi, I’m Mia Bennett, the chef and storyteller behind Grounding in Tradition. I’m so glad you’re here. This blog is my way of preserving the flavors, techniques, and rituals that shaped me as both a cook and a professional chef. Grounding in Tradition is not about trends or shortcuts. It is about honoring where food comes from, understanding the hands that prepare it, and carrying forward recipes that deserve to be remembered.


Leave a Reply