
Sometimes, the best desserts are the ones you don’t have to turn on the oven for. These no bake cheesecake bars are my go-to when I want something rich and creamy without the fuss—perfect for hot days or when I need a quick sweet fix after dinner. They come together so easily, it’s almost embarrassing how little effort they require for such a satisfying treat.
What I love most is how adaptable this recipe is. You can swap in different toppings or flavors, making it feel like a new dessert each time. Plus, they chill out in the fridge, which means I can prep them ahead and forget about them until I need something sweet and impressive. It’s one of those recipes that feels fancy but is really just pantry magic and a little patience.
This recipe is inspired by my late-night craving for something sweet but fuss-free. I love how no bake cheesecake bars offer a creamy, indulgent treat without turning on the oven, especially during those hot summer days or when I’m short on time. It’s a dessert that tastes fancy but is honestly just a few pantry staples combined with a little patience for the fridge.
A sweet escape from the oven
- These bars remind me of summer picnics, where the cool, creamy texture feels like a little slice of sunshine.
- I used to think no-bake desserts were less special, but these bars proved me wrong—rich, smooth, and just the right amount of sweet.
- Baking can be a hassle, especially on busy days; these are my go-to for a quick, satisfying treat without turning on the oven.
- There’s a nostalgic comfort in how simple ingredients come together into something so decadent—like a little slice of childhood in every bite.
- I love how versatile this recipe is—switch the toppings or flavors, and it feels like a new dessert every time.
A spontaneous sweet moment
- This recipe started as a way to use up a half-full box of cream cheese that was languishing in my fridge. I wanted something sweet but didn’t want to turn on the oven or fuss with complicated steps. One lazy afternoon, I threw together a few pantry staples, and it turned into these no-bake bars that I keep coming back to.
- What really makes this recipe special is how it’s become my quick fix for unexpected guests or when I need a sweet escape without much effort. The simplicity of graham cracker crust, creamy filling, and a quick chill means I can whip them up in minutes and still get that satisfying, melt-in-your-mouth moment.
- heading: ‘A spontaneous sweet moment’
History and Fun Facts
- No bake desserts gained popularity during the 20th century, especially in the 1950s when convenience foods took off.
- Cheesecake itself dates back to ancient Greece, but the no bake version became a household favorite for quick, fuss-free indulgence.
- The graham cracker crust was originally developed as a health food in the 19th century, but found new life in modern no bake recipes.
- This recipe’s simplicity reflects a long tradition of improvisation in home cooking, turning pantry staples into something special.
- The creamy texture mimics traditional baked cheesecakes but offers a cooler, fresher taste that’s perfect for summer days.
Key ingredients and their quirks
- Cream cheese: I love how it becomes luxuriously smooth as it warms slightly—make sure it’s softened, or you’ll end up with lumps that refuse to blend. Swap in Greek yogurt for a tangier, lighter option, but keep the sweetness balanced.
- Graham cracker crumbs: I crush them until fine, then mix with butter until they hold together. For a more intense flavor, try digestive biscuits instead—they lend a richer, buttery note that’s almost caramel-like.
- Sugar: I use granulated, but brown sugar adds a hint of caramel depth that’s divine. Adjust based on how sweet you want the filling—less if you prefer a more tart bite.
- Lemon juice: Brightens everything up and cuts through the richness. If you don’t have fresh, bottled works fine, but fresh lemon zest is a game-changer for that vivid, citrusy punch.
- Heavy cream: Whipped until soft peaks, it gives the bars their fluffy texture. Substitute with coconut cream for a dairy-free, subtly sweet alternative that shimmers with a hint of coconut flavor.
- Vanilla extract: Just a splash enhances the overall richness. Try almond extract for a nutty twist, but use sparingly—too much can overpower the delicate cheesecake flavor.
- Optional toppings: Fresh berries add a juicy burst, while chocolate shavings lend a decadent touch. Pick what suits your mood—these bars are versatile enough to handle both.
Spotlight on key ingredients
Cream cheese:
- I love how it becomes luxuriously smooth as it warms slightly—make sure it’s softened, or you’ll end up with lumps that refuse to blend. Swap in Greek yogurt for a tangier, lighter option, but keep the sweetness balanced.
- Graham cracker crumbs: I crush them until fine, then mix with butter until they hold together. For a more intense flavor, try digestive biscuits instead—they lend a richer, buttery note that’s almost caramel-like.
Heavy cream:
- Lemon juice: Brightens everything up and cuts through the richness. If you don’t have fresh, bottled works fine, but fresh lemon zest is a game-changer for that vivid, citrusy punch.
- Whipped cream: Whip until soft peaks, it gives the bars their fluffy texture. Substitute with coconut cream for a dairy-free, subtly sweet alternative that shimmers with a hint of coconut flavor.
Notes for ingredient swaps
- Dairy-Free: Swap cream cheese for a block of firm silken tofu blended until smooth. Keeps the texture creamy but loses some tang.
- Gluten-Free: Use gluten-free graham cracker crumbs or crushed digestive biscuits. The flavor stays rich, but the texture may be slightly crumblier.
- Sweetener: Replace granulated sugar with honey or maple syrup. Adds a different depth of sweetness and a touch of moisture.
- Lemon Juice: Use bottled lemon juice if fresh isn’t available. The bright, citrusy punch remains, but fresh zest offers more aromatic punch.
- Heavy Cream: Substitute with coconut cream for a dairy-free version that shimmers with subtle coconut flavor. Whip until fluffy for best texture.
- Crust Base: Omit the crust for a crustless version or try crushed cookies like Oreos or shortbread for a richer, more decadent base.
- Add-ins: Mix in chopped berries, chocolate chips, or swirls of fruit preserves before chilling for personalized touches.
Equipment & Tools
- 9×9 inch pan: To hold and shape the cheesecake bars.
- Parchment paper: For easy removal and cleaner slices.
- Mixing bowl: To combine crust and filling ingredients.
- Spatula: To press crust and smooth the filling.
- Hand mixer or whisk: To whip the cream and beat the cream cheese.
Step-by-step guide to no bake cheesecake bars
- Equipment ready: line a 9×9 inch pan with parchment paper, a sturdy mixing bowl, a spatula, and a hand mixer or whisk.
- Crush the graham crackers: place in a zip-top bag, smash with a rolling pin until fine, about 1-2 minutes.
- Make the crust: combine 1 1/2 cups crushed graham cracker crumbs with 1/3 cup melted butter in the bowl. Mix until evenly coated and resembles damp sand.
- Press crust into pan: transfer mixture to the prepared pan, press firmly with the back of a spatula or glass to create an even layer. Chill in the fridge for 15 minutes while preparing filling.
- Prepare the filling: in a large bowl, soften 16 oz cream cheese (about 30 seconds in the microwave if needed). Add 1/2 cup sugar, 1 teaspoon vanilla, and beat until smooth and creamy, about 2 minutes.
- Add lemon juice: pour in 2 tablespoons lemon juice, mix until fully incorporated. This brightens the flavor and cuts through richness.
- Whip the cream: in a separate bowl, whip 1 cup heavy cream until soft peaks form, about 3-4 minutes. Gently fold into the cream cheese mixture until combined, no streaks.
- Assemble the bars: spread the filling evenly over the chilled crust. Use a spatula to smooth the top. Cover with plastic wrap and refrigerate for at least 4 hours, preferably overnight, until firm.
- Final check: the filling should be set but still creamy, with a slight jiggle when gently shaken. The edges should be clean when sliced, with no cracks or cracks.
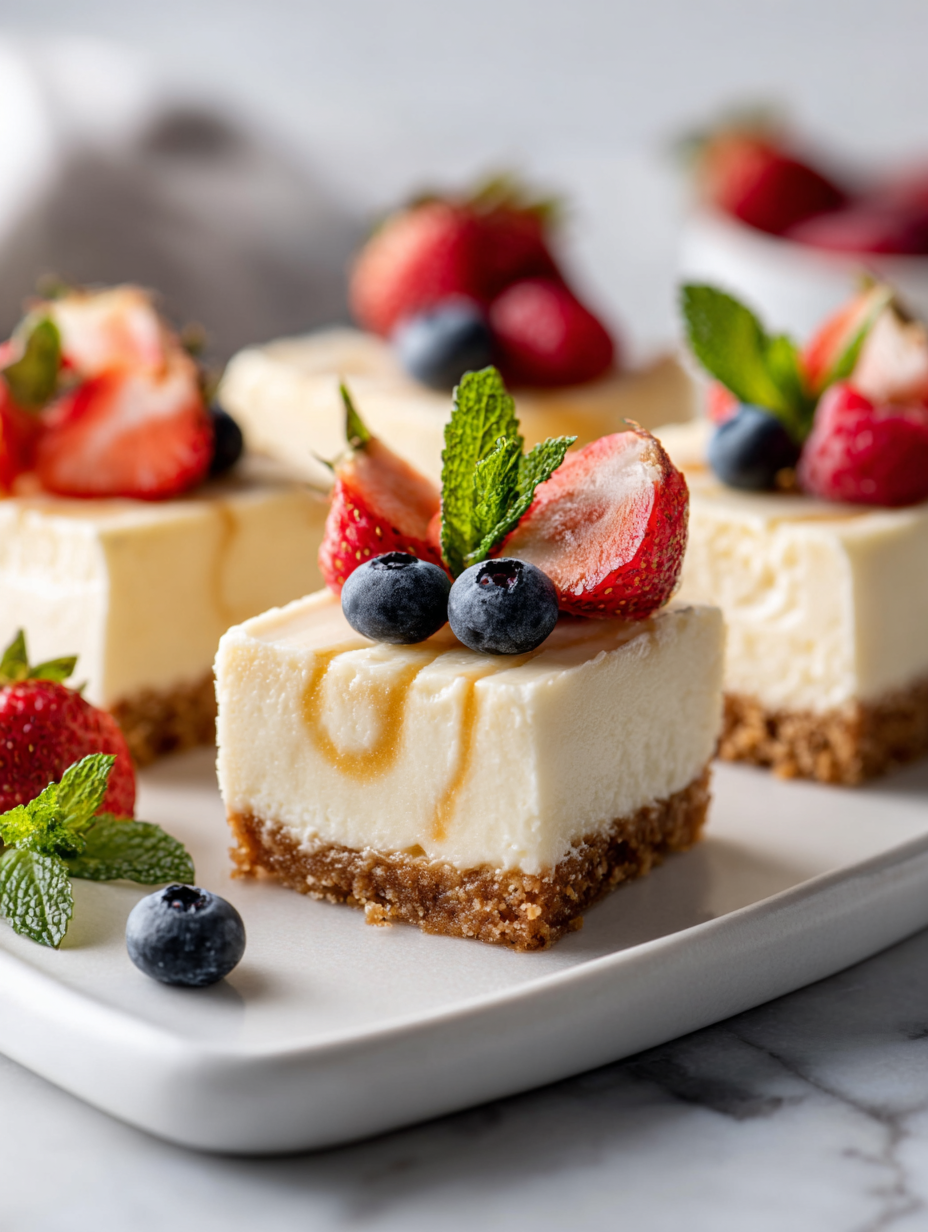
- Serve: lift bars out of the pan using the parchment paper, slice into squares, and serve chilled. Optional toppings include berries or chocolate shavings for extra flair.
Chill the assembled bars in the fridge for at least 4 hours or overnight. Once set, lift out using parchment, slice into squares, and serve chilled. Add toppings just before serving for extra flavor and presentation.
How to Know It’s Done
- Crust is firm and holds together when pressed.
- Filling is smooth, no lumps, and slightly fluffy after folding whipped cream.
- Bars are set and jiggle slightly but hold shape when sliced.
No Bake Cheesecake Bars
Ingredients
Equipment
Method
- Line your 9x9 inch pan with parchment paper, leaving some overhang for easy removal.
- Place the graham cracker crumbs in a mixing bowl and pour in the melted butter. Use a spatula to stir until the crumbs are evenly coated and resemble damp sand.
- Press the graham cracker mixture firmly into the bottom of your prepared pan, creating an even crust. Use the back of a spatula or a glass to smooth it out, then pop it into the fridge for about 15 minutes to chill.
- In a large bowl, beat the softened cream cheese with a hand mixer or whisk until smooth and creamy, about 2 minutes. It should be fluffy and free of lumps.
- Add the granulated sugar and vanilla extract to the cream cheese and continue beating until fully incorporated and silky.
- Pour in the lemon juice and mix again, brightening the flavor and slightly thinning the mixture.
- In a separate bowl, whip the heavy cream until soft peaks form—listen for a gentle swish and see the cream holding shape.
- Gently fold the whipped cream into the cream cheese mixture using a spatula, combining carefully to keep the filling light and airy.
- Spread the creamy filling evenly over the chilled crust, smoothing the top with a spatula for a neat finish.
- Cover the pan with plastic wrap and refrigerate for at least 4 hours, or preferably overnight, until the filling is set and slightly firm to the touch.
- Once chilled and firm, lift the cheesecake out of the pan using the parchment overhang. Slice into squares, serve chilled, and enjoy the rich, creamy texture.
Tips for perfect no-bake cheesecake bars
- Use room temperature cream cheese for a silky, lump-free filling that mixes easily.
- Crush graham crackers finely; larger chunks can make the crust crumbly rather than firm.
- Chill the crust thoroughly before adding filling to prevent slipping or uneven layers.
- Fold whipped cream gently into the cheese mixture to keep the filling light and airy.
- Use a spatula to smooth the top for an even, sleek finish before chilling.
- Don’t rush the chilling process; overnight in the fridge yields a firmer, more sliceable bar.
- Slightly under-chill if you prefer a softer, creamier bite—just be sure it’s not runny when served.
Common mistakes and how to fix them
- FORGOT to chill crust: Chill for at least 15 minutes, or crust may crumble when sliced.
- DUMPED filling too hot: Let cream cheese soften to room temperature for smooth mixing.
- OVER-TORCHED topping: Use low heat for melting chocolate or toppings to avoid burning.
- MISSED mixing fully: Scrape sides often to prevent lumps and ensure even flavor.
Quick fixes and pantry swaps
- When the filling is runny, splash in a little more whipped cream and fold gently.
- If the crust crumbles when pressed, patch with a bit more melted butter and press again.
- When the mixture cracks while setting, shield with plastic wrap and chill longer.
- DUMPED in too much lemon juice? Stir in a spoonful of cream cheese to balance acidity.
- heading
Prep, store, and reheat tips
- Prepare the crust and press it into the pan up to one day in advance; keep covered in the fridge for a firm base.
- The cheesecake filling can be made a day ahead and stored covered in the fridge; it firms up and flavors meld overnight.
- Store the assembled bars, covered tightly with plastic wrap, in the fridge for up to 3 days—texture becomes creamier and flavors deepen.
- Refrigerate chilled bars for at least 4 hours before serving; for best texture, let them sit at room temperature for 10 minutes to soften slightly.
- If freezing for longer storage, wrap bars tightly in plastic, then foil, and freeze up to 1 month. Thaw in the fridge and serve cold.
Top questions about no bake cheesecake bars
1. Can I use other cheeses instead of cream cheese?
Use softened cream cheese for smoothness, and avoid lumps. It makes mixing much easier and faster.
2. Can I swap the cream cheese for something else?
Yes, Greek yogurt can be a lighter, tangier substitute. It changes the texture slightly but keeps it creamy.
3. How long do I need to chill the bars?
Chill the bars for at least 4 hours or overnight for the best set. They should feel firm but creamy when ready.
4. What toppings work best for these bars?
You can add fresh berries, chocolate shavings, or fruit preserves on top. Keeps it versatile and fresh.
5. Can I change the crust ingredients?
Use graham cracker crumbs or digestive biscuits for the crust. You can also try crushed cookies for more flavor.
6. Can I prepare the crust in advance?
Yes, you can make the crust a day ahead. Keep it covered in the fridge for a firmer, better structure.
7. What if my filling is too soft or runny?
If the filling is too runny, fold in a little whipped cream to thicken it up before setting.
8. Can I skip the lemon or use a different flavor?
Use fresh lemon juice or bottled, but fresh zest really brightens the flavor. Add zest for extra citrus punch.
9. Are there dairy-free options available?
For dairy-free, try coconut cream or silken tofu. The texture will be different but still delicious.
10. What if my crust doesn’t hold together?
If you forget to press the crust firmly, just press again with the back of a spoon or glass for better compaction.
These no bake cheesecake bars are my go-to when I want something sweet without the fuss—cool, creamy, and surprisingly simple. They feel indulgent but come together with pantry staples and a little patience. Perfect for unexpected guests or a quick treat after dinner.
Every time I make them, I’m reminded how a little chill time transforms basic ingredients into something that feels special. No oven, no stress, just a chilled, luscious slice of summer in every bite. It’s a recipe I’ll keep coming back to, season after season.