
Sometimes, the craving for something sweet sneaks up on you when you least expect it—late at night, after a long day, or when friends drop by unexpectedly. This no-bake cheesecake cups recipe is my quick fix, a little jar of creamy comfort that whips up in minutes and chills just enough to satisfy that sweet tooth.
What I love most is how simple it is—no oven, no fuss, just a handful of ingredients and a bit of patience in the fridge. It’s a foolproof way to indulge without feeling weighed down, and honestly, it’s become a staple for last-minute dessert emergencies or when I want to impress with minimal effort.
This recipe is inspired by my late-night craving for something sweet but quick—no oven, no fuss, just creamy bites straight from the fridge. It’s my go-to when I want a dessert that feels indulgent yet effortless, especially after a long day or when unexpected guests show up.
Sweet Simplicity in a Cup
- This recipe is my secret weapon for unexpected guests—creamy, satisfying, and ready in minutes.
- I love how each bite takes me back to childhood summers—cool, sweet, and just a little tangy.
- There’s a thrill in assembling these cups quickly during chaos—no oven, no stress, just pure convenience.
The story behind this recipe
- This recipe came together during a weekend when I needed something sweet but didn’t want to turn on the oven. I was tired of heavy, baked desserts and craved something cool and creamy that could be assembled in minutes. It’s funny how a simple idea like this can become my favorite go-to when I want a quick treat without the fuss.
- I remember the first time I made these in a rush—my fridge was almost empty, but I had enough ingredients to whip up these little cups. The joy of seeing friends rave about a dessert I didn’t have to slave over still sticks with me. Now, they’re my secret weapon for last-minute dinner parties and lazy weekends alike.
- heading: The story behind this recipe
Historical & Cultural Tidbits
- This recipe has roots in 1950s mid-century American kitchens, where convenience was king and refrigeration was becoming widespread.
- Originally, similar no-bake desserts used gelatin and condensed milk, but this version leans into cream cheese for richer texture.
- In the era before food processors, recipes like this relied on softened cream cheese and manual mixing, making them a pantry staple for busy households.
- The portable, individual cups likely evolved from dessert buffets in fancy restaurants, adapted for home cooks seeking easy elegance.
Key ingredients and tips
- Cream cheese: I prefer it softened to avoid lumps, making the filling silky and smooth—your spoon will glide right through.
- Graham cracker crumbs: I toast mine lightly for a deeper, nutty aroma that contrasts beautifully with the creamy filling—try it if you want more depth.
- Sweetener (sugar or honey): I adjust to taste—sometimes a touch more honey gives it a floral sweetness that’s just right.
- Lemon juice: Brightens everything up with a citrusy zing, and it’s the secret to that subtle tang that keeps it from feeling too heavy—use fresh for the best punch.
- Heavy cream: Whipped until soft peaks, it gives the cups a light, airy texture—don’t overbeat or they’ll turn grainy.
- Vanilla extract: A splash adds warmth and complexity—skip if you want a more neutral flavor, but I think it really lifts the overall profile.
- Optional toppings: Fresh berries or a drizzle of chocolate—these add a burst of color and flavor, making each bite more interesting.
Spotlight on key ingredients
Cream cheese:
- I prefer it softened to avoid lumps, making the filling silky and smooth—your spoon will glide right through.
- Graham cracker crumbs: I toast mine lightly for a deeper, nutty aroma that contrasts beautifully with the creamy filling—try it if you want more depth.
Heavy cream:
- Lemon juice: Brightens everything up with a citrusy zing, and it’s the secret to that subtle tang that keeps it from feeling too heavy—use fresh for the best punch.
- Whipped until soft peaks, it gives the cups a light, airy texture—don’t overbeat or they’ll turn grainy.
Notes for ingredient swaps
- Dairy-Free: Coconut cream or cashew-based cream cheese can replace cream cheese. Expect a slightly tropical or nutty flavor that’s less tangy.
- Sweetener: Maple syrup or agave nectar can be used instead of sugar or honey. They add a subtle caramel note and slightly thinner consistency.
- Crust Base: Crushed digestive biscuits or Oreo crumbs work well if you don’t have graham crackers. They tend to be richer and more chocolatey.
- Lemon Juice: Lime juice provides a similar brightness with a slightly different citrus aroma—use fresh for best zing.
- Heavy Cream: Greek yogurt or whipped coconut milk can substitute for a lighter, tangier texture—may affect creaminess slightly.
- Flavor Extracts: Almond or citrus extracts can replace vanilla for a different aromatic dimension—use sparingly, as they’re more potent.
- Toppings: Fresh fruit, fruit compote, or chocolate shavings can be swapped based on what’s in your fridge—each adds a unique burst of flavor.
Equipment & Tools
- Small mixing bowls: For mixing crust and filling ingredients.
- Spoon or spatula: To mix and smooth ingredients.
- Piping bag or zip-top bag: For neatly filling the cups.
- Dessert cups or jars: To assemble and serve the cheesecake cups.
Step-by-step guide to no bake cheesecake cups
- Gather your equipment: small mixing bowls, a spoon, a piping bag or zip-top bag, and dessert cups or jars.
- Prepare the crust: In a bowl, combine graham cracker crumbs with a tablespoon of melted butter (about 15g) and a teaspoon of sugar. Mix until crumbly but holds together when pressed. Divide evenly into the bottoms of your cups, pressing down firmly with the back of a spoon. Chill in the fridge for 10 minutes to set.
- Make the filling: In a large bowl, beat 8 oz (225g) softened cream cheese until smooth, about 2 minutes. Add 1/4 cup (50g) sugar and a teaspoon of vanilla extract; beat until incorporated. Mix in 1 tablespoon (15ml) lemon juice for brightness. In a separate bowl, whip 1/2 cup (120ml) heavy cream until soft peaks form, about 2-3 minutes. Gently fold the whipped cream into the cream cheese mixture in two additions, maintaining lightness.
- Assemble the cups: Transfer the filling to a piping bag or zip-top bag, snip the tip, and pipe or spoon the filling over the chilled crusts. Smooth the tops with the back of a spoon or a small spatula.
- Chill to set: Cover the cups loosely with plastic wrap and refrigerate for at least 2 hours, or until firm and creamy. The filling should be slightly jiggle-free and hold its shape.
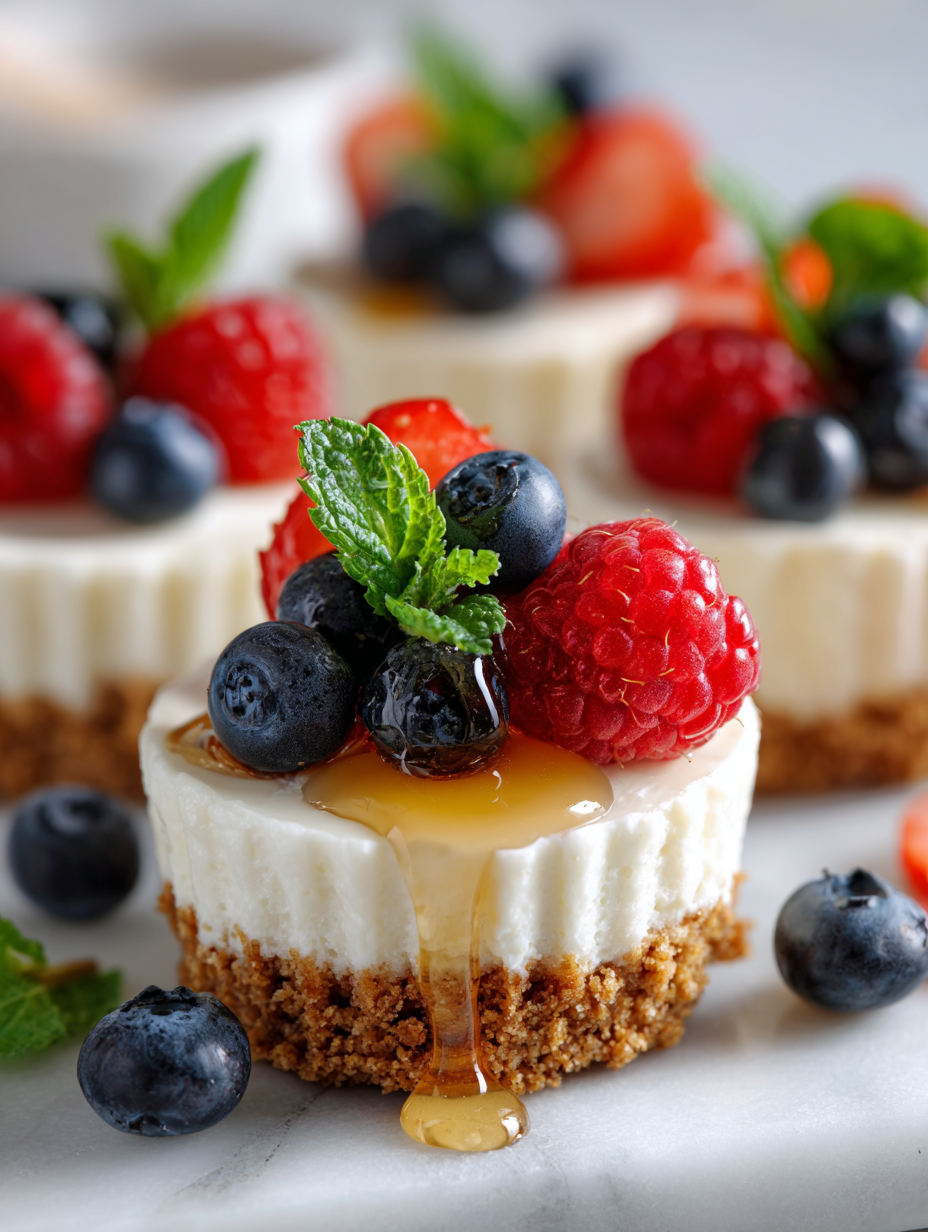
- Finish and serve: Optionally top with fresh berries, fruit compote, or a drizzle of chocolate just before serving for extra flair.
Chill the assembled cups in the fridge for at least 2 hours. Serve cold, topped with your favorite garnishes. For a prettier presentation, add toppings just before serving to prevent sogginess.
How to Know It’s Done
- Crust is firm and holds shape when pressed.
- Filling is smooth, slightly fluffy, and free of lumps.
- The cups are chilled until the filling is set and jiggle is minimal.
No-Bake Cheesecake Cups
Ingredients
Equipment
Method
- Mix the graham cracker crumbs, melted butter, and a teaspoon of sugar in a small bowl until the crumbs are evenly coated and hold together when pressed.
- Divide the crumb mixture evenly between your dessert cups or jars and press down firmly to create a compact crust layer. Chill in the fridge for about 10 minutes to set.
- In a large bowl, beat the softened cream cheese with sugar and vanilla extract until smooth and creamy, about 2 minutes. Add the lemon juice and mix until well combined.
- In a separate bowl, whip the heavy cream until soft peaks form, listening for gentle swirls and a slightly thickened sound.
- Gently fold the whipped cream into the cream cheese mixture in two additions, maintaining a light, airy texture. Use a spatula to fold carefully without deflating the mixture.
- Transfer the creamy filling into a piping bag or zip-top bag, snip the corner, and pipe or spoon the filling over the chilled crusts, smoothing the tops with the back of a spoon or small spatula.
- Cover the cups loosely with plastic wrap and refrigerate for at least 2 hours, or until the filling is firm and set.
- Before serving, top each cheesecake cup with fresh berries or a drizzle of chocolate to add color and flavor. Serve cold and enjoy the creamy, satisfying texture.
Pro tips for perfect cheesecake cups
- Bolded mini-head: Chill the crust thoroughly to ensure it stays firm and crisp when topped.
- Bolded mini-head: Use room temperature cream cheese for a silky, lump-free filling that mixes easily.
- Bolded mini-head: Whip the heavy cream just to soft peaks—overbeating can make it grainy and affect texture.
- Bolded mini-head: Fold whipped cream gently into the cream cheese mixture to keep it airy and light.
- Bolded mini-head: Use fresh lemon juice for a bright, tangy flavor that balances the richness of the cream cheese.
- Bolded mini-head: Chill assembled cups for at least 2 hours—this helps the filling set perfectly without cracking.
- Bolded mini-head: For an extra touch, briefly toast your graham cracker crumbs to develop a rich, nutty aroma.
Common mistakes and how to fix them
- FORGOT to chill crust; do so for 10 minutes to prevent sogginess.
- DUMPED filling mixture; fold gently to keep it airy and light.
- OVER-TORCHED the crust; keep an eye to prevent burning and develop a nutty aroma.
- FAILED to check jiggle; it should be slightly firm but still creamy when done.
Quick fixes for cheesecake cups
- When mixture is too runny, splash in a bit more crushed cookies to firm it up.
- If crust cracks when pressing down, patch it with extra crumbs and gentle pressure.
- Splash a little lemon juice if filling lacks brightness—shimmer of citrus lifts everything.
- When filling is lumpy, dump and start over with softened cream cheese for smoothness.
- Shield the cups with plastic wrap if condensation forms, preventing soggy edges.
Prep, store, and reheat tips
- Prepare the crust and filling components ahead—crust can be made and pressed into cups up to 24 hours in advance, kept covered in the fridge. Filling can be assembled a day ahead, just cover tightly and store in the fridge. The flavors meld better overnight, developing a richer tang.
- Store assembled cheesecake cups in an airtight container in the fridge for up to 3 days. The texture remains creamy, but toppings added later will stay freshest if added just before serving. Reheating isn’t necessary; serve chilled for best sensory experience.
- For the best experience, serve within 48 hours of making. After that, the crust may soften slightly and the filling may lose some of its initial fluffiness, but it still remains delicious. Keep cold, and avoid freezing as it can alter the texture.
- If you need to re-serve after a day or two, give the cups a gentle stir and top with fresh fruit or a splash of whipped cream to refresh the presentation and flavor. The creamy notes might be slightly more pronounced as flavors settle.
Top questions about cheesecake cups
1. Can I use store-bought cookie crumbs?
Yes, using pre-made cookie crumbs is fine, and it speeds up the process. Just look for plain, crushed cookies without too much sugar or additives.
2. Can I make this dairy-free?
Absolutely. If you’re allergic to dairy, coconut cream can replace heavy cream, though expect a slightly different texture and flavor—more tropical and less airy.
3. How long do I chill the cheesecake cups?
Chill the assembled cups for at least 2 hours, but overnight is better. They should be firm, with a slight jiggle, and the tops will be set and creamy.
4. What if the filling is too runny?
If your filling is too runny, fold in extra crushed cookies or a little more cream cheese. For a thicker texture, refrigerate for an additional hour before serving.
5. Can I substitute lemon juice?
Use fresh lemon juice for a bright, tangy flavor. Bottled lemon juice will work in a pinch but may lack the punch of fresh citrus scent.
6. Can I make these ahead of time?
Yes, you can prepare the crust and filling a day ahead. Keep the crust covered in the fridge, and assemble the cups just before serving to keep everything fresh.
7. My crust cracked, what do I do?
If the crust cracks when pressing, gently patch it with a few extra crumbs and press again. To prevent cracking, press firmly but gently, and chill before filling.
8. How do I know when the whipped cream is ready?
When whipping the cream, stop as soon as soft peaks form—overwhipping makes it grainy and difficult to fold into the filling.
9. When should I add toppings?
Add toppings like fresh berries or a drizzle of chocolate right before serving to keep them fresh and visually appealing. Keep toppings separate until serving if possible.
10. How can I adjust the sweetness?
If you find the filling too sweet, add a splash of lemon juice or a pinch of salt to balance the flavors without overpowering the creamy richness.
Sometimes, the best desserts are those that come together without much thought and still deliver pure comfort. These cheesecake cups are my go-to for busy days or when I need something sweet that doesn’t demand oven time or complicated steps.
Sharing them with friends or family feels special, even if I threw them together last minute. In the end, it’s the simple pleasures—cool, creamy, just a hint of tang—that really stick with me long after the last bite.