
After a long, chaotic week, I find myself craving something sweet that doesn’t require extra trips to the store or complicated steps. This no bake Greek yogurt cheesecake is my go-to because it’s honest, straightforward, and feels like a small victory in the kitchen. It’s the kind of dessert that feels indulgent but is actually made from pantry staples, giving me a break from the usual fuss.
There’s something satisfying about mixing a few simple ingredients and seeing a creamy, tangy cheesecake come together without turning on the oven. It’s a quiet act of reclaiming a moment for myself amidst the busy-ness, a little ritual of comfort. This recipe reminds me that sometimes, less really is more, especially when it’s about slowing down and enjoying the process.
This recipe is about reclaiming dessert simplicity after a chaotic week, using only pantry staples and a moment of quiet in the kitchen.
A Simple Escape in the Kitchen
- This cheesecake was born out of a need for a quick, satisfying dessert after a long day, no oven required.
- I love how the tangy Greek yogurt cuts through the richness of the cream cheese, making each bite refreshingly light.
- Baking can feel overwhelming, but this recipe reminds me that sometimes, simplicity brings the best results.
A Simple Escape in the Kitchen
- This cheesecake came about on a particularly lazy Sunday when I was craving something sweet but didn’t want to turn on the oven or make a fuss. I remembered how Greek yogurt adds a bright, tangy punch that can mimic cream cheese without all the heaviness. It was a small experiment that turned into a weekly staple, especially when I want a quick treat without the guilt.
- I love that it’s a bit rustic—no perfect cracks or smooth edges needed—and you can tweak the toppings endlessly. It’s a reminder that sometimes, the simplest ingredients—yogurt, a crumbly crust, a little honey—are enough to create something satisfying. Plus, it’s a recipe I keep coming back to when I want something homemade that feels indulgent but isn’t overly sweet.
- heading: ‘The story behind this recipe’
Trivia and Origin Insights
- This recipe taps into the Mediterranean tradition of using Greek yogurt for its tangy richness, dating back centuries.
- Originally, no-bake cheesecakes gained popularity in the 20th century as a quick alternative to traditional baked versions.
- The use of Greek yogurt in desserts became widespread in the last 30 years, appreciated for its probiotics and creamy texture.
- This dessert echoes a trend of simple, wholesome treats that rely on pantry staples rather than elaborate ingredients.
Ingredient breakdown: key components
- Greek yogurt: I prefer thick, full-fat Greek yogurt for a rich, tangy base that feels almost creamy. Swap for regular Greek yogurt if you want a lighter option, but the texture won’t be as velvety.
- Cream cheese: I use softened, full-fat cream cheese to get that smooth, luscious texture. For a slightly lighter version, try Neufchâtel—less fat, but still creamy and tangy.
- Honey: I love the natural sweetness and floral aroma honey adds—go for a good quality, floral variety. If you want less sweetness, reduce the honey or try agave syrup for a milder flavor.
- Graham cracker crust: I crush my own graham crackers to avoid additives, mixed with melted butter. For a gluten-free version, try almond or oat crust—just as crumbly and flavorful.
- Lemon zest: I add a bit of lemon zest to brighten the flavor and cut through the richness. For a more pronounced citrus hit, double the zest or add a splash of lemon juice—just don’t overdo it.
- Gelatin (optional): I sometimes add a little gelatin to firm things up, especially if I plan to serve after a few hours. Use unflavored gelatin, and dissolve it thoroughly to avoid lumps.
- Vanilla extract: I always include a splash for depth. For a twist, try almond or orange extract—just a few drops, so it doesn’t overpower.
Spotlight on Key Ingredients
Greek yogurt:
- I prefer thick, full-fat Greek yogurt for a rich, tangy base that feels almost creamy. Swap for regular Greek yogurt if you want a lighter option, but the texture won’t be as velvety.
- Cream cheese: I use softened, full-fat cream cheese to get that smooth, luscious texture. For a slightly lighter version, try Neufchâtel—less fat, but still creamy and tangy.
Lemon zest and honey:
- Honey: I love the natural sweetness and floral aroma honey adds—go for a good quality, floral variety. If you want less sweetness, reduce the honey or try agave syrup for a milder flavor.
- Lemon zest: I add a bit of lemon zest to brighten the flavor and cut through the richness. For a more pronounced citrus hit, double the zest or add a splash of lemon juice—just don’t overdo it.
Notes for ingredient swaps
- Dairy-Free: Swap Greek yogurt for coconut yogurt—adds a tropical note, but may alter tanginess and creaminess.
- Cream Cheese: Use ricotta or mascarpone for a lighter or richer texture, respectively. Ricotta makes it fluffier; mascarpone feels silkier.
- Sweetener: Replace honey with maple syrup or agave—each brings a different floral or caramel undertone, adjust sweetness accordingly.
- Crust Base: Swap graham crackers for digestive biscuits or gluten-free cookies—same crumbly texture, different flavor profiles.
- Lemon Zest: Use orange or lime zest for a different bright, citrusy aroma—experiment with small amounts first.
- Gelatin: Omit or replace with agar-agar for a vegetarian version—be mindful of setting times and texture differences.
- Flavor Enhancers: Add a splash of vanilla extract or a pinch of cinnamon—enhances warmth and depth, but don’t overpower the tang.
Equipment & Tools
- Springform pan: Holds the crust and filling, easy to remove the cheesecake.
- Mixing bowl: Combine and mix the filling ingredients.
- Rubber spatula: Scrape and smooth the mixture.
- Food processor or plastic bag and rolling pin: Crush the graham crackers into fine crumbs.
- Small saucepan: Dissolve gelatin if using.
Step-by-step guide to no bake cheesecake
- Equipment & Tools: Gather a 20cm (8-inch) springform pan, a mixing bowl, a rubber spatula, a food processor or plastic bag and rolling pin (for crust), and a small saucepan.
- Crush the graham crackers: Place about 200g of graham crackers in a plastic bag, seal, and crush into fine crumbs with a rolling pin, or use a food processor until crumbly.
- Make the crust: Mix the crumbs with 80g melted butter and a pinch of salt until evenly coated. Press into the bottom of the springform pan. Chill in the fridge for 15 minutes to set.
- Prepare the filling: In a bowl, combine 250g softened cream cheese, 200g Greek yogurt, 3 tbsp honey, and the zest of one lemon. Mix until smooth and slightly fluffy, about 2–3 minutes.
- Optional gelatin: If using gelatin, sprinkle 1 tsp unflavored gelatin over 2 tbsp cold water. Let bloom for 5 minutes, then gently heat until dissolved (about 20 seconds in the microwave). Mix into the filling for extra firmness.
- Assemble the cheesecake: Pour the filling over the chilled crust. Use a spatula to smooth the top. Tap the pan gently to remove air bubbles.
- Refrigerate: Cover loosely with plastic wrap. Chill in the fridge for at least 4 hours, preferably overnight. The filling should firm up and develop flavor.
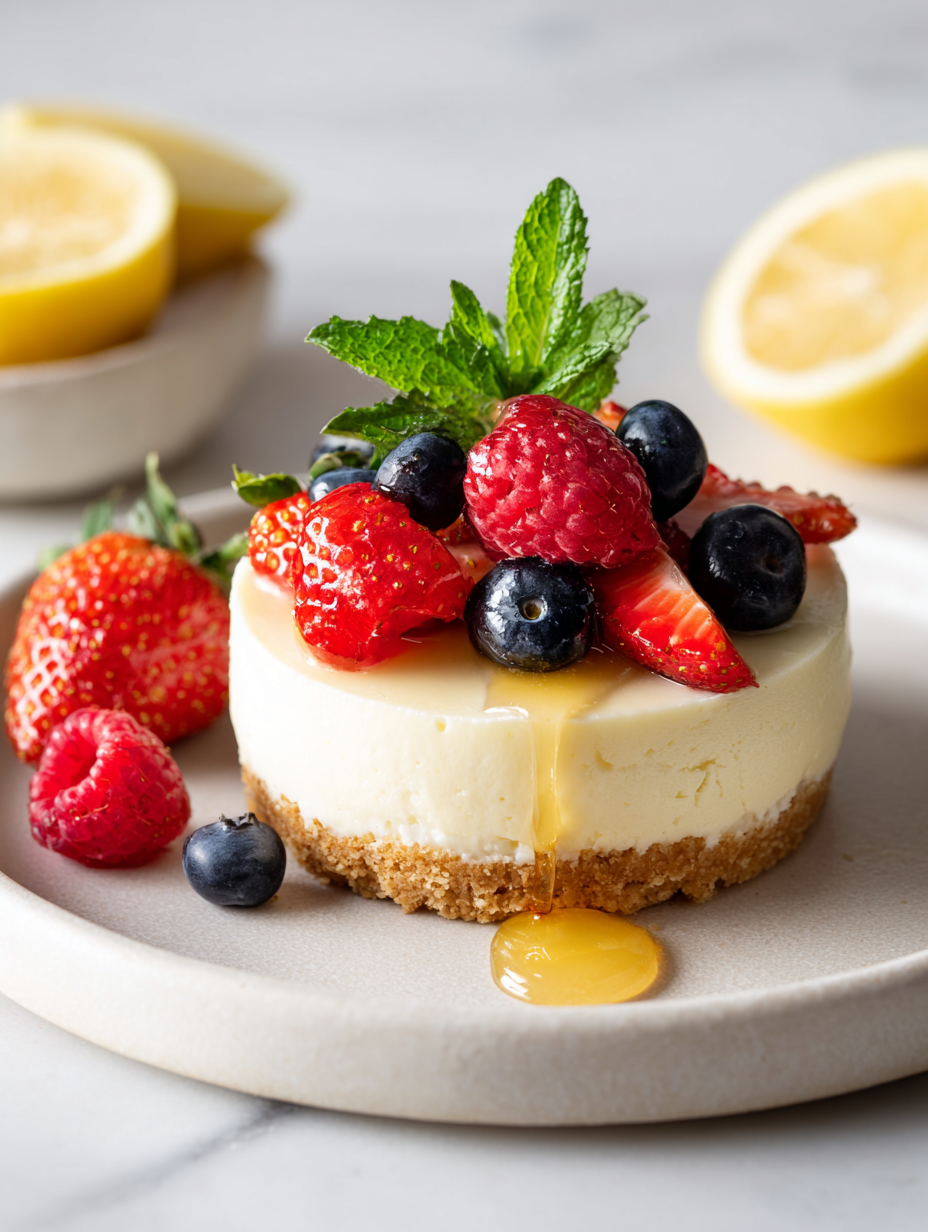
- Finish and serve: Once set, remove from fridge. Carefully release the springform pan. Slice with a hot, damp knife for clean cuts. Serve chilled, garnished with fresh fruit or a drizzle of honey if desired.
Let the cheesecake chill in the fridge for at least 4 hours, preferably overnight. Once firm, gently remove the sides of the springform pan. Slice with a hot, damp knife and serve immediately, optionally garnished with fresh fruit or herbs.
How to Know It’s Done
- Crust is firm and holds shape when pressed.
- Filling is smooth, creamy, and has no lumps after mixing.
- Cheesecake is firm but not rubbery, with a slight jiggle in the center when tapped.
No Bake Greek Yogurt Cheesecake
Ingredients
Equipment
Method
- Place the graham crackers in a plastic bag, seal, and crush into fine crumbs with a rolling pin, or pulse in a food processor until crumbly.
- Transfer the crumbs to a bowl and stir in the melted butter until evenly coated.
- Press the crumb mixture firmly into the bottom of a springform pan, creating an even crust. Chill in the fridge for 15 minutes to set.
- In a mixing bowl, combine softened cream cheese, Greek yogurt, honey, and lemon zest. Mix with a spatula or hand mixer until smooth and slightly fluffy, about 2-3 minutes.
- If using gelatin, sprinkle it over cold water in a small saucepan and let it bloom for 5 minutes. Then, gently warm just until dissolved (about 20 seconds in the microwave), ensuring it doesn't boil.
- Stir the dissolved gelatin into the cream cheese mixture until fully incorporated.
- Pour the filling over the chilled crust and smooth the top with a spatula. Gently tap the pan to remove air bubbles.
- Cover loosely with plastic wrap and refrigerate for at least 4 hours, preferably overnight, until the cheesecake is firm and set.
- Once set, carefully remove the sides of the springform pan. Slice with a hot, damp knife for clean cuts and serve chilled.
Notes
Tips for a flawless no bake cheesecake
- Bolded mini-head: Chill the crust thoroughly to ensure it holds together when slicing, avoiding crumbles.
- Bolded mini-head: Mix the filling just until smooth; overmixing can incorporate too much air, causing cracks.
- Bolded mini-head: Use a hot, damp knife for clean slices—dip and wipe between cuts for the sharpest edges.
- Bolded mini-head: If the filling seems too runny, add an extra teaspoon of gelatin dissolved thoroughly before mixing in.
- Bolded mini-head: When pressing the crust, use the bottom of a glass to get an even, compact layer that won’t crumble.
Common mistakes and how to fix them
- FORGOT to let the crust chill, resulting in a crumbly base. Fix: Chill for 15 minutes before filling.
- DUMPED too much gelatin, making the cheesecake rubbery. Fix: Use only 1 tsp gelatin and dissolve thoroughly.
- OVER-TORCHED the crust in the oven, causing burnt edges. Fix: Keep oven at 180°C (350°F), watch closely.
- MISSED to check the filling’s smoothness, leading to lumps. Fix: Mix until silky, about 2–3 minutes, scrape sides.
Quick fixes and pantry swaps
- If the crust crumbles, splash a little extra butter and press again firmly.
- When the filling is too runny, dump in a bit more dissolved gelatin and chill.
- Splash a hot water bath over the knife before slicing for cleaner cuts.
- Patch cracks by smoothing with a hot damp spatula or knife just after removing from fridge.
- Shield the edges with foil if the crust starts to brown too quickly in the oven.
Prep, store, and reheat tips
- Prepare the crust and press it into the pan a day before. It firms up nicely in the fridge, making assembly quicker.
- The cheesecake filling can be made up to 24 hours in advance. Cover tightly with plastic wrap and keep chilled for a fresh, tangy flavor.
- Store leftovers in an airtight container in the fridge for up to 3 days. The texture remains creamy, and flavors deepen slightly.
- To reheat, serve straight from the fridge—no reheating needed. If you prefer it softer, let it sit at room temperature for 10 minutes; the texture softens and flavors bloom.
Top questions about Greek yogurt cheesecake
1. Can I use regular yogurt instead of Greek?
Greek yogurt makes the cheesecake tangy and creamy, similar to cream cheese but lighter. Use full-fat for best texture.
2. Can I swap Greek yogurt for sour cream?
Yes, but the texture might be less thick. Strain regular yogurt through cheesecloth for a creamier consistency.
3. What if I don’t have honey?
Absolutely. Sour cream adds richness and tang, but will alter the flavor slightly and make it more indulgent.
4. Can I omit the honey for a less sweet version?
Maple syrup or agave work well as substitutes. They change the flavor slightly but keep the sweetness.
5. How do I prevent cracks in the cheesecake?
Yes, just reduce the total amount of sweetener or add a splash of vanilla for flavor instead.
6. How long should I refrigerate it?
Chill it thoroughly, don’t overmix the filling, and consider adding a bit of dissolved gelatin to firm it up.
7. Can I serve it immediately after making?
At least 4 hours, preferably overnight. It needs time to set and develop flavor.
8. How do I know when it’s ready to serve?
It’s best to wait. The texture improves and flavors meld after chilling overnight.
9. What’s the ideal texture?
It should be firm but still have a slight jiggle in the center when gently shaken.
10. Can I freeze it?
A smooth, creamy filling that holds its shape when sliced, without cracks or runny spots.
This no bake Greek yogurt cheesecake is more than just a quick dessert; it’s a reminder that simplicity can be beautiful and satisfying. In a busy world, it offers a moment of calm, a chance to enjoy something homemade without fuss or guilt.
Sometimes, the best recipes are the ones that feel like a small act of kindness—quick to assemble, honest in flavor, and just enough to make you pause and appreciate the little wins in the kitchen.