
On hot days, the last thing I want is to turn on the oven. This no-bake peanut butter cheesecake is my go-to when I need something sweet and satisfying without heating up the kitchen. It’s a simple fix that feels like a little treat that comes together fast, no fuss, no mess.
What I love most is how flexible it is—peanut butter is a comfort food for me, and this cheesecake turns that into a creamy, rich dessert that’s perfect for sharing or keeping all to yourself. It’s one of those recipes that feels like a small victory—no baking, just mixing, chilling, and enjoying. And honestly, it’s great for busy weekends or when friends drop by unexpectedly.
Focusing on how a simple, no-bake cheesecake can be a comforting, fuss-free way to satisfy sweet cravings without heating up the kitchen, especially during hot days or busy moments.
The unexpected comfort of no-bake desserts
- This recipe reminds me of lazy Sunday afternoons when I’d whip up something sweet without making a fuss.
- I love how this cheesecake feels like a little rebellion against the heat—cool, creamy, and so easy to make.
- There’s a nostalgic joy in mixing peanut butter into everything, and this dessert captures that perfectly.
- I feel a quiet pride knowing I can satisfy a sweet tooth with just a few simple ingredients, no oven needed.
- Whenever I make this, it’s like a small act of kindness to myself—quick, comforting, and utterly delicious.
The story behind this recipe
This recipe came about during a summer when I was craving something sweet but didn’t want to turn on the oven amidst the heat. I wanted a dessert that was easy, satisfying, and didn’t require much fuss—something I could whip up quickly after a long day. The idea of combining peanut butter with a creamy cheesecake seemed like the perfect comfort, especially when chilled and set just right. It’s become a staple in my kitchen, a no-fail way to indulge without the heat or the mess.
Historical and Cultural Nuggets
- This peanut butter cheesecake has roots in mid-20th-century American dessert trends, where creamy, no-bake treats gained popularity as quick, comforting fixes.
- It’s believed that the combination of peanut butter and cheesecake emerged from home cooks experimenting with simple, pantry-staple ingredients in the 1960s and 70s.
- The no-bake style became especially favored during the hot summer months, offering a cool, luscious dessert without turning on the oven.
- Variations of this dessert spread across household cookbooks, often adapted with local ingredients, making each version slightly unique.
Key Ingredients Breakdown
- Creamy peanut butter: I use chunky for texture, but smooth works just as well—look for natural, oozing richness that coats the palate.
- Cream cheese: Softened to room temp; it blends smoothly, creating that luscious, velvety filling—skip refrigeration if it’s still stiff, or else lumps form.
- Graham cracker crust: I crush my own for a fresher crunch, but store-bought works fine—just be sure it’s well-packed for a sturdy base.
- Honey or maple syrup: Adds a touch of natural sweetness—adjust to your taste, especially if your peanut butter is extra salty or sweetened.
- Heavy cream: Whipped until soft peaks—this gives the filling lift and a light texture, so don’t overwhip or it’ll turn buttery and runny.
- Lemon juice: Brightens everything—just a splash, but it cuts through the richness, especially if your peanut butter is on the sweeter side.
- Chocolate or peanuts (optional): For topping—crunchy, melty, or salty, these toppings add that final burst of flavor and texture.
Spotlight on key ingredients
Peanut Butter:
- Creamy peanut butter: I prefer chunky for texture, but smooth melts into the filling seamlessly—look for natural, oozing richness that coats the palate.
- Cream cheese: Needs to be softened to avoid lumps—its velvety texture is key, so don’t skip this step or you’ll get clumps instead of smoothness.
- Chocolate topping (optional): Melts into a glossy sheen when warm, adding a rich aroma and that satisfying crackle when you bite—use good quality for depth.
Cream Cheese:
- Heavy cream: Whipped just until soft peaks—overwhipping makes it butter-like, under-whipping leaves it runny, so watch the texture carefully.
- Graham cracker crust: Crush into fine crumbs that stick together when pressed—fresher crumbs give a better crunch, but store-bought is fine in a pinch.
- Lemon juice: Brightens the flavor with a sharp, citrusy zing—just a splash, but it elevates the richness and balances sweetness.
Notes for ingredient swaps
- Dairy-Free: Swap cream cheese for coconut cream or a cashew-based cream cheese alternative. It will be slightly sweeter and less tangy.
- Nut Butter: Use almond or cashew butter instead of peanut butter. Expect a different flavor profile but similar creamy texture.
- Crust Base: Substitute digestive biscuits or graham crackers with crushed Oreo cookies (for a chocolate twist) or gluten-free cookies for dietary needs.
- Sweetener: Replace honey with maple syrup or agave nectar. The flavor will shift slightly but still add sweetness and moisture.
- Heavy Cream: Use coconut whipped cream for a dairy-free version—light, fluffy, and subtly coconut-y.
- Lemon Juice: Lime juice can be used for a more pronounced citrus kick or omit for a richer, creamier flavor.
- Toppings: Swap chopped peanuts with crushed pretzels, mini chocolate chips, or dried fruit to customize crunch and flavor.
Equipment & Tools
- Springform pan: To easily remove the cheesecake without damaging the edges.
- Mixing bowls: For preparing the crust and filling.
- Rubber spatula: To fold and spread the mixture evenly.
- Electric mixer (optional): To whip the cream and beat the filling smoothly.
- Refrigerator: To chill and set the cheesecake.
Step-by-step guide to no-bake cheesecake
- Gather your equipment: a 20cm (8-inch) springform pan, mixing bowls, rubber spatula, and a spatula for pressing crust. Chill the pan in the freezer for 10 minutes beforehand.
- Make the crust: crush 200g (7 oz) of graham crackers or digestive biscuits into fine crumbs. Mix with 50g (1/4 cup) melted butter and 2 tbsp honey. Press evenly into the bottom of the chilled pan. Refrigerate for 15 minutes to set.
- Prepare the filling: in a large bowl, beat 250g (9 oz) softened cream cheese until smooth, about 1 minute. Add 200g (3/4 cup) creamy peanut butter and mix until combined, about 30 seconds. Pour in 120ml (1/2 cup) heavy cream and 2 tbsp honey, then beat until fluffy and light, about 1-2 minutes. Mix in 1 tbsp lemon juice for brightness.
- Transfer the filling: spoon or pour the peanut butter mixture onto the crust. Smooth the top with a spatula. Cover loosely with plastic wrap or foil.
- Chill the cheesecake: place in the fridge for at least 4 hours, preferably overnight. The filling should be firm but creamy, and the edges set well.
- Check doneness: ensure the cheesecake is firm to touch and slightly jiggles in the center when gently shaken. The top should be smooth and matte, not shiny or wet.
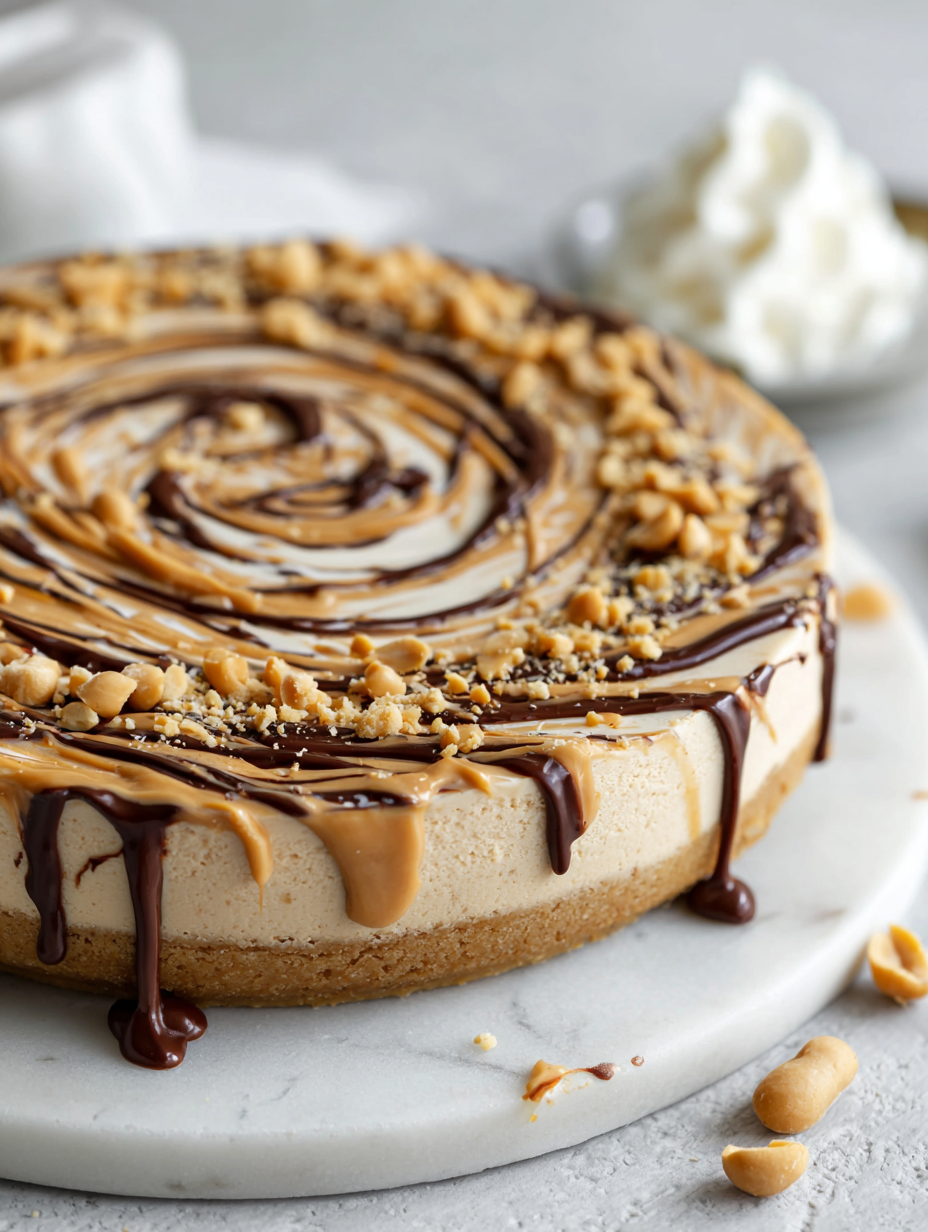
- Finish and serve: carefully release the springform, garnish with chopped peanuts or chocolate if desired. Slice with a warm knife for clean cuts. Serve chilled.
After chilling, gently release the springform ring. Garnish with chopped peanuts or chocolate shavings if desired. Slice with a warm, damp knife for clean pieces. Serve directly from the fridge for best texture and flavor.
How to Know It’s Done
- Crust is firm and crisp when chilled.
- Filling is set and holds shape when sliced.
- Surface is smooth, matte, and slightly jiggles in the center.
No-Bake Peanut Butter Cheesecake
Ingredients
Equipment
Method
- Crush the graham crackers or digestive biscuits into fine crumbs and place in a mixing bowl.
- Pour in the melted butter and honey, then stir until the mixture is evenly coated and resembles wet sand.
- Press the crumb mixture firmly into the bottom of a chilled springform pan, creating an even crust. Refrigerate for 15 minutes to set.
- In a large bowl, beat the softened cream cheese until smooth and creamy, about 1 minute.
- Add the peanut butter and mix until well combined, creating a thick, peanutty mixture.
- In a separate bowl, whip the heavy cream until soft peaks form, then gently fold it into the peanut butter mixture using a spatula.
- Stir in the honey or maple syrup and lemon juice to brighten the flavor.
- Pour the creamy filling over the chilled crust and smooth the top with a spatula.
- Cover the pan loosely with plastic wrap or foil and refrigerate for at least 4 hours or overnight, until set and firm.
- Once chilled and set, carefully release the springform pan and transfer the cheesecake to a serving plate. Garnish with chopped peanuts or chocolate chips if desired.
- Slice with a warm, damp knife for clean cuts and serve chilled for the best creamy texture.
Notes
Tips for a perfect no-bake cheesecake
- Bolded mini-head: Chill the crust before adding filling to prevent sogginess and ensure a sturdy base.
- Bolded mini-head: Whip the heavy cream just until soft peaks form—overwhipping turns it buttery, under-whipping leaves it flat.
- Bolded mini-head: Use a warm knife when slicing—dip in hot water and wipe for clean, smooth cuts.
- Bolded mini-head: Gently fold whipped cream into the filling—preserves airiness and prevents a dense texture.
- Bolded mini-head: Press the crust firmly with the back of a spoon—ensure an even, compact base for uniform slices.
- Bolded mini-head: Let the cheesecake chill for at least 4 hours or overnight—this is when it fully sets and flavors meld.
- Bolded mini-head: Add toppings just before serving—peanuts or chocolate chips stay crunchy and fresh.
Common mistakes and how to fix them
- FORGOT to chill the crust: Always refrigerate before adding filling to prevent sogginess.
- DUMPED the whipped cream: Fold gently to keep the mixture airy, not flat or runny.
- OVER-TORCHED the edges: Chill thoroughly, then slice with a warm knife for clean cuts.
- MISSED the setting time: Patience is key—let it chill at least 4 hours, preferably overnight.
Quick fixes and pantry swaps
- When the crust is soggy, splash it with a quick bake at 180°C (350°F) for 5 minutes.
- If the filling cracks, patch with a dollop of whipped cream and smooth gently.
- Dumped the whipped cream too stiff? Fold in a tablespoon of milk or cream to loosen.
- When the cheesecake won’t set, chill it longer—give it at least 2 more hours in the fridge.
- Splash hot water on your knife before slicing for clean, smooth cuts.
Prep, store, and reheat tips
- Prepare the crust and press it into the pan ahead of time; it benefits from a few hours in the fridge to firm up.
- The cheesecake can be made a day in advance; keep it covered in the fridge for up to 2 days. The flavors deepen overnight.
- For best texture, serve it straight from the fridge. Reheat briefly if desired—just a few seconds in the microwave until slightly warm, and check for a smooth, creamy bite.
- Cover tightly to prevent it from absorbing fridge odors. The chilled, firm texture makes slicing easier and cleaner.
- If the cheesecake begins to soften too much after storage, give it a quick 15-minute chill in the freezer before serving to restore firmness.
Top questions about peanut butter cheesecake
1. Can I use crunchy peanut butter?
Use natural peanut butter for a richer, oozing flavor, but regular works if you prefer a sweeter taste.
2. Is crunchy peanut butter okay?
Yes, but it might add extra texture. For a smoother filling, stick with creamy peanut butter.
3. How long should I chill it?
Chill the cheesecake for at least 4 hours, but overnight is best to fully set and deepen flavors.
4. Can I freeze leftovers?
Yes, you can freeze slices for up to 2 months. Wrap tightly to prevent freezer burn.
5. Do I need to soften the cream cheese?
Use room temperature cream cheese; cold cheese won’t blend smoothly and might cause lumps.
6. How do I keep it fluffy?
Mix gently when folding whipped cream into the filling to keep it light and airy.
7. Can I make it less sweet?
Adjust the sweetness by adding more honey or syrup if your peanut butter is less sweet.
8. Is there a dairy-free option?
Yes, substitute with coconut cream or a dairy-free cream cheese for a vegan version.
9. How do I get neat slices?
Use a warm, damp knife when slicing to get clean, smooth edges without tearing.
10. Can I skip the lemon juice?
Yes, adding a splash of lemon juice brightens the flavor and balances the richness of peanut butter.
This no-bake peanut butter cheesecake is a reminder that simple ingredients can come together into something unexpectedly comforting. It’s perfect for hot days or when you’re short on time but still craving something rich and satisfying.
Sharing this dessert feels like passing along a small piece of joy—creamy, nutty, and just a little decadent. It’s a bit messy, a bit imperfect, but always honest and deeply satisfying when you take that first spoonful.