
Sometimes, the best desserts come from the simplest ideas. A no bake ricotta cheesecake feels like that secret little treat you make when you want something luxurious without heating up the kitchen or fussing over crusts and bakes. It’s light, creamy, and surprisingly elegant, even if it’s thrown together in a rush.
What I love most is how forgiving it is—no oven, no water bath, just a handful of ingredients and a bit of patience in the fridge. It’s perfect for those times when you want to impress without stress, or when you’re just craving something smooth and subtly sweet that feels a little fancy but is totally doable on a weekday.
This recipe focuses on the unexpected elegance of a no bake ricotta cheesecake, emphasizing how simplicity and quality ingredients can transform a humble dessert into something surprisingly sophisticated, perfect for last-minute gatherings or when you want something creamy without the fuss.
The understated elegance of ricotta
- I love how this cheesecake feels like a quiet victory—simple ingredients, big flavor, no oven needed.
- There’s a nostalgic thrill in mixing creamy ricotta and lemon zest, reminding me of lazy weekend mornings.
- Sometimes, I get a little proud watching it set—like I’ve crafted something special out of just a few things.
- It’s chaos-free, which means I can actually enjoy making dessert without that ‘what if I mess up’ stress.
- Sharing this always sparks surprise—people don’t expect a no-bake treat to be so rich and velvety.
The story behind this recipe
- This recipe was born out of a busy weekend when I wanted something sweet but didn’t want to turn on the oven or fuss with crusts. I remembered how my grandmother used to make ricotta-based desserts, simple and honest. That nostalgic memory pushed me to experiment with a no bake version that’s just as comforting but a lot less work.
- I love how it’s become my go-to for last-minute dinners or when I want something elegant without the stress. It’s like a little secret—fooling everyone into thinking I spent hours, but really, it’s about fresh ingredients and a bit of patience in the fridge. Every time I make it, I feel a quiet satisfaction, knowing that simple can be so satisfying.
- heading: The charm of simplicity
Trivia and historical tidbits
- Ricotta cheese has been a staple in Mediterranean desserts since ancient times, often used for its creamy texture and mild flavor.
- This no bake cheesecake variant became popular in the early 2000s with the rise of quick, fuss-free desserts in home cooking blogs.
- In Italy, ricotta is traditionally made from leftover whey, making it an eco-friendly choice that’s historically tied to resourcefulness.
Key ingredients at a glance
- Ricotta cheese: I love how it’s creamy and mild, giving the cheesecake its velvety texture. For a richer taste, go for full-fat ricotta, but if you want it lighter, skim works fine—just watch for a slightly firmer set.
- Cream: Heavy cream whips up into a smooth, cloud-like topping that balances the tang of ricotta. Whip it until soft peaks form; if it’s overbeaten, it can become butter-like, so keep an eye on the texture.
- Sugar: I prefer superfine sugar here—it dissolves faster, blending seamlessly into the ricotta. If you only have granulated, give it a bit of extra stirring to avoid graininess.
- Lemon zest: Adds a bright, fresh zing that cuts through the richness. Use organic lemons for the best aromatic punch, and grate carefully to avoid the bitter pith—unless you want a touch of bitterness.
- Digestive biscuits: I like their buttery crunch, but graham crackers work just as well. Crush them finely for a smooth crust, or leave a few bigger crumbs for texture—just don’t skip the butter to help it all hold together.
- Butter: Unsalted, melted—this is the glue for the crust. Make sure it’s fully incorporated and the crumbs are evenly coated; if it feels too dry, add a tiny splash more melted butter.
- Vanilla extract: I use pure vanilla for warmth and depth, but a splash of vanilla bean paste adds flecks of seeds and a more intense aroma—worth the extra effort.
Spotlight on key ingredients
Ricotta cheese:
- I love how it’s creamy and mild, giving the cheesecake its velvety texture. For a richer taste, go for full-fat ricotta, but if you want it lighter, skim works fine—just watch for a slightly firmer set.
- Cream: Heavy cream whips up into a smooth, cloud-like topping that balances the tang of ricotta. Whip it until soft peaks form; if it’s overbeaten, it can become butter-like, so keep an eye on the texture.
- Lemon zest: Adds a bright, fresh zing that cuts through the richness. Use organic lemons for the best aromatic punch, and grate carefully to avoid the bitter pith—unless you want a touch of bitterness.
Digestive biscuits and butter:
- Digestive biscuits: Their buttery crunch is perfect for the crust, but graham crackers work just as well. Crush them finely for a smooth crust or leave some bigger crumbs for texture—skip the butter at your peril, it’s the glue.
- Butter: Unsalted, melted—this is the binder for the crust. Make sure it’s fully incorporated and the crumbs are evenly coated; if it feels too dry, add a tiny splash more melted butter.
Notes for ingredient swaps
- Dairy-Free: Swap ricotta for blended silken tofu with a squeeze of lemon—creamy but less rich, with a subtle bean flavor.
- Sweetener: Honey or maple syrup can replace sugar, adding a different depth of flavor—less straightforward sweetness, more floral or smoky notes.
- Crust: Almond flour or oats mixed with butter make a gluten-free base—coarser texture, nuttier flavor.
- Citrus: Lime zest instead of lemon—gives a slightly different brightness, more tropical vibe.
- Cream: Coconut cream or cashew cream as a dairy-free alternative—rich and velvety, with a hint of coconut or nutty sweetness.
- Biscuits: Graham crackers or digestive biscuits can be swapped based on availability—different crunch and flavor, but still good structure.
- Butter: Use coconut oil or margarine if dairy-free—maintains richness, but alters the flavor profile slightly.
Equipment & Tools
- Springform pan: To hold the crust and filling, easy to remove for clean presentation.
- Mixing bowls: For preparing crust and filling components separately.
- Spatula: To fold ingredients gently and spread the filling evenly.
- Rolling pin or heavy object: To crush biscuit crumbs uniformly.
- Parchment paper: To line the pan for easy removal.
- Whisk or hand mixer: To whip the cream to soft peaks.
Step-by-step guide to no bake ricotta cheesecake
- Gather your equipment: a 20cm (8-inch) springform pan, a mixing bowl, a spatula, and parchment paper. Line the bottom of the pan with parchment for easy release.
- Crush the digestive biscuits: place in a zip-top bag and press with a rolling pin until fine crumbs. Measure about 150g (1 1/4 cups).
- Melt 75g (about 1/3 cup) unsalted butter: do this in a small saucepan over low heat or in short bursts in the microwave until just melted. Pour over the biscuit crumbs and stir until evenly coated.
- Press the crust: transfer the crumb mixture into the prepared pan. Use the back of a spoon or your fingers to press firmly into the bottom, creating an even layer. Chill in the fridge for 15 minutes to set.
- Prepare the ricotta filling: in a large mixing bowl, combine 400g (about 1 2/3 cups) ricotta cheese, 1/2 cup superfine sugar, and finely grated zest of 1 lemon. Mix with a spatula until smooth and creamy, avoiding lumps.
- Whip the cream: in a separate bowl, beat 1 cup heavy cream until soft peaks form. If over-beaten, it can become butter-like—stop when it holds gentle peaks.
- Fold the whipped cream into the ricotta mixture: gently incorporate in three additions, using a light hand to keep the mixture airy and smooth.
- Pour the filling into the chilled crust: spread evenly with a spatula. Tap the pan gently on the counter to remove air bubbles.
- Cover loosely with plastic wrap: refrigerate for at least 4 hours, preferably overnight, to allow the cheesecake to set and flavors to meld.
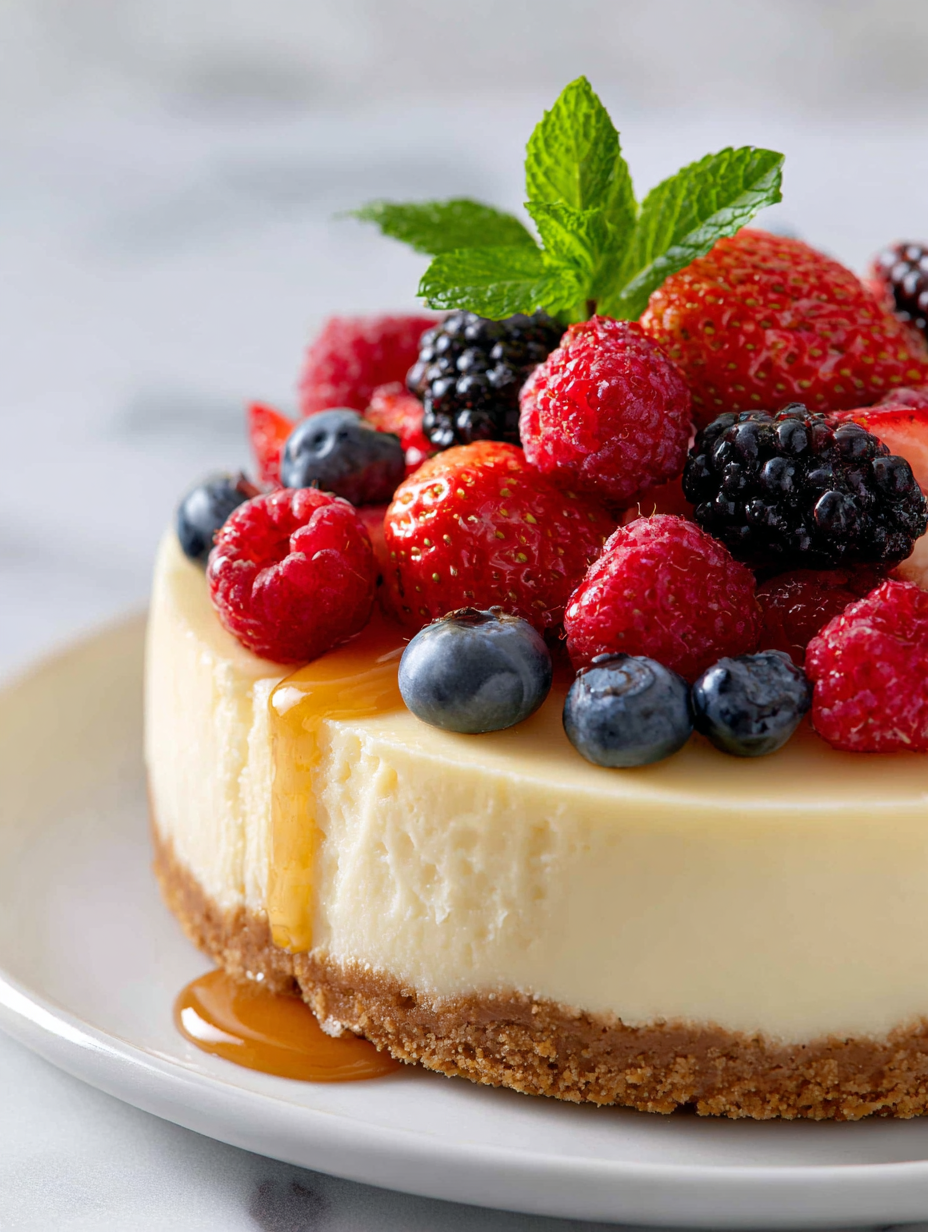
- Finish and serve: before serving, gently run a knife around the edge of the pan to loosen. Release the springform ring and transfer to a plate. Optionally, garnish with fresh berries or a dusting of powdered sugar.
Let the cheesecake chill undisturbed in the fridge for at least 4 hours or overnight. Before serving, loosen the sides of the pan, remove the ring, and garnish as desired. Slice with a sharp knife warmed slightly for clean cuts.
How to Know It’s Done
- Crust feels firm and holds together when pressed.
- Filling is set with a slight wobble in the center when fully chilled.
- Surface is smooth, with no liquid or separation.
No Bake Ricotta Cheesecake
Ingredients
Equipment
Method
- Place the digestive biscuits in a zip-top bag and crush them finely with a rolling pin until you have about 150g of crumbs.
- Pour the melted butter over the crushed biscuits and stir until all the crumbs are evenly coated and sticky.
- Transfer the crumb mixture into your springform pan, pressing it firmly into the bottom with the back of a spoon or your fingers to create an even crust. Chill in the fridge for 15 minutes to set.
- While the crust chills, combine the ricotta cheese, superfine sugar, and lemon zest in a large bowl. Mix with a spatula until smooth, creamy, and free of lumps.
- In a separate bowl, whip the heavy cream with a whisk or hand mixer until soft peaks form—this means it will hold gentle peaks that curl over when you lift the whisk.
- Gently fold the whipped cream into the ricotta mixture in three additions, using a spatula to keep the mixture light and airy.
- Pour the smooth filling into the chilled crust, spreading it evenly with a spatula. Tap the pan gently on the counter to release any trapped air bubbles.
- Cover the cheesecake loosely with plastic wrap and refrigerate for at least 4 hours, preferably overnight, until the filling is set and firm to the touch.
- Before serving, run a warm knife around the edge of the pan to loosen, then carefully release the springform ring. Garnish with fresh berries or a dusting of powdered sugar if desired.
- Slice with a sharp, warmed knife and enjoy this creamy, elegant dessert that’s perfect for any occasion.
Notes
Tips for Perfect No Bake Cheesecake
- Bolded mini-head: Chill the crust thoroughly to prevent sogginess—pop it in the fridge for at least 15 minutes before filling.
- Bolded mini-head: Whip the cream just until soft peaks form—overwhipping turns it buttery and ruins the lightness.
- Bolded mini-head: Gently fold whipped cream into the ricotta to keep the filling airy—use a spatula and a light touch.
- Bolded mini-head: Use fresh lemon zest for a bright, zingy flavor—avoid the bitter white pith for the best aroma.
- Bolded mini-head: Press the crust firmly into the pan for an even base—use the back of a spoon or your fingers for best results.
- Bolded mini-head: Chill the assembled cheesecake overnight for full set and deep flavor—don’t rush this crucial step.
- Bolded mini-head: Run a warm knife around the edge before releasing the springform—ensures clean, smooth slices.
Common mistakes and how to fix them
- FORGOT to chill the crust, resulting in a soggy base. FIX by refrigerating for at least 15 minutes.
- DUMPED too much lemon zest, overpowering the filling. FIX by adding zest gradually and tasting.
- OVER-TORCHED the edges, causing a burnt flavor. FIX by watching closely and removing early.
- MISSED to fold whipped cream gently, deflating the filling. FIX by using a light hand and folding carefully.
Quick Fixes and Pantry Swaps
- When the crust feels too soft, splash a little extra melted butter and press again.
- If the filling cracks, gently smooth with a spatula and refrigerate longer before serving.
- Dumped too much lemon zest? Fix by stirring in a bit more ricotta to balance flavors.
- Over-torched edges? Patch with a sprinkle of fresh whipped cream or fruit topping to hide the burn.
- If the cheesecake wobbles excessively, give it a few more hours in the fridge and check for firmness.
Prep, store, and reheat tips
- Prepare the crust and press it into the pan at least 1 hour ahead; it firms up nicely in the fridge, making assembly easier.
- The cheesecake can be made up to 24 hours in advance; keep it covered tightly in the fridge to prevent it from absorbing other odors.
- For the best texture, let it sit at room temperature for 10–15 minutes before slicing; it will soften slightly, enhancing creaminess.
- Refrigerate leftovers for up to 3 days; the flavors deepen, and the texture remains smooth, but avoid freezing, which can cause it to crack.
Top questions about no bake ricotta cheesecake
1. Can I use low-fat ricotta?
Use full-fat ricotta for the creamiest texture and richer flavor. Skim works, but it’s a bit firmer.
2. Can I substitute mascarpone for ricotta?
Yes, but it might be less creamy and set a little differently. Consider adding a tablespoon of cream to compensate.
3. Is mascarpone a good substitute?
Absolutely, mascarpone adds extra richness and a silkier mouthfeel, but it’s a bit more expensive.
4. How long should I chill it?
Chill the cheesecake at least 4 hours, preferably overnight, to fully set and develop flavors. It should wobble slightly in the center when ready.
5. My cheesecake cracked, what do I do?
If it cracks on top, gently smooth with a spatula or add fresh fruit or whipped cream to hide the imperfections.
6. Can I skip the lemon zest?
Use organic lemons for the zest to get a more aromatic, bright flavor. Grate carefully to avoid the bitter pith.
7. What can I use instead of digestive biscuits?
You can swap digestive biscuits with graham crackers or even spiced cookies for a different flavor profile.
8. Can I prepare the crust in advance?
Yes, you can make the crust ahead and keep it in the fridge for up to 1 day before filling.
9. Can I prepare the filling ahead?
The filling is best when made fresh, but it can sit in the fridge for up to 2 hours before pouring into the crust.
10. My whipped cream is grainy, how do I fix it?
If the whipped cream becomes overbeaten and grainy, fold in a little fresh cream or start over with fresh cream for a smooth finish.
This cheesecake isn’t just about ease; it’s a quiet reminder that simple ingredients can create something quietly stunning. Every time I make it, I appreciate the clean, fresh flavor and the way it feels like a small, satisfying victory in my kitchen.
It’s perfect when you need a sweet finish without the fuss, especially during busy weeks or when unexpected guests arrive. Honestly, nothing beats that cool, creamy bite that comes from a dessert made with care and a little patience in the fridge.