
This no bake hazelnut bites recipe is my answer to those days when oven time feels like a luxury I can’t afford. There’s something about the smoky, roasted aroma of hazelnuts that sticks with you long after you’ve taken a bite, even when you skip the heat. It’s a simple way to indulge in that rich, nutty flavor without fuss or waiting, perfect for when you need a quick, satisfying treat.
I first came up with this idea during a busy weekend when I wanted something sweet but didn’t want to turn on the stove. It’s funny how a handful of chopped hazelnuts and a bit of chocolate can come together so easily—like a little magic trick in the kitchen. These bites are honest, unpolished, but they hit all the right notes of crunch, gooeyness, and that smoky, roasted scent.
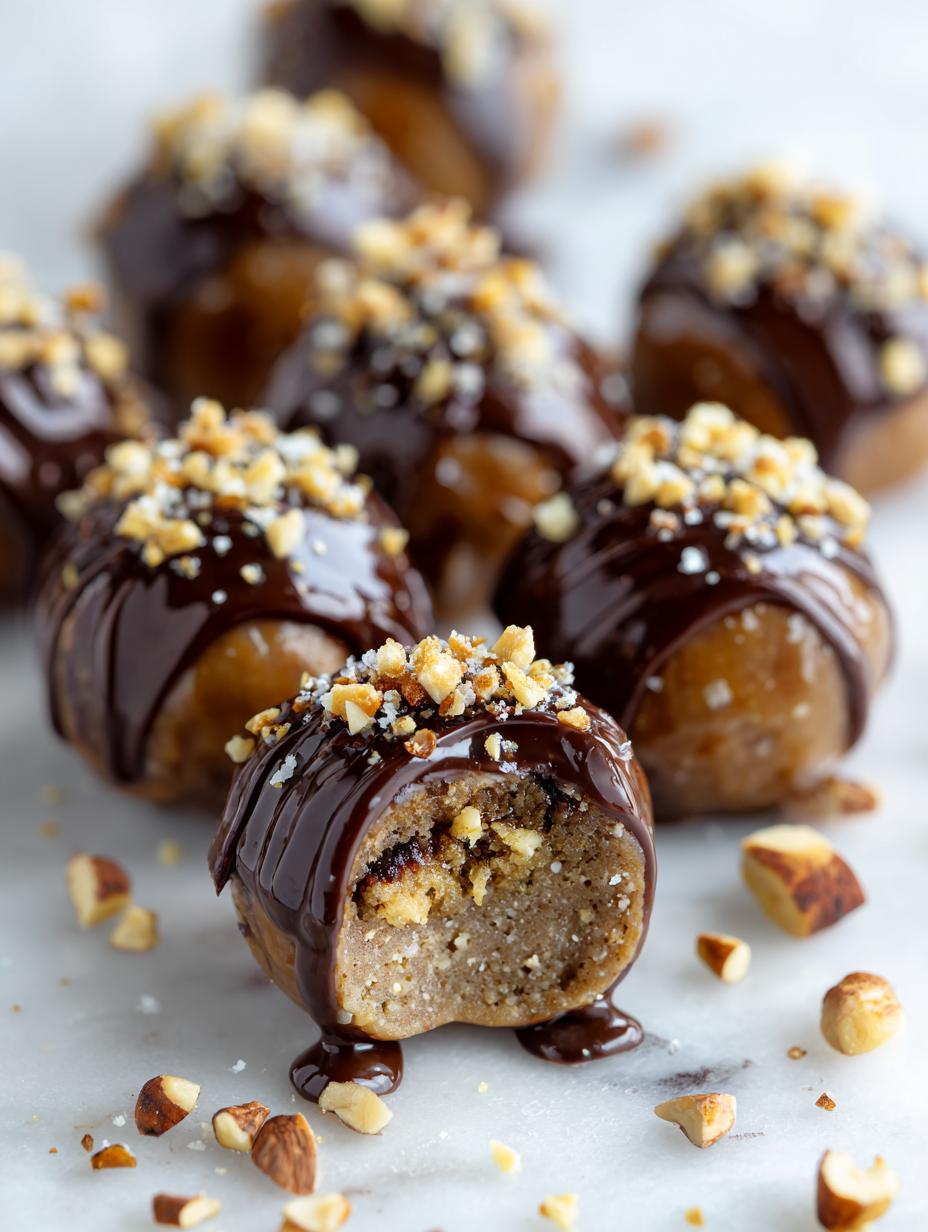
This recipe is inspired by the crave-worthy crunch and rich aroma of roasted hazelnuts, but with a twist—no oven required. It’s perfect for those days when turning on the stove feels like too much effort, yet you still crave that deep, smoky nutty flavor. I love how these bites capture that satisfying texture without all the fuss, making them my go-to quick treat for unexpected guests or a last-minute snack.
Smell of roasted hazelnuts
- Making these bites always reminds me of lazy Sunday afternoons, the smell of hazelnuts filling the kitchen while I get lost in a book.
- I love how these little treats bring back childhood memories of roasted nuts and chocolate, simple pleasures that feel like a cozy hug.
- Sometimes I get a bit chaotic trying to coat each bite perfectly, but the messy, uneven ones are my favorites—they taste more honest that way.
- Sharing these with friends always sparks a small moment of joy, watching their eyes light up at that first crunchy, nutty bite.
The story behind this recipe
Making these no-bake hazelnut bites was born out of a moment of kitchen chaos. I needed something quick, satisfying, and full of that irresistible roasted hazelnut scent that lingers long after. It’s funny how a simple idea—crushing nuts, melting chocolate—can turn into a little treat that feels like a warm hug. Every time I make them, I remember the joy of turning a few pantry staples into something unexpectedly special.
Trivia and Origins
- These hazelnut bites draw inspiration from traditional European confectionery, where roasted nuts and chocolate are a classic pairing.
- Historically, no-bake treats gained popularity during wartime shortages, emphasizing simple ingredients and minimal equipment.
- The smoky aroma of roasted hazelnuts has been cherished in Mediterranean cuisines for centuries, often used to add depth to desserts.
- Modern versions of these bites have become a favorite for quick holiday gifts, blending nostalgia with convenience.
Key ingredients overview
- Hazelnuts: I love using toasted hazelnuts for that deep, smoky aroma—crush them while still warm for maximum flavor release. You can swap in almonds if you prefer a milder nut, but the smoky note won’t be the same.
- Dark chocolate: I prefer a good-quality, bittersweet chocolate that melts smoothly and coats well—look for one with at least 70% cocoa. Milk chocolate will make it sweeter and softer, so adjust the sweetness if you go that route.
- Honey or maple syrup: I use honey for that sticky, glossy finish and natural sweetness—if you want a more neutral flavor, try agave. Skip sugar if you want a less chewy texture.
- Coconut oil: I add just a touch to help the chocolate melt and set shiny—coconut oil lends a subtle tropical scent, but butter works fine for a richer taste. Be careful not to overdo it, or the bites will be greasy.
- Vanilla extract: I love a splash of vanilla to round out the nutty and chocolate flavors—skip it if you prefer a more straightforward nutty hit, but it makes a noticeable difference in depth.
- Sea salt: I sprinkle a tiny pinch on top for contrast—if you’re not a salt fan, just leave it out. It really heightens the chocolate and nut flavors with a shimmer of saltiness.
- Optional add-ins: Dried cherries or sea salt flakes—these give unexpected bursts of flavor and crunch, but keep it simple if you prefer pure hazelnut-chocolate bliss.
Spotlight on key ingredients
Hazelnuts:
- I love using toasted hazelnuts for that deep, smoky aroma—crush them while still warm for maximum flavor release. You can swap in almonds if you prefer a milder nut, but the smoky note won’t be the same.
- They have a rich, buttery texture that becomes beautifully crunchy when chopped and combined with melted chocolate. Their aroma is warm and inviting, almost caramelized after roasting.
Dark chocolate:
- I prefer a good-quality, bittersweet chocolate that melts smoothly and coats well—look for one with at least 70% cocoa. Milk chocolate will make it sweeter and softer, so adjust the sweetness if you go that route.
- When melted, it becomes glossy and luscious, with a rich cocoa scent that hints at bitter, smoky undertones. It’s the backbone of these bites, so quality matters.
Notes for ingredient swaps
- Dairy-Free: Use coconut butter instead of chocolate for a rich, creamy texture without dairy. It’s a bit more delicate but still delicious.
- Nut Variations: Swap hazelnuts for almonds or cashews if you prefer a milder, less smoky nut flavor. Toast them first for extra aroma.
- Sweetener: Maple syrup can replace honey for a slightly different sweetness and a hint of caramel. Adjust quantity to taste.
- Oil Type: Instead of coconut oil, use butter for a richer, more decadent bite. Keep it cool to avoid melting during handling.
- Adding Salt: Sea salt flakes on top elevate the chocolate and nuts—skip if you prefer a more subdued flavor without the salty contrast.
Equipment & Tools
- Double boiler or microwave: To melt the chocolate gently without burning.
- Spatula or spoon: For mixing and pressing into molds.
- Mini muffin liners or silicone molds: To shape and contain the bites during setting.
- Baking sheet: To toast hazelnuts evenly.
- Cooling rack (optional): To cool molded bites if needed.
Step-by-step guide to no bake hazelnut bites
- Gather all your ingredients and tools before starting—mise en place makes everything smoother. Chop the hazelnuts roughly, aiming for uneven pieces to keep some crunch. Melt the chocolate gently in a double boiler or microwave, stirring every 20-30 seconds to prevent burning. Toast the hazelnuts if they aren’t already roasted—spread on a baking sheet at 180°C (350°F) for 8-10 minutes until fragrant and slightly darker. Mix the crushed hazelnuts into the melted chocolate along with honey, vanilla, and a pinch of sea salt. Stir until well combined and glossy. Spoon the mixture into mini muffin liners or silicone molds, pressing lightly to shape. Chill in the fridge for at least 30 minutes until firm and set. Remove carefully from molds, and if desired, sprinkle with extra sea salt or chopped hazelnuts for garnish.
- Use a small spatula or spoon for pressing the mixture into molds—compact it well for even bites. Keep an eye on the chocolate—overheated or scorched chocolate will seize or turn grainy. When smoothing the tops, work quickly before the chocolate starts to set. If the mixture becomes too thick to stir smoothly, warm it slightly or add a tiny splash of coconut oil to loosen. During chilling, check for firmness—if the bites wobble when nudged, give them a few more minutes. For a shiny finish, ensure the chocolate is fully melted and smooth before pouring. If the bites crack when removing from molds, let them sit at room temp for a few minutes to soften slightly before handling.
- Rest the bites in the fridge for at least 30 minutes—longer if you want them extra firm. Serve straight from the fridge for that satisfying cold crunch. To plate, gently peel away liners or pop the bites out of molds. Keep leftovers in an airtight container in the fridge for up to a week; they might soften slightly but will retain flavor. For longer storage, freeze for up to a month—let thaw at room temp for 10 minutes before eating. If they feel too sticky or soft after storage, give them a quick chill in the fridge to restore firmness. For best flavor, bring them to room temp for a few minutes before serving—this enhances the nutty aroma and smooth chocolate finish.
Chill the bites in the fridge for at least 30 minutes until firm. Gently peel away liners or pop from molds. Serve immediately or store in an airtight container in the fridge for up to a week. For longer storage, freeze and thaw briefly at room temp before serving.
How to Know It’s Done
- Chocolate is fully melted, glossy, and smooth before pouring.
- Bites are firm and set when lightly pressed—no wobble or softness.
- Color should be rich, dark chocolate with a matte, slightly shiny surface after chilling.
No-Bake Hazelnut Bites
Ingredients
Equipment
Method
- Start by toasting your hazelnuts in a preheated oven at 180°C (350°F) for about 8-10 minutes until fragrant and slightly darker, then let them cool before roughly chopping into uneven pieces.
- Gently melt the chopped dark chocolate using a double boiler or microwave, stirring every 20-30 seconds to keep it smooth and glossy. Once melted, remove from heat and let it cool slightly.
- Add the honey, vanilla extract, and coconut oil to the melted chocolate, stirring until well combined and shiny, creating a smooth chocolate mixture.
- Fold in the chopped hazelnuts into the chocolate mixture, ensuring they are evenly coated and distributed, which will give the bites their crunch and smoky flavor.
- Spoon the mixture into mini muffin liners or silicone molds, pressing down lightly to shape and ensure each bite is compact and uniform.
- Sprinkle a tiny pinch of sea salt on top of each mold for added flavor contrast and a hint of saltiness.
- Place the molds on a baking sheet and chill in the fridge for at least 30 minutes until the bites are firm and set.
- Once firm, gently remove the hazelnut bites from the molds or peel away the liners, revealing shiny, crunchy treats with a rich chocolate coating.
- Serve immediately or store in an airtight container in the fridge for up to a week. For longer storage, freeze and thaw briefly at room temperature before enjoying.
Notes
Pro tips for perfect bites
- Bolded mini-head: Use chopped hazelnuts while still warm to maximize aroma and ease of crushing.
- Bolded mini-head: Melt chocolate gently, stirring frequently—avoid overheating to keep it glossy and smooth.
- Bolded mini-head: Press mixture firmly into molds or liners to ensure bites hold together well.
- Bolded mini-head: Chill in the fridge for at least 30 minutes until fully set and firm to the touch.
- Bolded mini-head: For shiny tops, ensure melted chocolate is smooth and at room temperature before pouring.
- Bolded mini-head: If mixture becomes too thick, warm slightly or add a tiny splash of coconut oil to loosen.
- Bolded mini-head: Gently peel away liners or pop from molds to avoid cracking; let sit at room temp briefly.
Common mistakes and how to fix them
- FORGOT to toast hazelnuts → Toast nuts at 180°C (350°F) for 8-10 mins until fragrant.
- DUMPED melted chocolate too hot → Let chocolate cool slightly before mixing with nuts for smooth texture.
- OVER-TORCHED chocolate → Remove from heat immediately; add a splash of coconut oil to loosen if seized.
- TOO soft after chilling → Chill longer or add a tiny splash of coconut oil to set properly.
Quick fixes and pantry swaps
- When mixture is too sticky, splash in a tiny bit of warm water to loosen.
- If chocolate seizes, quickly add a spoonful of coconut oil and stir until smooth.
- Splash a little more honey if bites lack sweetness after chilling.
- Patch cracks by gently warming the bites slightly before serving.
- Shield delicate bites with parchment if stacking to prevent sticking.
Prep, store, and reheat tips
- Prepare the mixture and chop hazelnuts a day in advance; store separately in airtight containers to keep freshness and aroma intact.
- Store the assembled bites in an airtight container in the fridge for up to a week; the chocolate will stay glossy and firm, but flavors deepen over time.
- For longer storage, freeze the bites in a single layer, then transfer to a sealed container—best enjoyed within a month. Thaw at room temperature for 10 minutes before serving.
- Refrigerated bites will have a satisfying cold crunch, but if you prefer them softer, let them sit at room temp for a few minutes—sensory cue: smell the rich, roasted aroma re-emerge.
Top questions about hazelnut bites
1. Can I use raw hazelnuts instead of roasted?
Yes, using roasted hazelnuts adds that smoky, rich flavor, but raw nuts can work if toasted first. Expect a milder aroma.
2. Do I need to toast the hazelnuts first?
Absolutely. Just chop and toast them at 180°C (350°F) for about 8 minutes until fragrant. It enhances flavor and crunch.
3. How long should I chill the bites?
Chill the bites for at least 30 minutes until firm and set. They should feel solid and crack slightly when gently pressed.
4. How should I store leftovers?
Store in an airtight container in the fridge for up to a week. For longer, freeze and thaw for a fresh, firm bite.
5. What if the chocolate melts poorly?
If the chocolate seizes or becomes grainy, add a small spoonful of coconut oil and stir until smooth. Keep the heat gentle.
6. Can I use milk chocolate?
Use high-quality dark chocolate (70% cocoa or higher) for a rich, smooth coating. Cheaper chocolates may be waxy or dull.
7. Can I swap honey with another sweetener?
Yes, maple syrup can replace honey for a different flavor profile—more caramel notes, slightly less sticky.
8. Should I add salt on top?
Sprinkle sea salt flakes on top after pouring chocolate to enhance the nutty and chocolate flavors with a shimmer of saltiness.
9. Can I make these dairy-free?
For a dairy-free version, coconut butter or coconut oil can replace chocolate, but expect a softer, more delicate texture.
10. The mixture is too sticky, what now?
If your mixture is too sticky, add a bit more chopped nuts or chill it for 10–15 minutes before shaping to firm up.
These no-bake hazelnut bites are a small reminder that sometimes, the simplest ingredients create the most satisfying treats. They come together quickly but carry a depth of smoky, nutty aroma that makes you pause and appreciate how easy good flavor is to achieve.
Whenever I make these, I think about how a handful of pantry staples can turn into something genuinely special. They’re perfect for moments when you want a snack that’s honest, unpolished, and still utterly delightful—no oven required.

Hi, I’m Mia Bennett, the chef and storyteller behind Grounding in Tradition. I’m so glad you’re here. This blog is my way of preserving the flavors, techniques, and rituals that shaped me as both a cook and a professional chef. Grounding in Tradition is not about trends or shortcuts. It is about honoring where food comes from, understanding the hands that prepare it, and carrying forward recipes that deserve to be remembered.


Leave a Reply