
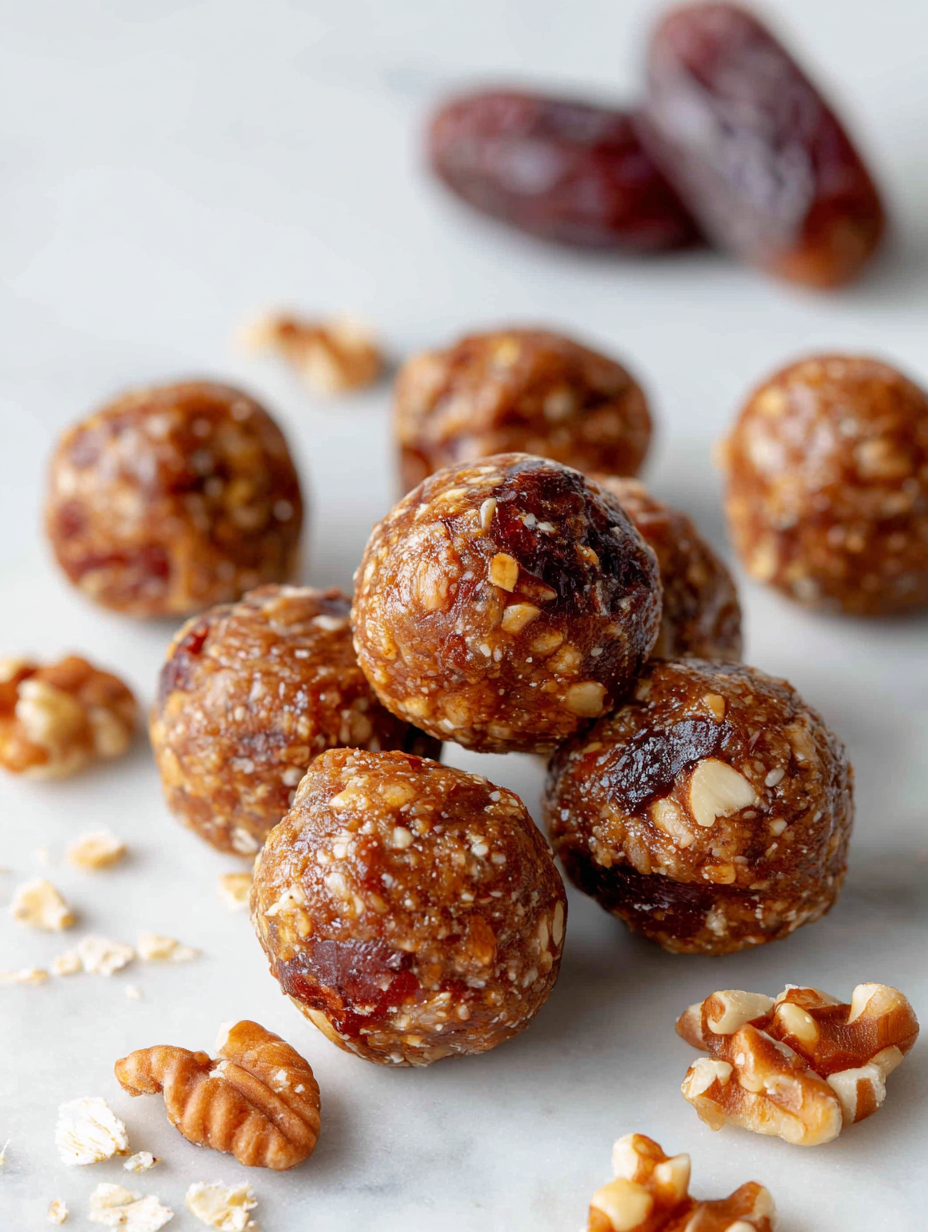
These no-bake date nut bites are my go-to when I want something sweet but don’t want to turn on the oven. It’s all about that sticky, caramel-like chewiness from the dates, balanced with the crunch of toasted nuts. Honestly, I love how minimal the ingredients are — just a handful, yet they come together quickly and satisfy that craving without any fuss.
There’s something satisfying about making treats that don’t require heat, especially when life gets busy or the weather’s too hot for baking. These bites are my kind of recipe — honest, straightforward, and flexible enough to tweak with whatever nuts or seeds I’ve got. Plus, they remind me of childhood snacks, just a little more grown-up and packed with natural sweetness.
Focusing on the simplicity and natural sweetness of dates and nuts, this recipe highlights how minimal ingredients can create something unexpectedly satisfying without any baking fuss.
A Simple, No-Bake Delight
- Making these bites always takes me back to lazy Sunday afternoons in my childhood, sneaking snacks from the jar.
- I get a little proud every time someone asks for the recipe — they can’t believe how simple it is.
- There’s a rush of relief when I realize I don’t need to turn on the oven in the middle of summer heat.
- These bites remind me that sometimes, the best treats are just a few honest ingredients smashed together.
- I love how adaptable this recipe is — I can toss in a handful of seeds or a splash of vanilla for a personal touch.
The story behind this recipe
This recipe came together on a chaotic morning when I was craving something sweet but didn’t want to wait or turn on the oven. I remembered how my grandmother used to keep a jar of dates and nuts on hand, quick snacks she’d toss together without fuss. One day, I just started blending those ingredients, hoping for a chewy, nutty bite, and it stuck. Now, it’s become my go-to for busy days or when I need a little energizing treat that’s honest and simple.
Historical & Cultural Roots
- Dates have been a natural sweetener for thousands of years, prized in Middle Eastern cultures for their rich, caramel-like flavor.
- This recipe likely evolved from traditional no-bake bites in Mediterranean regions, where nuts and dried fruits are staples in everyday snacks.
- Historically, no-bake treats like these emerged as practical, energy-dense snacks for travelers and laborers in arid climates.
- Using dates as a base is a nod to ancient preservation methods—dates keep well and provide instant energy, making them ideal for quick bites.
- Modern spins on these bites reflect a trend towards simple, wholesome ingredients that require minimal fuss, echoing back to traditional practices.
Ingredient breakdown: key components
- Dates: They’re the sticky, sweet core of these bites, bringing a caramel richness that’s almost addictive. If you prefer a milder sweetness, try medjool dates—they’re softer and more flavorful.
- Nuts: I love walnuts for their slightly bitter crunch, but almonds or pecans work well too. Toast your nuts first to boost their aroma—your kitchen will smell like a cozy bakery.
- Binder: A splash of honey or a drizzle of maple syrup helps everything stick together better, especially if your dates are a bit dry. Skip it if you want a less sweet version.
- Flavor Add-ins: A pinch of sea salt or a dash of vanilla can elevate the flavor, making each bite a little more complex. I often toss in a sprinkle of cinnamon for warmth.
- Optional seeds: Chia or flax seeds add a slight crunch and boost nutrition. Mix them in with the nuts for a more textured bite, or sprinkle on top before chilling.
- Coconut: Shredded coconut adds a tropical note and chewy texture. Use unsweetened if you want to keep it less sugary—your teeth will thank you.
- Chocolate: A few dark chocolate chips stirred in or pressed on top can turn these into a decadent treat. Just don’t overload—it’s all about balance.
Spotlight on key ingredients
Dates:
- They’re the sticky, sweet core of these bites, bringing a caramel richness that’s almost addictive. If you prefer a milder sweetness, try medjool dates—they’re softer and more flavorful.
- Nuts: I love walnuts for their slightly bitter crunch, but almonds or pecans work well too. Toast your nuts first to boost their aroma—your kitchen will smell like a cozy bakery.
Nuts:
- I love walnuts for their slightly bitter crunch, but almonds or pecans work well too. Toast your nuts first to boost their aroma—your kitchen will smell like a cozy bakery.
- Dates: They’re the sticky, sweet core of these bites, bringing a caramel richness that’s almost addictive. If you prefer a milder sweetness, try medjool dates—they’re softer and more flavorful.
Notes for ingredient swaps
- Dates: I prefer Medjool dates for their soft, caramel-like sweetness, but you can swap in Deglet Noor dates for a firmer bite.
- Nuts: Walnuts give a slight bitterness, almonds are milder, and pecans add a buttery note—toast whichever you choose for extra aroma.
- Sweetener: Honey adds floral notes, maple syrup offers a deeper caramel flavor, but agave works if you want a neutral sweetener.
- Flavor Boosters: Vanilla extract or a pinch of cinnamon can elevate the taste; skip if you want something more straightforward.
- Seeds: Chia or flax seeds add crunch and nutrition, but use sparingly if you prefer a smoother texture.
- Coconut: Shredded unsweetened coconut enhances chewiness; toasted coconut brings a smoky aroma—use as you like.
- Chocolate: Mix in dark chocolate chips or press on top for a decadent twist—dark chocolate pairs best, but milk works too.
Equipment & Tools
- Food processor: To finely chop and blend the dates and nuts into a sticky mixture.
- Mixing bowl: To knead and combine ingredients easily.
- Spatula: To transfer and press mixture into bites and onto the sheet.
- Parchment-lined baking sheet: To chill the bites without sticking and for easy clean-up.
Step-by-step guide to no-bake bites
- Equipment & Tools: Gather a food processor (for blending), a mixing bowl (to combine nuts), a spatula (for scooping), and a baking sheet lined with parchment (for chilling).
- Pit the dates if they have pits. Measure out about 1 1/2 cups of pitted dates. Chop them roughly for easier processing.
- Toast the nuts: heat a dry skillet over medium (160°C/320°F). Toast nuts for 3-4 minutes, stirring often, until fragrant and lightly golden. Let cool.
- In the food processor, add the toasted nuts and pulse until coarsely chopped, about 8-10 pulses. Don’t over-process; some texture is good.
- Add the chopped dates to the processor. Pulse in short bursts (about 10-12 times), stopping to scrape down sides, until the mixture begins to stick together but isn’t completely smooth.
- If the mixture feels too dry or crumbly, add a teaspoon of honey or maple syrup. Pulse again until it comes together—this usually takes 2-3 pulses.
- Transfer the mixture to a bowl. Using a spatula, knead it slightly to ensure everything is evenly combined. If it’s sticky, lightly oil your hands.
- With your hands, roll the mixture into 12-15 small bites, about 2-3 cm diameter. Press firmly so they hold together well.
- Place the bites on the prepared parchment-lined sheet. For a firmer bite, refrigerate for at least 30 minutes. For a softer, chewier texture, refrigerate for 1 hour or until set.
- Optional: Roll in shredded coconut or sprinkle with sea salt before chilling for extra flavor. Press toppings lightly to adhere.
- Once chilled and firm, serve or store in an airtight container. Keep refrigerated for up to a week or freeze for longer storage.
Chill the bites in the refrigerator for at least 30 minutes until firm. Serve directly from fridge or room temperature. For best texture, consume within a week or freeze for longer storage.
How to Know It’s Done
- Color: nuts should be golden and fragrant after toasting.
- Texture: mixture should hold together when pressed, not crumbly.
- Appearance: bites should be uniformly shaped and slightly glossy from binding ingredients.
No-Bake Date Nut Bites
Ingredients
Equipment
Method
- Toast the nuts in a dry skillet over medium heat for 3-4 minutes until fragrant and golden, then let them cool slightly before chopping coarsely.
- Add the chopped nuts to a food processor along with the roughly chopped dates. Pulse in short bursts for about 10-12 times until the mixture starts to stick together but still has some texture.
- If the mixture feels too dry, drizzle in a teaspoon of honey and pulse a few more times until it comes together into a sticky, cohesive dough.
- Transfer the mixture to a mixing bowl and knead it gently with your hands to ensure everything is evenly combined and sticky enough to hold together.
- Scoop out portions of the mixture and roll them between your palms into small bites, about 2-3 centimeters in diameter, pressing firmly so they hold their shape.
- Place each bite on a parchment-lined baking sheet. If desired, roll them in shredded coconut or sprinkle a tiny pinch of sea salt on top for extra flavor.
- Refrigerate the bites for at least 30 minutes to allow them to set and firm up. For a chewier texture, refrigerate for up to an hour.
- Once chilled and firm, serve the bites directly from the fridge or at room temperature. Enjoy their chewy, caramel-like texture with a satisfying crunch from the nuts.
Notes
Pro tips for perfect bites
- Pulse in short bursts to maintain texture—avoid over-processing the nuts and dates.
- Toast nuts until fragrant, not dark—this enhances flavor without bitterness.
- If mixture feels crumbly, add a teaspoon of honey or maple syrup to help it stick.
- Chill the bites for at least 30 minutes—this firms them up and makes shaping easier.
- Use slightly damp hands when rolling to prevent sticking and achieve smooth spheres.
- Incorporate a pinch of sea salt or vanilla to amplify sweetness and add depth.
- For an extra chew, press shredded coconut or seeds into the bites before refrigerating.
Common mistakes and how to fix them
- FORGOT to evenly process nuts and dates; pulse in short bursts for texture.
- DUMPED too many dates at once; add gradually to control stickiness.
- OVER-TORCHED nuts; toast until fragrant, not dark, to avoid bitterness.
- MISSED the chill time; refrigerate until bites are firm and hold shape.
Quick fixes and pantry swaps
- When mixture is crumbly, splash a little water or honey to help it come together.
- If bites stick too much to your hands, dampen your palms slightly before shaping.
- Splash a few drops of lemon juice if nuts turn bitter during toasting.
- Patch cracks in the bites by pressing the edges back together and refrigerating briefly.
- Shield delicate bites with parchment if they start to crack or crumble during handling.
Prep, store, and reheat tips
- Prep the mixture: Prepare and shape the bites up to a day ahead, then keep covered in the fridge. The flavors meld better and texture stays firm.
- Store in an airtight container: Keep the bites refrigerated for up to a week. The natural oils from nuts and dates keep them chewy and flavorful.
- Shelf life: These bites stay good for about 5-7 days in the fridge. For longer storage, freeze them for up to 3 months—just thaw before eating.
- Reheating or serving: Best enjoyed chilled or at room temperature. If you prefer softer bites, give them a quick 10-second zap in the microwave—watch for melty bits and a warm aroma.
Top questions about no-bake bites
1. Can I use dried fruit instead of dates?
Dates are naturally sticky and sweet, so they help hold the bites together without added binders. Keep an eye on how moist your dates are—drier ones may need a splash of water or honey.
2. What if my mixture doesn’t stick together?
Yes, but dried fruit like apricots or figs can be a bit firmer and less sticky, so you might need to chop them finer or add extra binder like honey.
3. How do I fix crumbly bites?
Chill the mixture longer—at least 30 minutes—so it firms up enough to roll. If it’s still crumbly, add a touch more honey or maple syrup and pulse again.
4. Can I use different nuts?
Yes, you can swap out nuts — almonds, pecans, or cashews work well. Just toast them first to boost flavor and aroma, then chop coarsely.
5. Can I customize the flavor?
Absolutely. You can add a pinch of cinnamon, vanilla, or cocoa powder to boost flavor. Feel free to experiment with different seeds or dried fruit for variety.
6. How long do these bites last?
Store these bites in an airtight container in the fridge for up to a week. For longer storage, freeze for up to 3 months and thaw briefly before eating.
7. How do I handle sticky or dry mixture?
If your bites feel too sticky, dust your hands lightly with coconut or cocoa powder when shaping. If mixture is too dry, add a small splash of water or honey.
8. How should I serve these?
Refrigerate until firm, about 30 minutes. For softer bites, let them sit at room temperature for a few minutes before serving.
9. Can I add chocolate?
If you want a richer taste, stir in dark chocolate chips or press some on top before chilling. For a more subtle flavor, skip the chocolate.
10. Are these bites flexible for different ingredients?
Yes, these are quite forgiving. Just keep an eye on how moist your ingredients are and adjust with extra nuts or sweetener as needed.
These no-bake date nut bites are a reminder that simple ingredients can create something unexpectedly satisfying. They’re honest, quick, and perfect for busy days or when I need a sweet fix without fuss.
Every bite carries a bit of nostalgia, a little chaos in the mixing, and a lot of flavor. They’re a small, reliable treat that I keep coming back to, season after season.