
In the chaos of busy mornings, I find myself reaching for these no bake energy balls more often than I’d like to admit. They’re my little rescue—mess-free, quick to assemble, and made with ingredients I usually keep stocked. The best part? I can toss them together in minutes, no oven required, which means more time for coffee and a deep breath before the day kicks into high gear.
These energy balls aren’t just about convenience; they’re a small act of grounding. When everything feels frenzied, I rely on their familiar textures and the sweet, nutty aroma that fills the kitchen. It’s a simple reminder that I can nourish myself even in the busiest moments, keeping me steady amidst the morning rush.
Focusing on how these energy balls serve as a practical, mess-free snack that I can make in the chaos of a busy morning, using ingredients I usually have on hand, and how they help me stay grounded amidst the rush.
Mess-Free Mornings
- Making these energy balls is my secret weapon on hectic mornings; they feel like a small, doable act of kindness.
- I love how these little bites remind me of childhood snacks, but with a grown-up twist that keeps me energized.
- There’s a strange comfort in the messy process—stirring, rolling, no perfect shape needed—that makes me smile every time.
- When I need a quick pick-me-up, these are my go-to, especially when I crave something crunchy and sweet.
- They’re not just snacks; they’re a tiny act of self-love in a busy day, grounding me with familiar flavors.
The story behind this recipe
- I stumbled on this recipe during a particularly chaotic week when I needed a quick, nourishing snack I could make without fuss. One afternoon, I tossed together whatever nuts, dried fruit, and oats I had lying around—thinking I’d just snack on it while managing the chaos. Instead, I found myself reaching for these energy balls every morning after that, as a small, comforting ritual amidst the rush.
- The real inspiration was how these little bites could be both a practical solution and a tiny moment of calm. No baking, no fuss, just good ingredients pressed into manageable balls. They’ve become my go-to for busy mornings, a simple way to feel grounded before the day really kicks in.
- heading: ‘The story behind this recipe’
History and Trivia
- These no bake energy balls trace their roots to resourceful home cooks wanting quick, portable snacks in the early 2000s health movement.
- They gained popularity as a practical solution for busy mornings and post-workout refueling, especially among fitness enthusiasts.
- The concept of energy bites is believed to have evolved from traditional trail mix balls used by hikers and campers for easy energy on the go.
Ingredient breakdown: key components
- Oats: I use rolled oats, which give a hearty chew and absorb flavors well. Swap with quick oats for a softer bite, but expect a less chewy texture.
- Nut Butter: I prefer almond or peanut butter for that rich, creamy feel and nutty aroma. Sunflower seed butter works for nut allergies, though it’s a bit milder in flavor.
- Honey or Syrup: I love the sticky sweetness honey adds, especially when it’s golden and fragrant. Maple syrup is a good substitute—less sticky, but with a distinct caramel note.
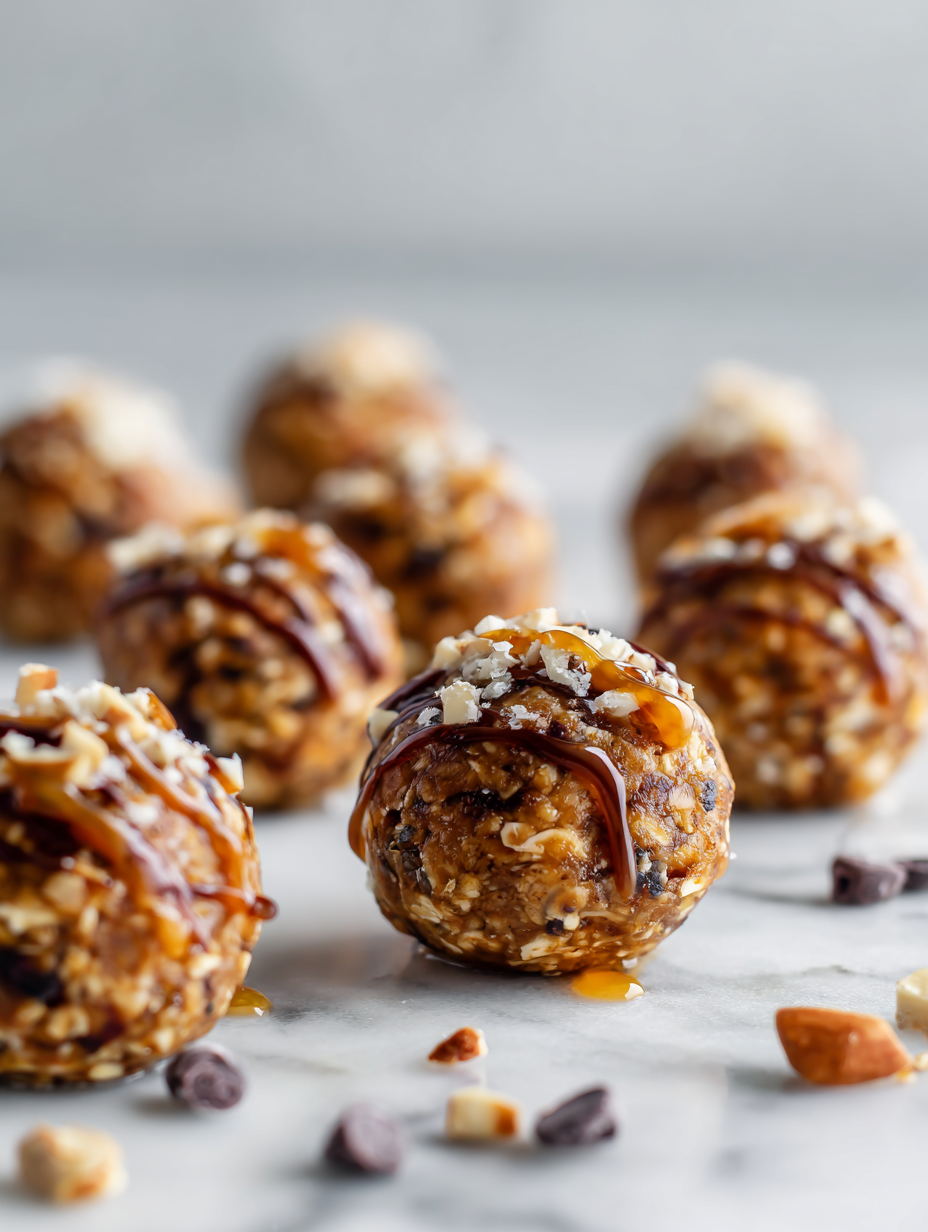
- Add-ins: Dried cranberries or chocolate chips are my favorites—they add bursts of flavor. Dried apricots or coconut flakes work too, for different textures and tastes.
- Extras: A pinch of sea salt heightens all the flavors and balances sweetness. You could try a splash of vanilla extract for extra warmth and aroma.
- Coconut Oil: I use a little to help everything hold together and add subtle richness. Coconut oil can be swapped for a neutral oil, but the texture might be less tender.
- Sesame Seeds or Chia: I sprinkle these in for crunch and extra nutrients. Chia seeds swell and create a gel-like coating, so add a bit more honey if your mixture feels dry.
Spotlight on key ingredients
Dates and Coconut:
- Dates: I love their sticky, caramel-like texture and natural sweetness. They help bind the mixture without added sugar. For a milder flavor, try dried apricots, but expect a softer bite.
- Coconut: I use shredded, unsweetened coconut for a chewy, tropical hint. It adds texture and aroma that makes these bites feel special. Toast it lightly for extra flavor, or skip if you prefer a softer, less toasted note.
Notes for ingredient swaps
- Oats: I use rolled oats for hearty texture. Swap with quick oats for softer bites, but expect less chewiness.
- Nut Butter: I prefer almond or peanut butter for richness. Sunflower seed butter works if allergies are a concern, with a milder flavor.
- Honey or Syrup: Honey gives a fragrant sweetness. Maple syrup is a good alternative, adding a caramel note but less stickiness.
- Add-ins: Dried cranberries or chocolate chips add flavor bursts. Dried apricots or coconut flakes bring different textures and tastes.
- Extras: Sea salt enhances flavors. Vanilla extract adds warmth—try a splash for a different aroma.
- Coconut Oil: I use a little for binding and richness. Neutral oils can be substituted, but may affect tenderness.
- Seeds & Nuts: Chia seeds or sesame seeds add crunch and nutrients. Chia swells into a gel, so add extra honey if dry.
Equipment & Tools
- mixing bowl: To combine and stir the ingredients.
- sturdy spoon: For mixing everything evenly.
- tablespoon: To portion out the mixture for rolling.
- baking sheet lined with parchment: To hold the formed energy balls while chilling.
Step-by-step guide to no bake energy balls
- Gather your equipment: a mixing bowl, a sturdy spoon, a tablespoon, and a baking sheet lined with parchment. You’ll need these for mixing and shaping.
- In the mixing bowl, combine 1 cup of rolled oats, 1/2 cup of nut butter, and 1/4 cup of honey. Stir until well mixed. The mixture should be sticky but manageable.
- Add 1/4 cup of dried cranberries or chocolate chips, and a pinch of sea salt. Mix thoroughly to distribute evenly.
- Using a tablespoon, scoop out portions of the mixture. Roll each into a compact ball about 1 inch in diameter. If the mixture is too dry, add a tiny splash of water; if too sticky, sprinkle a little more oats.
- Place the balls on the prepared baking sheet, spacing them about 1 inch apart. They won’t spread much, so you can pack them close.
- Chill in the refrigerator for at least 30 minutes. This helps them firm up and makes handling easier. If in a hurry, freeze for 10 minutes, but avoid leaving them too long in the freezer to prevent freezing solid.
- Once chilled and firm, store the energy balls in an airtight container. Keep in the fridge for up to a week, or freeze for up to a month. They’re best enjoyed straight from the fridge, with a satisfying chew and rich aroma.
Chill the energy balls in the fridge for at least 30 minutes until firm. Serve straight from the fridge or at room temperature for a softer bite. Pack into containers for on-the-go snacking or store in the freezer for longer shelf life.
How to Know It’s Done
- The mixture is firm enough to hold shape without cracking when rolled.
- Energy balls are uniformly sized, about 1 inch diameter, for even bites.
- When chilled, they feel firm but not frozen solid, with a slight give when pressed.
No Bake Energy Balls
Ingredients
Equipment
Method
- Combine the rolled oats, nut butter, and honey in a large mixing bowl, stirring until the mixture becomes thick and sticky, with a slight sheen from the honey.
- Add dried cranberries or chocolate chips to the mixture, sprinkling in a pinch of sea salt, and stir thoroughly to evenly distribute the add-ins.
- Using a tablespoon, scoop out a portion of the mixture and roll it between your palms to form a compact ball about 1 inch in diameter, pressing firmly to ensure it holds together.
- Place each formed energy ball onto the prepared baking sheet lined with parchment, spacing them about an inch apart.
- Repeat the process until all the mixture is used, then press down lightly on each ball to flatten slightly if desired.
- Chill the energy balls in the refrigerator for at least 30 minutes until they are firm and set, which helps them hold their shape.
- Once chilled, enjoy these chewy, flavorful bites straight from the fridge or at room temperature. Store any leftovers in an airtight container in the fridge for up to a week or freeze for longer storage.
Notes
Pro tips for perfect energy balls
- Bolded mini-head: Use slightly chilled mixture → It’s easier to roll into firm balls with a better texture.
- Bolded mini-head: Incorporate add-ins gradually → Distribute flavors evenly and prevent clumping.
- Bolded mini-head: Pack ingredients tightly → Ensures each ball holds together without cracking.
- Bolded mini-head: Chill before serving → Resting in the fridge firms up the balls, enhancing chewiness.
- Bolded mini-head: Use your hands for shaping → Warm palms slightly help mold sticky mixtures smoothly.
- Bolded mini-head: Adjust sweetness as needed → Taste the mixture before rolling; add more honey if it’s not sweet enough.
- Bolded mini-head: Store in airtight containers → Keeps energy balls fresh and prevents them from drying out.
Common mistakes and how to fix them
- FORGOT to check mixture consistency → Add a splash of water or more oats as needed.
- DUMPED ingredients too quickly → Mix thoroughly before adding more dry ingredients.
- OVER-TORCHED the mixture → Stir immediately and lower heat to prevent burning.
- FAILED to chill enough → Chill for at least 30 minutes to help balls set properly.
Quick fixes and pantry swaps
- If mixture feels dry → Splash in a tiny bit of water and knead until cohesive.
- When balls are too sticky → Dust hands with oats or coconut for easier rolling.
- Splash some neutral oil if energy balls crack when shaping.
- Patch cracks with a little nut butter or honey for extra stickiness.
- Shield from moisture by storing in airtight containers, preventing texture loss.
Prep, store, and reheat tips
- Prep the mixture in advance: Combine ingredients the night before for a quicker morning assembly, keeping it covered in the fridge. The flavors meld overnight, making it even tastier.
- Store the energy balls in an airtight container in the fridge for up to a week. The cool environment keeps them firm and fresh, with a subtle nutty aroma that deepens over time.
- Freeze for longer storage: Place the balls in a freezer-safe container for up to a month. Thaw in the fridge for a few hours or at room temperature for a softer bite. Expect a firmer texture straight from the freezer, with an intense, cold aroma.
- Reheating isn’t necessary—these are best enjoyed chilled or at room temperature. If you prefer slightly softer, let them sit out for 10 minutes, and you’ll notice a richer aroma and softer chew.
- Sensory note: When stored properly, the energy balls retain their chewy texture and pleasant aroma. If they smell off or feel overly dry, discard and make a fresh batch.
Top questions about energy balls
1. Can I use crunchy peanut butter instead of smooth?
Yes, you can swap honey for maple syrup or agave nectar. The texture stays sticky, but the flavor shifts slightly.
2. How long do energy balls last in the fridge?
Absolutely. Crunchy peanut butter adds extra texture and nutty bits, making each bite more interesting.
3. Can I make these vegan?
They stay fresh up to a week in an airtight container. For longer storage, freeze them for up to a month.
4. Are these suitable for nut allergies?
Yes. Use maple syrup instead of honey and ensure your nut butter is vegan-friendly. They’ll taste just as good.
5. How do I prevent the balls from cracking?
You can try seed butters like sunflower or tahini, but expect a different flavor profile and slightly softer texture.
6. Can I add chocolate for extra flavor?
Chill the mixture before rolling, and pack the ingredients tightly. If cracks appear, press them back together gently.
7. What’s the best way to store leftovers?
Definitely. Chocolate chips or chopped dark chocolate work well, adding a sweet, melty surprise in each bite.
8. Should I refrigerate or freeze before serving?
Keep them in an airtight container in the fridge for up to a week, or freeze for longer storage.
9. Can I customize the add-ins?
Refrigerate for a firmer bite and easier handling or freeze for longer storage. Let sit at room temp for a softer texture.
10. Are energy balls safe for kids?
Yes. Dried fruits, seeds, or nuts can be swapped based on your preference, adding variety to each batch.
These no bake energy balls are more than just a quick snack—they’re a small act of self-care that fits into even the busiest mornings. The comforting aroma of nuts and honey, combined with that satisfying chew, remind me that nourishing myself can be simple and grounding, no matter how chaotic the day.
Whenever I need a moment of calm or a boost of energy, these bites come through. They’re imperfect, honest, and made with ingredients I trust—perfect for keeping me steady as I jump from one thing to the next.