
This recipe is inspired by my grandmother’s secret stash of leftover holiday chocolates, turned into quick, no-fuss fudge balls. It’s a way to repurpose those tiny, forgotten treats into something rich and satisfying, without turning on the oven.
I love how you can throw everything together in one bowl, then roll and chill. No baking, no fuss—just a little bit of magic that feels like a treat and a little nostalgia all at once.
These fudge balls are perfect for when you need a sweet fix in a hurry or want to clear out a small mountain of odds and ends from your pantry. They come together fast, taste indulgent, and keep nicely in the fridge for whenever that chocolate craving hits.
This recipe is inspired by my grandmother’s secret stash of leftover holiday chocolates, turned into quick, no-fuss fudge balls. It’s a way to repurpose those tiny, forgotten treats into something rich and satisfying, without turning on the oven.
Transforming Odds and Ends
- Making these fudge balls reminds me of childhood afternoons in my grandma’s kitchen, smelling of cocoa and warm sugar.
- I love how a handful of pantry staples can come together to create something so indulgently rich in minutes.
- There’s a quiet satisfaction in rolling each ball—like tiny treasures—knowing they’ll bring smiles.
- Sometimes I add a pinch of sea salt on top—just enough to make the chocolate flavor pop and keep it interesting.
Transforming Odds and Ends
This recipe sprouted from a lazy Sunday afternoon, when I was rummaging through my pantry and found a half-empty jar of peanut butter and a bag of crushed cookies. It hit me how those simple ingredients could come together without any heat, creating something both nostalgic and satisfying. It’s funny how sometimes the best treats are born out of just improvisation and a bit of boredom. Now, making these fudge balls feels like a little act of rebellion against the fuss and mess of baking, offering instant gratification and a sweet reminder that simple can be delicious.
Historical & Cultural Tidbits
- These fudge balls have roots in resourcefulness, born during wartime rationing when simple ingredients were all that was available.
- In some cultures, similar no-bake confections have been made for centuries, often using local nuts, dates, or honey as natural binders.
- The concept of turning leftover sweets into easy, bite-sized treats gained popularity in the 20th century, especially during post-war home cooking revival.
Ingredient breakdown
- Dates: I love how their sticky, caramel-like texture helps everything hold together—try medjool dates for that rich, oozing sweetness, or swap with dried figs if you prefer a more subtle, fruity note.
- Butter: I use unsalted, which gives a creamy richness that melts in your mouth—if you want a dairy-free version, coconut oil works but keeps it a bit more tropical and less buttery.
- Cocoa Powder: I prefer Dutch-processed for a smooth, mellow chocolate flavor, but if you want a brighter, more acidic punch, go for natural cocoa—just adjust the sweetness.
- Crushed Cookies: I reach for simple digestive or graham crackers—they add crunch and flavor, but you could try crushed pretzels for a salty contrast or even toasted oats for nuttiness.
- Chocolate Chips: I toss in semi-sweet or dark chocolate for depth, but white chocolate chips bring a different kind of sweetness—just watch they don’t melt completely when mixed.
- Vanilla Extract: I love a splash of pure vanilla—it brightens everything, but if you’re out, a touch of almond extract adds a lovely depth, just a tiny bit.
- Sea Salt: I finish with a pinch of flaky sea salt, which makes the chocolate pop—try smoked sea salt if you want a smoky twist or Maldon for that crisp finish.
Spotlight on key ingredients
Dates:
- I love how their sticky, caramel-like texture helps everything hold together—try medjool dates for that rich, oozing sweetness, or swap with dried figs if you prefer a more subtle, fruity note.
- Butter: I use unsalted, which gives a creamy richness that melts in your mouth—if you want a dairy-free version, coconut oil works but keeps it a bit more tropical and less buttery.
Cocoa Powder & Cookies:
- Cocoa Powder: I prefer Dutch-processed for a smooth, mellow chocolate flavor, but if you want a brighter, more acidic punch, go for natural cocoa—just adjust the sweetness.
- Crushed Cookies: I reach for simple digestive or graham crackers—they add crunch and flavor, but you could try crushed pretzels for a salty contrast or even toasted oats for nuttiness.
Notes for ingredient swaps
- Dairy-Free: Swap butter for coconut oil for a tropical note, but expect a slightly different melt-in-your-mouth feel.
- Vegan: Use vegan chocolate chips and plant-based butter or coconut oil—still rich but skip the dairy.
- Nut-Free: Replace crushed cookies with toasted oats or gluten-free graham crackers to keep crunch and flavor.
- Sweetener: Substitute honey with maple syrup or agave nectar—both add a different, but equally pleasant, sweetness.
- Chocolate: Dark chocolate chips bring depth; white chocolate offers a sweeter, creamier contrast—choose based on your mood.
- Add-ins: Mix in chopped dried fruits or nuts for texture—peanuts or dried cranberries add a burst of flavor and chew.
- Salt: Use smoked sea salt or flaky Maldon for a smoky or crisp finish that elevates the chocolate flavor.
Equipment & Tools
- Mixing bowl: Combine ingredients and mix thoroughly.
- Sturdy spoon: Stir ingredients evenly and scoop mixture.
- Baking sheet or plate: Place formed fudge balls for chilling.
- Parchment paper: Prevent sticking and make cleanup easier.
Step-by-step guide to fudge balls
- Gather your equipment: a large mixing bowl, a sturdy spoon, a baking sheet or plate, and parchment paper for easy cleanup.
- In the bowl, combine 1 cup of crushed cookies, 1/2 cup of cocoa powder, and a pinch of sea salt. Mix until evenly distributed.
- Add 1/2 cup of melted butter or coconut oil. Stir well until the mixture is crumbly but starts to clump together when pressed.
- Stir in 1/2 cup of chocolate chips, 1/4 cup of honey or maple syrup, and 1 teaspoon of vanilla extract. Mix thoroughly.
- If the mixture feels too dry and crumbly, add a teaspoon of water or more melted butter, one at a time, until it sticks together.
- Test the mixture by pinching a small amount; it should hold its shape without crumbling. Adjust with more honey or butter if needed.
- Using your hands, roll the mixture into 1-inch balls. Place each ball on the prepared baking sheet or plate lined with parchment.
- Once all balls are formed, refrigerate for at least 30 minutes to firm up and intensify the flavors.
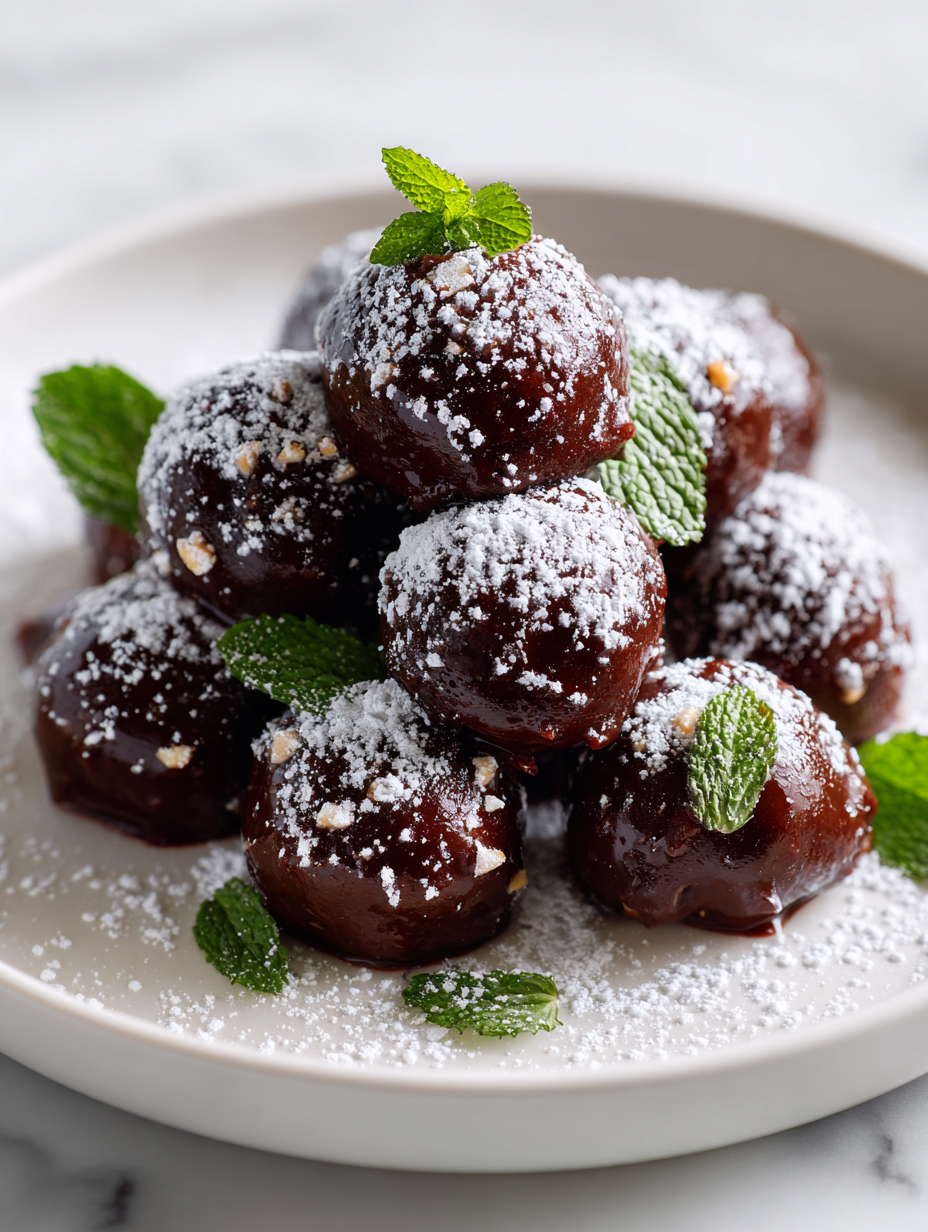
- After chilling, if desired, roll the fudge balls in shredded coconut, chopped nuts, or cocoa powder for extra texture and flair.
- Serve straight from the fridge or at room temperature for a softer bite. Keep stored in an airtight container in the fridge for up to a week.
Refrigerate the fudge balls for at least 30 minutes until firm. Serve directly or transfer to an airtight container. Keep in the fridge for up to a week, or freeze for longer storage.
How to Know It’s Done
- Fudge balls hold their shape when pressed; if they fall apart, add more melted butter or honey.
- The mixture should smell rich and chocolatey, not raw or overly dry.
- Chill until firm and no longer sticky to the touch before serving.
No-Bake Holiday Chocolate Fudge Balls
Ingredients
Equipment
Method
- Place crushed cookies, cocoa powder, and a pinch of sea salt into a large mixing bowl. Stir together until evenly combined and fragrant.
- Pour in the melted butter and stir until the mixture starts to clump together and feels slightly sticky.
- Add chocolate chips, honey, and vanilla extract, then mix thoroughly until all ingredients are evenly distributed and the mixture is cohesive.
- If the mixture feels too dry or crumbly, add a teaspoon of water or extra melted butter, stirring until it holds together when pressed.
- Using your hands, scoop out about a tablespoon of mixture and roll it into a firm ball, pressing gently to shape. Place each ball on a parchment-lined baking sheet or plate.
- Repeat until all the mixture is used, then refrigerate the fudge balls for at least 30 minutes to set and firm up.
- Once chilled, optionally roll the fudge balls in toppings like shredded coconut or chopped nuts for extra texture and presentation.
- Serve the fudge balls straight from the fridge for a chewy, firm bite, or let them sit at room temperature for a softer, melty texture. Store leftovers in an airtight container in the fridge.
Notes
Tips for perfect fudge balls
- Bolded Mini-Head: Use slightly softened butter to mix more smoothly, avoiding crumbly textures.
- Bolded Mini-Head: Chill the mixture thoroughly—at least 30 minutes—to make rolling easier and ensure firm balls.
- Bolded Mini-Head: Incorporate a pinch of sea salt on the outside after forming—this enhances chocolate richness.
- Bolded Mini-Head: When adding melted chocolate, do so gradually and stir constantly to prevent seizing or burning.
- Bolded Mini-Head: For a more intense chocolate flavor, sift the cocoa powder to eliminate lumps and aerate it.
- Bolded Mini-Head: Roll the fudge balls in toppings right after chilling—wetting slightly helps toppings stick better.
- Bolded Mini-Head: Store in an airtight container in the fridge—these fudge balls keep well for up to a week, maintaining their chewy texture.
Common mistakes and how to fix them
- FORGOT to chill mixture → Chill for at least 30 minutes until firm.
- DUMPED mixture too hot → Let it cool slightly before rolling into balls.
- OVER-TORCHED chocolate → Use low heat and stir constantly to prevent burning.
- MISSED salt sprinkle → Add flaky sea salt after chilling for a flavor pop.
Quick fixes and pantry swaps
- When mixture feels sticky, splash a tiny bit of water to loosen it up.
- If fudge balls crack when rolling, chill the mixture for 10 minutes before shaping.
- DUMPED melted chocolate too hot → let it cool slightly for smooth mixing.
- When fudge balls are too soft, freeze for 10 minutes to firm up quickly.
- Splash a little more cocoa or crushed cookies if mixture is too dry and crumbly.
Prep, store, and reheat tips
- You can prepare the mixture a day ahead; keep it covered in the fridge to prevent it from drying out, and the flavors will meld beautifully.
- Store the fudge balls in an airtight container in the fridge for up to a week. The cold keeps them firm and chewy, with a rich chocolate aroma.
- For longer storage, freeze the balls in a single layer on a baking sheet, then transfer to a freezer bag. They’ll keep for up to a month.
- Reheating isn’t necessary. Serve straight from the fridge for a firm bite or let them sit at room temperature for about 10 minutes for a softer, melty texture. Expect a glossy, inviting sheen and a fragrant waft of cocoa.
Top questions about fudge balls
1. Can I substitute nut butters for butter?
Yes, you can use nut butters like peanut or almond, but it will add a richer, nutty taste and slightly change the texture.
2. Are these fudge balls vegan?
Absolutely. Use dairy-free chocolate chips and coconut oil instead of butter for a vegan version that still tastes rich.
3. The mixture is too sticky, what do I do?
If your mixture feels too sticky, refrigerate it for 15-20 minutes or dust your hands with cocoa powder before rolling.
4. How can I add more flavor or texture?
You can roll the fudge balls in shredded coconut, chopped nuts, or cocoa powder for extra texture and flavor.
5. How long do these fudge balls last?
Store the fudge balls in an airtight container in the fridge for up to a week, or freeze for up to a month.
6. Can I reheat the fudge balls?
Yes, gently reheat in the microwave for 10-15 seconds if you want a softer, melty bite, but they are best served chilled.
7. What are good substitutes for dates?
Use medjool dates for that oozy, caramel-like texture. Dried figs work well if you prefer a fruitier, less sweet flavor.
8. Should I use Dutch-processed or natural cocoa?
Dutch-processed cocoa gives a smooth, mellow flavor, while natural cocoa offers a brighter, more acidic chocolate punch.
9. Should I add salt to the recipe?
Mix in a pinch of sea salt after forming the balls to enhance the chocolate flavor and add a savory contrast.
10. My fudge balls crack when I roll them, what now?
If the mixture cracks when rolling, chill it for 10 minutes. Cold hands make shaping easier and neater.
These fudge balls are more than just a sweet treat; they’re a little reminder that simple ingredients can create something satisfying and comforting. Every time I make them, I’m transported back to lazy afternoons in my kitchen, where the smell of cocoa and melted chocolate fills the air.
They’re perfect for a quick fix or when you need a small, rich indulgence without any fuss. Keeping a batch in the fridge means I always have something ready to satisfy that craving—no oven, no mess, just good, honest chocolatey bites.