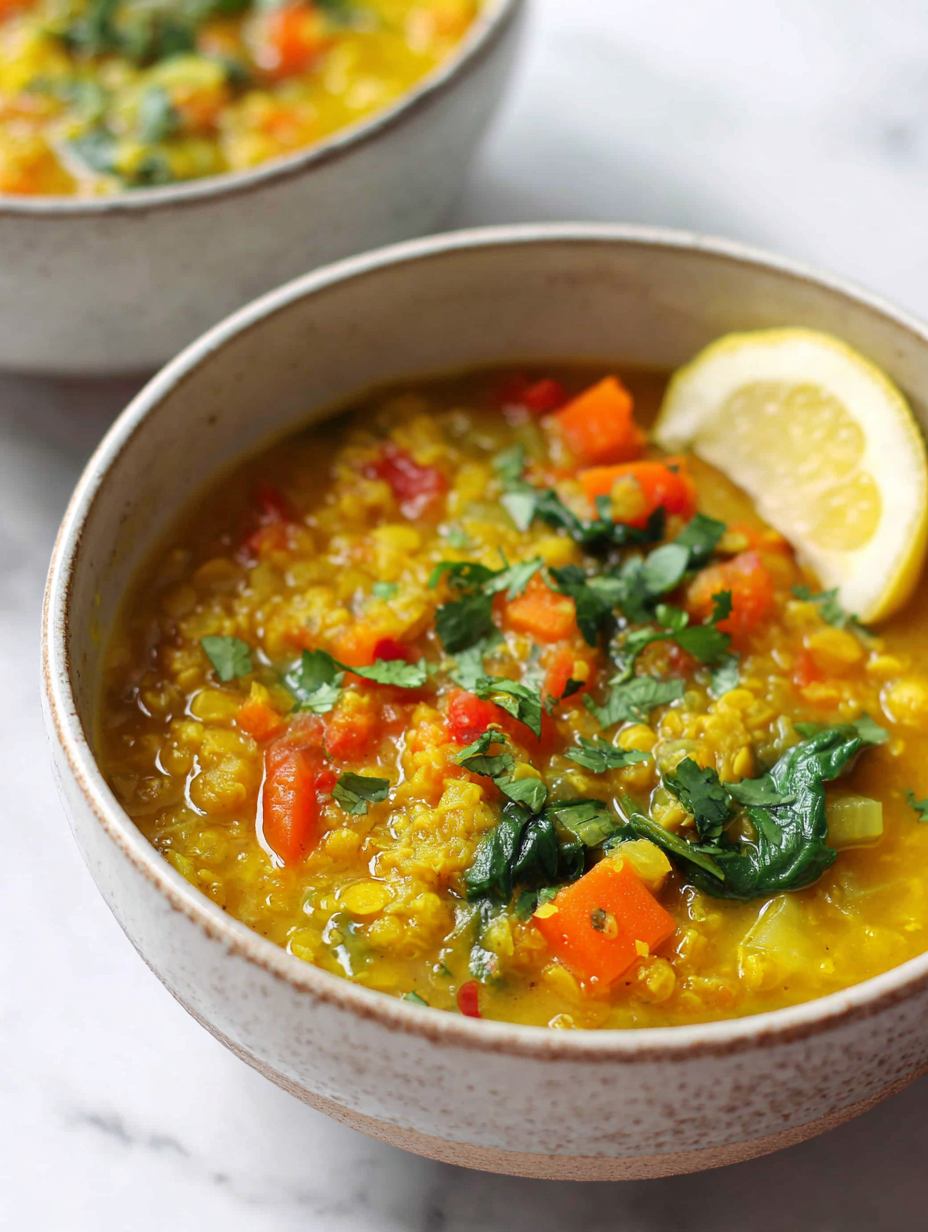
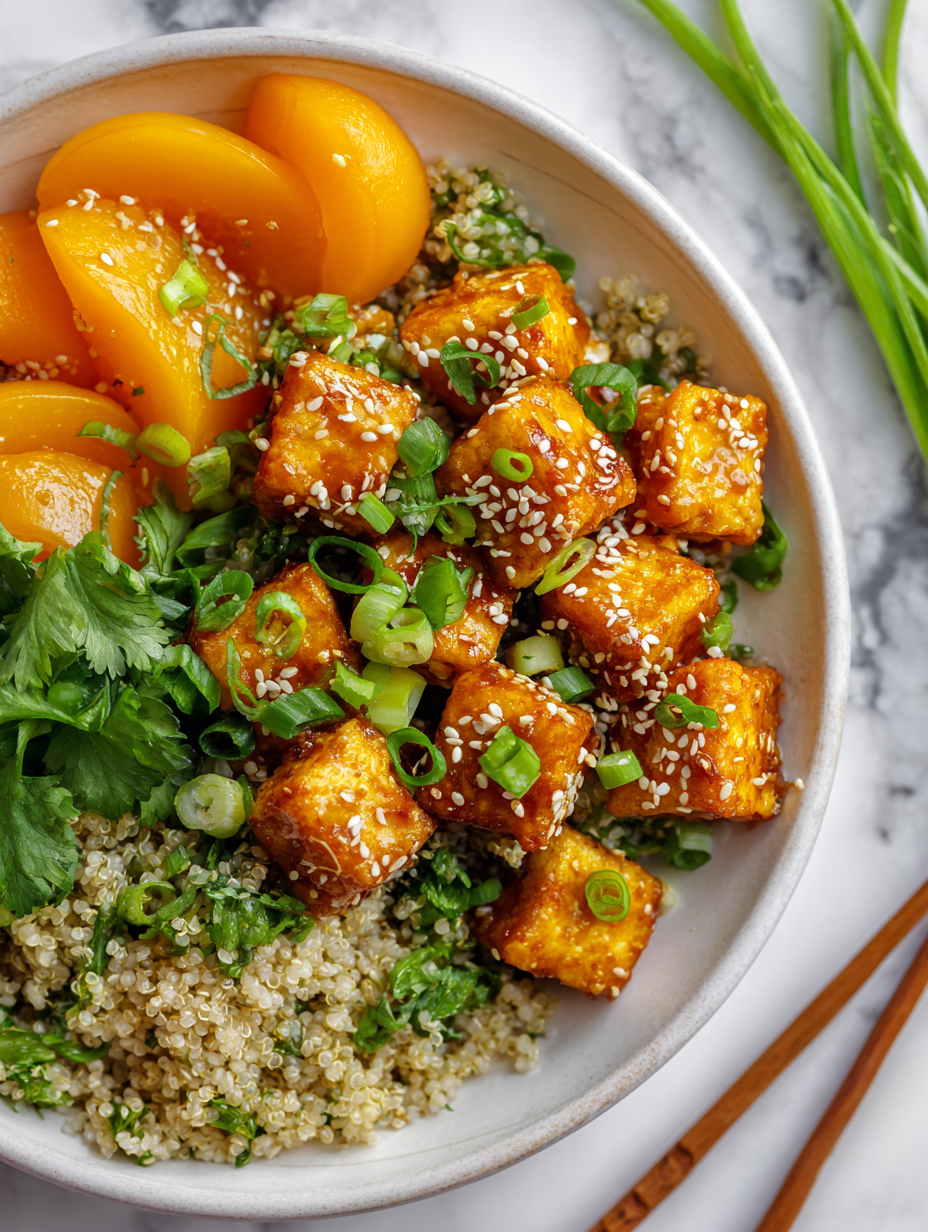
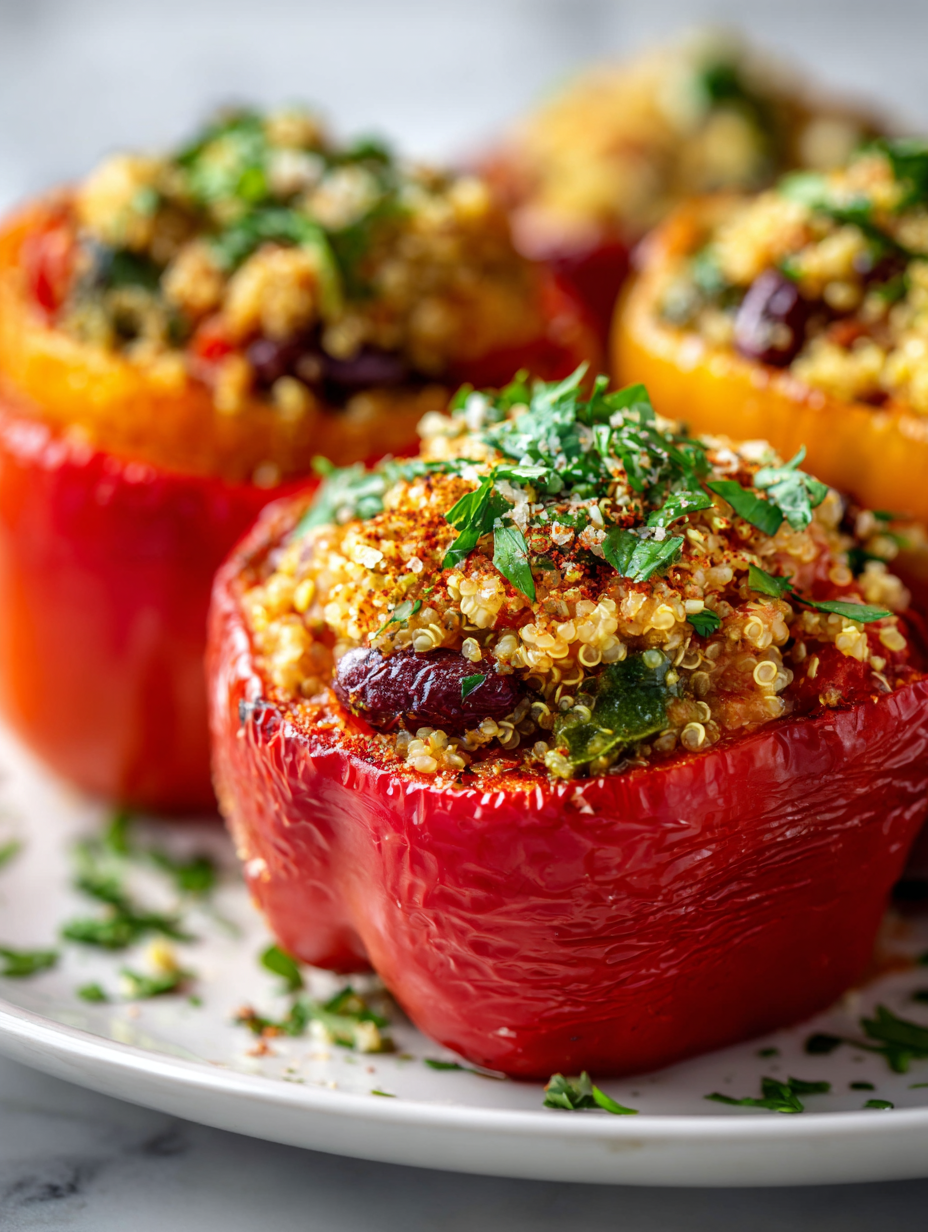
Category: Main Course

  • Meghan Markle’s Zucchini Bolognese: A Fresh Take on Comfort Food

    Meghan Markle’s Zucchini Bolognese: A Fresh Take on Comfort Food

    When I first tried making a zucchini bolognese, I was skeptical. Would the zucchini really mimic the richness of traditional meat sauce? Turns out, cooking it down slowly transforms it into a silky, flavorful base that’s surprisingly satisfying. It’s a dish that celebrates fresh produce and honest effort, perfect for those busy weeknights.

    Why This Dish Keeps Calling Me Back

    It’s quick, adaptable, and endlessly forgiving. I love how it tastes like a fresh garden in every bite, especially when I toss in basil at the end. It’s also a reminder that healthy doesn’t have to be boring, especially when you can make it taste this vibrant.

    Ingredient Breakdown and Substitutions

    • Zucchini: Fresh, young zucchini work best; their mild flavor and tender flesh make a silky sauce. You can swap with yellow squash for a sweeter touch.
    • Crushed tomatoes: Use good-quality canned tomatoes for richness. Fresh tomatoes work in summer, but they need longer cooking to develop flavor.
    • Garlic: A generous amount adds depth and aroma. Substitute with garlic powder if fresh isn’t available, but fresh is always better.
    • Onions: Yellow or white onions give sweetness and body. Shallots are a fine substitute if you want a milder flavor.
    • Olive oil: Good extra virgin oil enhances the aroma and richness. Coconut oil can work for a different flavor profile.
    • Chili flakes: Adds a subtle heat and complexity. Paprika offers smokiness if you prefer milder spice.
    • Herbs (basil, oregano): Fresh herbs brighten the sauce. Dried herbs are okay if you add them early for deeper flavor.

    Essential Equipment & Tools

    • Chef’s knife: For chopping onions, garlic, and zucchini with precision.
    • Heavy-bottomed pan: Ensures even heat for simmering and prevents sticking.
    • Wooden spoon: Stirs the sauce gently without scratching the pan.
    • Grater: For shredding zucchini into fine, cookable strands.

    Step-by-Step for Zucchini Bolognese

    Step 1: Gather your ingredients and set out your tools. A sharp knife, a heavy-bottomed pan, and a wooden spoon are essentials.

    Step 2: Heat a tablespoon of olive oil in a large pan over medium heat, about 160°C (320°F). Add finely chopped onions and garlic, sauté until translucent and fragrant, around 5 minutes.

    Step 3: Add grated zucchini to the pan. Cook, stirring often, until the zucchini releases its moisture and starts to brown slightly, about 8 minutes.

    Step 4: Pour in crushed tomatoes, a splash of red wine if you like, and season with salt, pepper, and a pinch of chili flakes. Simmer gently for 20 minutes, stirring occasionally.

    Cooking Checkpoints & Tips

    • The sauce should be vibrant and slightly thickened, not watery.
    • Zucchini should be tender but not mushy, with a slight bounce when pressed.
    • The aroma of garlic and cooked zucchini should be sweet and inviting, not burnt or bitter.

    Common Mistakes & How to Fix Them

    • Cooking zucchini too high or too fast, causing mushiness.? Add a splash of water or broth if the sauce is too thick and sticking.
    • Over-seasoning early, risking overpowering the delicate zucchini flavor.? Reduce heat and cook longer to develop flavors and avoid sogginess.
    • Burning garlic or onions, which can make the sauce bitter.? Taste and adjust salt at the end to balance acidity.
    • Adding cold ingredients straight from the fridge, causing temperature shock.? Use a non-stick pan if sticking becomes an issue.

    Zucchini Bolognese

    This zucchini bolognese uses grated zucchini cooked down into a silky, flavorful sauce that mimics traditional meat-based sauces. It’s made with fresh vegetables and crushed tomatoes, simmered to develop depth and richness, resulting in a vibrant, hearty dish with a tender, sauce-coating texture. Perfect for quick weeknight dinners that are both healthy and satisfying.
    Prep Time 10 minutes
    Cook Time 30 minutes
    Total Time 40 minutes
    Servings: 4
    Course: Main Course
    Cuisine: Italian
    Calories: 180

    Ingredients
      

    • 2 medium zucchini preferably young and tender
    • 1 can crushed tomatoes high-quality, preferably San Marzano or similar
    • 3 cloves garlic minced
    • 1 yellow onion finely chopped
    • 1 tablespoon olive oil good quality extra virgin
    • 1/2 teaspoon chili flakes optional for heat
    • to taste salt and pepper
    • Fresh basil chopped, for finishing

    Equipment

    • Chef’s knife
    • Heavy-bottomed pan
    • Wooden spoon
    • Grater

    Method
     

    1. Start by peeling and finely chopping the yellow onion, then set it aside. Mince the garlic cloves and prepare your zucchini for shredding.
    2. Grate the zucchini using a box grater or food processor until you have fine, rice-like strands. This helps it cook down quickly and creates a silky texture.
    3. Heat a tablespoon of olive oil in a heavy-bottomed pan over medium heat until it shimmers and begins to smoke slightly. Add the chopped onion and sauté until translucent and fragrant, about 5 minutes, hearing a gentle sizzle and smelling sweet aromatics.
    4. Add the minced garlic to the pan and cook for another 30 seconds, stirring constantly until it becomes fragrant and slightly golden, about 30 seconds to 1 minute.
    5. Stir in the grated zucchini, spreading it evenly in the pan. Cook, stirring often, until the zucchini releases moisture and starts to brown slightly, about 8 minutes, creating a fragrant, slightly caramelized aroma.
    6. Pour in the crushed tomatoes, then add chili flakes, salt, and pepper to taste. Stir well to combine all the ingredients and bring to a gentle simmer.
    7. Reduce heat to low and let the sauce simmer gently, uncovered, for about 20 minutes, stirring occasionally. The sauce should thicken slightly and develop a vibrant red color, with the zucchini fully tender.
    8. Taste the sauce and adjust salt and pepper as needed. Just before serving, tear fresh basil leaves and stir them into the sauce for a bright, aromatic finish.
    9. Serve the zucchini bolognese hot over pasta, rice, or enjoy it as a hearty vegetable side. The sauce should be silky, vibrant, and coated evenly on the surface.

    Notes

    For a richer flavor, add a splash of red wine when pouring in the crushed tomatoes. Use fresh herbs for a bright finish, and feel free to adjust chili flakes for desired heat.
    This dish isn’t just a way to sneak more vegetables onto your plate; it’s a reminder that comfort food can be bright and fresh. The zucchini softens into a silky sauce that clings to pasta in a way that’s both satisfying and surprisingly light. Play around with herbs or add a splash of lemon at the end to make it uniquely yours. It’s a reminder that good food often comes from improvisation and a little bit of patience.

  • Best Chili Recipe: A Slow-Burn Love Letter to Comfort Food

    Best Chili Recipe: A Slow-Burn Love Letter to Comfort Food

    Chili is comfort, chaos, nostalgia, and pride all in one bowl. But I’ve learned that the secret isn’t just in the ingredients—it’s in the patience to let the flavors slowly meld. This recipe isn’t about quick fixes; it’s about building layers of smoky, spicy depth that make every spoonful feel like a warm hug.

    Why This Chili Keeps Calling Me Back

    Because it’s simple, honest, and deeply satisfying. The slow simmer turns humble ingredients into something soulful. It’s the kind of dish that tastes even better the next day, with flavors intensified and the heat mellowed. That patience, that layering—it’s what makes every bowl feel like a small victory.

    Breaking Down the Heart of the Chili

    • Ground beef: I like a mix of chuck and sirloin—fatty enough to stay juicy, lean enough to not be greasy. Swap for ground turkey if you prefer leaner.: Provides a savory, meaty base that absorbs spices beautifully.
    • Chili powder: It’s my secret weapon—smoky, earthy, with just a hint of sweetness. Feel free to tweak the ratio to suit your heat preference.: Adds warmth and depth, essential for that classic chili flavor.
    • Crushed tomatoes: I use San Marzano for their bright, sweet acidity—makes the sauce velvety and vibrant.: A tangy foundation that balances richness.
    • Cumin: Earthy, warm, and slightly nutty—use fresh if you can for maximum aroma.: Creates a smoky backbone that ties everything together.
    • Worcestershire sauce: A splash deepens the umami and adds a subtle tang—don’t skip it.: Gives a layer of complexity that makes the flavors pop.
    • Beans (kidney or black): I prefer beans cooked from dry, but canned works if you rinse thoroughly.: Adds creaminess and texture—make sure they’re tender and not mushy.
    • Smoked paprika: Oozy, smoky, and slightly sweet—perfect for that slow, smoky finish.: Enhances depth and provides a subtle, fragrant kick.

    What You’ll Need to Make This Chili

    • Large heavy-bottomed pot: Ensures even heat and prevents scorching during simmering.
    • Wooden spoon: Stirs ingredients gently without scratching the pot.
    • Measuring spoons and cups: Keeps seasoning and liquids balanced.
    • Chef’s knife: Chops onions, garlic, and other ingredients efficiently.
    • Can opener: Opens canned tomatoes and beans.

    Step-by-Step to a Perfectly Cozy Chili

    Step 1: Start by gathering all your ingredients. This chili benefits from a slow simmer, so patience is key.

    Step 2: Heat a large, heavy-bottomed pot over medium heat, about 160°C (320°F). Add some oil and let it shimmer.

    Step 3: Cook the onions and garlic until fragrant, about 5 minutes, until softened and translucent.

    Step 4: Add the ground beef, breaking it apart, and cook until browned, about 8 minutes. Don’t rush this step; it’s where the flavor deepens.

    Step 5: Stir in chili powder, cumin, smoked paprika, and a pinch of cayenne. Cook for another minute to toast the spices.

    Step 6: Pour in crushed tomatoes, beef broth, and a splash of Worcestershire sauce. Bring to a gentle boil.

    Step 7: Reduce heat to low, cover, and let it simmer for at least 2 hours. Stir occasionally, scraping the bottom.

    Step 8: Check the chili—meat should be tender, and flavors melded. If it thickens too much, add a bit more broth.

    Step 9: Taste and adjust salt, pepper, or spice levels. Let it rest for 10 minutes before serving.

    Cooking Checkpoints and Tips to Keep in Mind

    • Onions and garlic should be fragrant and translucent, not browned or burnt.
    • Meat should be browned and slightly caramelized, not gray or waterlogged.
    • The chili should be thick and rich, not watery, after simmering for 2 hours.
    • Taste and adjust seasoning before serving to balance heat, salt, and acidity.

    Common Mistakes and How to Fix Them

    • Chili tastes flat or dull.? Add more salt or acid to brighten flavors.
    • Onions still raw or harsh.? Cook onions and garlic longer for better flavor.
    • Meat still tough after cooking.? Reduce heat and simmer longer for tenderness.
    • Bottom of the pot is scorched or burnt.? Stir frequently to prevent sticking.

    Hearty Slow-Simmered Chili

    This chili is a comforting, robust dish featuring ground beef simmered with smoky spices, crushed tomatoes, and beans. The slow cooking process melds flavors into a thick, velvety texture with a deep, smoky-spicy profile, perfect for a cozy meal. Its layered flavors develop over time, making each spoonful rich and satisfying.
    Prep Time 15 minutes
    Cook Time 2 hours
    Total Time 2 hours 15 minutes
    Servings: 6
    Course: Main Course
    Cuisine: American
    Calories: 350

    Ingredients
      

    • 1 lb ground beef (chuck and sirloin mix) or lean ground turkey
    • 1 large yellow onion finely chopped
    • 3 cloves garlic minced
    • 2 tbsp chili powder smoky and earthy
    • 1 tsp cumin warm and slightly nutty
    • 1 tsp smoked paprika for smoky depth
    • 28 oz crushed tomatoes preferably San Marzano
    • 1 cup beef broth or water
    • 1 tbsp Worcestershire sauce adds umami
    • 1 can kidney or black beans rinsed and drained

    Equipment

    • Large heavy-bottomed pot
    • Wooden spoon
    • Measuring spoons and cups
    • Chef’s knife
    • Can opener

    Method
     

    1. Gather all your ingredients and get ready to build layers of flavor. Finely chop the onion and mince the garlic, preparing for a fragrant sauté.
    2. Heat a large heavy-bottomed pot over medium heat until the oil shimmers gently. Add the chopped onion and cook, stirring occasionally, until translucent and fragrant, about 5 minutes.
    3. Add the minced garlic and cook for another minute, until it releases a warm aroma and becomes fragrant but not browned.
    4. Increase the heat slightly and add the ground beef, breaking it apart with your spoon. Cook until browned and caramelized at the edges, about 8 minutes, stirring occasionally.
    5. Sprinkle in the chili powder, cumin, and smoked paprika. Stir well, cooking for 1 minute to toast the spices and release their rich aromas.
    6. Pour in the crushed tomatoes and beef broth, then add the Worcestershire sauce. Stir everything together and bring to a gentle simmer.
    7. Reduce the heat to low, cover the pot, and let the chili simmer slowly for at least 2 hours. Stir occasionally, scraping the bottom to prevent sticking and ensure even cooking.
    8. After simmering, check the chili; the meat should be tender, and the flavors deeply melded. Stir in the rinsed beans and cook uncovered for another 15 minutes to heat through and thicken slightly.
    9. Taste the chili and adjust with salt, pepper, or spice if needed. Let it rest for 10 minutes to allow flavors to settle before serving.
    10. Spoon the hearty chili into bowls, garnish as desired, and enjoy the rich, smoky flavors in every warm bite.
    This chili is all about the slow build of flavors. It’s not quick, but the depth of smoky, spicy goodness makes it worth the wait. Feel free to swap in different beans or add a splash of beer for extra richness. Just remember, the best chili is the one you let simmer long enough to forget about but never stop tasting.

  • Reviving Grandma’s Soup: The Unusual Art of Chicken Noodle Soup

    Reviving Grandma’s Soup: The Unusual Art of Chicken Noodle Soup

    Chicken noodle soup isn’t just a classic; it’s a canvas for personal stories and seasonal echoes. I’ve learned that the secret lies in the slow build of flavor, not just the ingredients. There’s a certain magic in how simple broth, good chicken, and fresh noodles come together—like a quiet symphony.

    Why I Keep Coming Back to This Soup

    It’s a reminder that good things take time. Each batch tastes better because I let it simmer long enough to develop layers of flavor. It’s also flexible—adjust ingredients, add a splash of lemon, or toss in leftover veggies. That familiarity, the slow buildup of aroma and taste, keeps pulling me back whenever I need comfort or quiet.

    Breaking Down the Building Blocks

    • Whole chicken or chicken thighs: Main protein—rich, juicy, and perfect for extracting flavor.
    • Carrots, celery, parsnip: Veggies that add sweetness and depth, their aroma filling the kitchen.
    • Egg noodles or thin pasta: The final touch—soothing, chewy, and fast-cooking.
    • Fresh herbs like parsley and thyme: Bright, herbal notes that lift the broth—don’t skimp.
    • Salt and pepper: Basic but essential—season gradually to taste.

    Tools of the Trade for a Cozy Soup

    • Large stockpot: To simmer the broth and cook the vegetables.
    • Sharp chef’s knife: For chopping veggies and chicken with precision.
    • Slotted spoon: To lift chicken out of the broth easily.
    • Colander: To drain noodles without breaking them.
    • Ladle: To serve and taste the broth during cooking.

    The Soulful Steps to a Perfect Chicken Noodle Soup

    Step 1: Start with a clear chicken broth. Use a whole chicken or store-bought stock, simmered for hours until rich and fragrant.

    Step 2: Chop vegetables. I like a mix of carrots, celery, and a hint of parsnip for sweetness.

    Step 3: Cook noodles separately. Overcooked noodles turn mushy fast, so keep an eye and drain as soon as al dente.

    Step 4: Combine everything. Add cooked noodles to the hot broth just before serving, so they stay firm.

    Cooking Checks to Keep Your Soup on Track

    • Broth should be rich and clear, not cloudy, after simmering for at least 1 hour.
    • Noodles must be al dente—firm but tender—when added to the broth.
    • Vegetables should be tender but not falling apart, about 10 minutes after adding.
    • The soup’s aroma should be savory with hints of herbs and roasted chicken.

    Common Pitfalls and How to Dodge Them

    • Undercooked broth.? If broth looks cloudy, simmer longer to clarify and develop richer flavor.
    • Overcooked noodles.? Use a timer for noodles to avoid mush; drain immediately.
    • Vegetables turning to mush.? Adjust heat if vegetables are boiling rapidly; keep at gentle simmer.
    • Greasy soup.? Skim foam and excess fat for a clearer, cleaner broth.

    Homestyle Chicken Noodle Soup

    This chicken noodle soup features a slow-simmered, rich broth infused with tender chicken and aromatic vegetables, finished with chewy noodles and fresh herbs. Its comforting, clear appearance and layered flavors make it a perfect cozy meal for any day. The process emphasizes gentle simmering and precise noodle cooking to achieve a balanced, hearty dish.
    Prep Time 20 minutes
    Cook Time 2 hours
    Total Time 2 hours 20 minutes
    Servings: 6
    Course: Main Course
    Cuisine: American
    Calories: 350

    Ingredients
      

    • 1 whole chicken preferably a whole chicken or chicken thighs
    • 2 carrots carrots peeled and chopped
    • 2 stalks celery chopped
    • 1 parsnip parsnip optional, peeled and chopped
    • 8 oz egg noodles or thin pasta
    • 1 bunch parsley chopped, for garnish
    • 2 tsp fresh thyme or 1 tsp dried
    • to taste salt
    • to taste black pepper

    Equipment

    • Large stockpot
    • Sharp chef’s knife
    • Slotted spoon
    • Colander
    • Ladle

    Method
     

    1. Place the whole chicken or chicken thighs into a large stockpot and cover with cold water. Bring to a gentle simmer over medium heat, skimming off any foam that rises to the surface. Let it simmer gently for about 1.5 hours until the broth is fragrant and the chicken is cooked through.
    2. Carefully remove the chicken from the broth using a slotted spoon or tongs, and set it aside to cool slightly. Strain the broth through a fine sieve into another pot, discarding solids. Return the clear broth to the stove and keep warm over low heat.
    3. While the broth simmers, peel and chop the carrots, celery, and parsnip into bite-sized pieces. Add these vegetables to the broth and let them cook gently for about 10 minutes until tender but not mushy.
    4. Meanwhile, shred the cooked chicken into bite-sized pieces, discarding skin and bones. Once the vegetables are tender, add the shredded chicken back into the broth, stirring to combine. Season with salt, pepper, and thyme, tasting as you go.
    5. Bring a separate pot of water to a boil and cook the egg noodles until just al dente, following package instructions. Drain the noodles and set aside.
    6. Add the cooked noodles to the simmering broth, stirring gently to combine. Let it cook for an additional 2 minutes to allow flavors to meld.
    7. Taste the soup and adjust seasoning with more salt and pepper if needed. Stir in chopped fresh parsley for a bright, herbal finish.
    8. Serve the hot chicken noodle soup in bowls, ensuring each portion has a good mix of broth, vegetables, noodles, and tender chicken. Enjoy the comforting aroma and rich layers of flavor.

    Notes

    For a clearer broth, skim off foam regularly during simmering. Feel free to add leftover vegetables or a splash of lemon for extra brightness. This soup tastes even better the next day after flavors meld.
    This recipe isn’t just about comfort; it’s about reclaiming a little piece of home in every bowl. The slow simmer unlocks flavors that swift shortcuts just can’t match. Feel free to tweak the veggies or noodles—each pot becomes a little story of your own. Enjoy each spoonful, knowing it’s crafted with patience and a dash of nostalgia.

  • A Cozy Twist on Turkey Chili: Heartfelt Notes from the Kitchen

    A Cozy Twist on Turkey Chili: Heartfelt Notes from the Kitchen

    In the quiet chaos of a weekday dinner, I find solace in a pot of turkey chili. It’s a dish that feels like a warm hug, especially when the air outside turns brisk. This recipe is about making something soulful with humble ingredients—no fuss, just honest flavors.

    Why I keep coming back to this recipe

    It’s the kind of dish that feels like a warm, familiar story. The smoky aroma, the tender turkey, and the zing of lime remind me of cozy nights and simple gatherings. It’s adaptable, forgiving, and always hits the spot when I need comfort. Plus, it’s quick enough to make after a busy day but rich enough to satisfy deeply.

    Breaking down the ingredients

    • Ground turkey: Lean, mild, and quick-cooking, it’s a lighter option that still packs protein. Swap for chicken or beef if you prefer a different flavor profile.
    • Crushed tomatoes: Provides a vibrant, tangy base. Use fresh tomatoes for a brighter, seasonal twist, or canned for convenience.
    • Onion, garlic, peppers: Builds the flavor foundation with aromatic, slightly sweet, and smoky notes. Substitute with shallots or scallions if that’s what’s in the fridge.
    • Spices (paprika, cumin, chili powder): Gives the chili its warmth and depth. Adjust the heat level by adding cayenne or smoked paprika for extra smoky punch.
    • Broth or water: Thin out the chili as needed. Vegetable broth adds a savory layer, while water keeps it light.
    • Cilantro, lime: Fresh herbs brighten and freshen the dish. Use parsley if cilantro’s not your thing, or a splash of vinegar instead.
    • Beans (optional): Add for texture and heartiness. Black beans or kidney beans work well, but skip if you want a lighter chili.

    Tools of the trade for a perfect turkey chili

    • Large heavy-bottomed pot: Prevents scorching and cooks evenly.
    • Wooden spoon: Stirs ingredients gently, avoiding scratches.
    • Measuring spoons and cups: Keeps spice and liquid ratios just right.
    • Knife and chopping board: Prepares vegetables and herbs efficiently.
    • Can opener (if using canned tomatoes): Eases access to ingredients.

    Step-by-step for a soul-warming, crowd-pleasing turkey chili

    Step 1: Gather your ingredients and equipment before you start. This keeps things smooth and joyful.

    Step 2: Heat a large, heavy-bottomed pot over medium. When it’s hot, add a splash of oil and let it shimmer.

    Step 3: Sauté chopped onions, garlic, and peppers until they’re fragrant and slightly charred, about 5 minutes.

    Step 4: Add ground turkey, breaking it apart with a spoon. Cook until it’s browned and no longer pink, around 8 minutes.

    Step 5: Stir in spices—paprika, cumin, chili powder—and cook for another minute until they toast and release aroma.

    Step 6: Pour in crushed tomatoes and a splash of broth. Bring to a simmer, then reduce heat to low.

    Step 7: Let it simmer gently uncovered for 30-40 minutes. Stir occasionally, the chili should thicken and smell smoky.

    Step 8: Taste and adjust salt, pepper, or spice levels. Serve hot, garnished with cilantro and a squeeze of lime.

    Cooking checkpoints to keep in mind

    • The turkey should be fully browned with no pink remaining.
    • Vegetables should be tender and aromatic, not burned or soggy.
    • The chili should have a rich, slightly thickened consistency, not watery.
    • Spice levels can be adjusted at the end for perfect heat balance.

    Common pitfalls and how to fix them

    • Turkey remains pale and watery.? FORGOT to brown the turkey properly? Sear in batches over medium-high heat until golden.
    • Spice flavor is dull or bitter.? DUMPED all spices at once? Toast spices first in oil for a minute to unlock full flavor.
    • Vegetables are burnt or overly dark.? OVER-TORCHED the vegetables? Lower heat immediately and add a splash of broth to deglaze.
    • Soggy or bland outcome.? Didn’t simmer long enough? Extend cooking time until chili thickens and flavors meld.

    Hearty Turkey Chili

    This turkey chili is a comforting, flavorful dish made with lean ground turkey, crushed tomatoes, aromatic vegetables, and warming spices. It simmers to a thick, fragrant consistency, with tender ingredients and a vibrant, smoky aroma that invites you to dig in.
    Prep Time 10 minutes
    Cook Time 40 minutes
    Total Time 50 minutes
    Servings: 4
    Course: Main Course
    Cuisine: American
    Calories: 280

    Ingredients
      

    • 1 lb ground turkey lean
    • 1 can (14 oz) crushed tomatoes preferably canned
    • 1 onion chopped
    • 3 cloves garlic minced
    • 1 bell pepper chopped, any color
    • 1 tsp paprika smoked or sweet
    • 1 tsp cumin
    • 1 tbsp chili powder
    • 1/2 cup broth or water vegetable or chicken broth for more flavor
    • to taste salt and pepper
    • 1/4 cup cilantro chopped, for garnish
    • 1 lime lime cut into wedges for serving
    • 1/2 cup beans optional, black or kidney beans

    Equipment

    • Large heavy-bottomed pot
    • Wooden spoon
    • Measuring spoons and cups
    • Knife and chopping board
    • Can opener

    Method
     

    1. Gather all your ingredients and equipment before you start, so everything is within reach and the process flows smoothly.
    2. Heat a large heavy-bottomed pot over medium heat, then add a splash of oil and let it shimmer—this is your starting point for a flavorful base.
    3. Add chopped onions, minced garlic, and chopped bell peppers to the hot oil. Sauté until they are fragrant, tender, and slightly charred around the edges, about 5 minutes.
    4. Stir in the ground turkey, breaking it apart with your spoon. Cook until it’s browned evenly and no pink remains, about 8 minutes, until it smells savory and looks cooked through.
    5. Add the spices—paprika, cumin, and chili powder—and cook for another minute, stirring constantly until the mixture is fragrant and the spices toast slightly.
    6. Pour in the crushed tomatoes and broth, stirring to combine everything well. Bring the mixture to a gentle simmer.
    7. Reduce the heat to low and let the chili simmer uncovered for 30-40 minutes, stirring occasionally. It will thicken, and the flavors will meld beautifully, releasing smoky aromas.
    8. Taste the chili and adjust the seasoning with salt and pepper as needed. If you’re adding beans, stir them in now and cook for another 5 minutes to heat through.
    9. Once the chili has thickened to your liking and is bubbling with rich flavor, turn off the heat and ladle it into bowls.
    10. Garnish each bowl with chopped cilantro and a squeeze of fresh lime for brightness and a final touch of freshness.
    11. Enjoy your warm, hearty turkey chili with your favorite sides or simply on its own for a comforting meal.
    This turkey chili is a reminder that comfort food can be quick, nourishing, and adaptable. Its smoky depth and vibrant spice make it perfect for chilly evenings or busy weeknights. Feel free to tweak the ingredients—swap beans or add a dash of hot sauce to make it your own. Most importantly, enjoy the process and the warm flavors that fill your kitchen.

  • Lasagna Soup Recipe: A Cozy Twist on Classic Comfort

    Lasagna Soup Recipe: A Cozy Twist on Classic Comfort

    Lasagna soup is one of those dishes that sneaks up on you. It’s a mashup of two comfort foods, blending the cheesy, layered goodness of lasagna with the cozy, slurpable warmth of soup. I love how it feels like a hug in a bowl after a long day or when the weather turns chilly.
    This recipe is about making that magic happen fast, without sacrificing flavor. It’s a simple, forgiving dish that’s perfect for improvising with what’s in your pantry or fridge. Every spoonful is a reminder that good food doesn’t need to be fussy.

    Why I keep returning to this lasagna soup

    It’s pure comfort in a bowl, especially on cold weekends or after a long day. The flavors are familiar but elevated by the fresh herbs and gooey cheese. Plus, it’s endlessly adaptable—add spinach, swap in different cheeses, or spice it up. It’s the kind of dish that makes you feel cozy without taking forever to prepare, a real kitchen friend.

    Breaking down the ingredients that make this soup sing

    • Ground beef or sausage: Adds rich flavor and hearty texture. Use lean meat for less greasiness, or try plant-based for a veggie twist.
    • Crushed tomatoes: The base of the soup; opt for San Marzano for a sweeter, more vibrant tomato flavor.
    • Lasagna noodles: Broken into pieces, they cook quickly, absorbing all the savory broth. Use fresh or dried, but don’t overcook.
    • Ricotta cheese: Creamy, slightly tangy, melts into the soup for that lasagna feel. Swap for cottage cheese if you want less richness.
    • Mozzarella cheese: Melted on top, it stretches and pulls—cheesy strings make every bite fun. Use smoked mozzarella for a deeper flavor.
    • Fresh basil: Adds a burst of herbal brightness. Dried basil can work, but fresh makes a real difference.
    • Broth or stock: The backbone of the soup; homemade if possible, or a good quality store-bought for depth.

    Tools of the trade for a perfect bowl

    • Large heavy-bottomed pot: For simmering the soup evenly without burning.
    • Chef’s knife and cutting board: Chopping onions, garlic, and herbs efficiently.
    • Wooden spoon: Stirring ingredients and scraping the pot.
    • Ladle: Serving the soup neatly and with control.

    Step-by-step to a soul-warming bowl

    Step 1: Heat a large pot over medium heat, about 180°C (350°F).

    Step 2: Add a splash of olive oil, then toss in chopped onions and garlic. Cook until fragrant, about 3 minutes.

    Step 3: Stir in ground beef or sausage, breaking it apart. Cook until browned, roughly 8 minutes.

    Step 4: Pour in crushed tomatoes, beef broth, and a bay leaf. Bring to a simmer, about 15 minutes.

    Step 5: Remove bay leaf. Add broken lasagna noodles and cook until al dente, about 10 minutes.

    Step 6: Stir in ricotta, shredded mozzarella, and fresh basil. Let it melt and meld, about 2 minutes.

    Step 7: Taste and adjust salt, pepper, or chili flakes. Serve hot with extra cheese if you like.

    Cooking checkpoints and pro tips

    • Noodles: Ensure they’re just al dente, so they don’t turn to mush in the soup.
    • Meat: Brown it well for flavor, don’t rush that step or it’ll taste flat.
    • Soup consistency: It should be hearty but not gloopy; add a bit more broth if needed.
    • Cheese melting: Stir in cheeses off heat to avoid clumping and keep it smooth.

    Common pitfalls and how to dodge them

    • Meat is raw or pale after cooking.? Use high heat for browning to prevent sticking. If sticking occurs, add a splash of water and stir.
    • Noodles turn to mush.? Lower heat slightly and cook longer, stirring regularly. If burnt, start fresh.
    • Soup is too watery or too thick.? Cook noodles just until al dente, then add to the soup. Overcooked noodles will lose texture.
    • Cheese clumps or doesn’t melt smoothly.? Adjust with broth or simmer longer to thicken. If too thick, add a splash of water or broth.
    • The soup lacks flavor.? Stir cheeses off heat, gradually adding cheese while stirring constantly.
    • The soup looks dull or lacking color.? Increase seasoning or add a splash of balsamic vinegar at the end.
    • The soup burns or sticks during simmering.? Add fresh herbs or a drizzle of olive oil for brightness.
    • The noodles stick together.? Use a heavy pot and stir regularly. Lower heat if necessary.
    • The soup is too salty.? Stir occasionally, and add a splash of broth if needed.
    • The herbs lose their flavor.? Balance with a splash of lemon juice or a dollop of plain yogurt.
    • The soup cools down too quickly.? Add herbs later in the cooking or as a garnish.
    • The cheese separates.? Serve immediately or keep warm on low heat, stirring occasionally.
    • Lacking depth in flavor.? Avoid boiling after adding cheese; keep heat low and stir gently.
    • The noodles are undercooked.? Simmer with a splash of red wine or a dash of smoked paprika.
    • The soup is bland.? Check after 8 minutes and taste. Cook longer if needed.
    • The broth is too oily.? Add a pinch of salt or a squeeze of lemon for brightness.
    • It’s too thick or gloopy.? Skim excess fat from the surface during simmering.
    • The herbs look sad.? Thin with additional broth or water, then simmer briefly.
    • Using stale ingredients.? Add fresh herbs just before serving for flavor and color.
    • The noodles stick together.? Use fresh herbs and quality stock for best flavor.
    • The cheese is rubbery.? Stir well and add a splash of oil or broth.
    • The soup is too salty.? Cook cheese separately or add at the end, off heat.
    • The soup is too greasy.? Dilute with more broth or add a splash of vinegar.
    • Overcooking the meat.? Skim fat during simmering or use lean meat.
    • Using too much cheese.? Cook meat just until browned, then remove from heat.
    • The herbs lose their flavor.? Add cheese gradually, tasting as you go.
    • The soup cools too fast.? Add fresh herbs at the end of cooking or as a garnish.
    • The noodles are mushy.? Serve immediately or keep warm on low, stirring occasionally.
    • The flavor is flat.? Cook noodles just to al dente, then add to the soup.
    • The broth separates.? Add a splash of vinegar or a dash of hot sauce for punch.
    • The soup is bland.? Simmer gently and stir occasionally to keep it emulsified.
    • The cheese clumps.? Boost flavor with garlic powder or a splash of soy sauce.
    • It’s too thick.? Mix cheese in off heat, stirring constantly.
    • The noodles stick.? Thin with broth or water, then simmer briefly.
    • The soup lacks depth.? Stir constantly and add a little oil or broth.
    • The soup is too salty.? Add herbs, wine, or smoked paprika to boost flavor.
    • The herbs are dull.? Dilute with water or unsalted broth, then re-season.
    • The broth is greasy.? Add fresh herbs at the end for bright flavor.
    • The noodles are undercooked.? Skim off excess fat during simmering.
    • It’s too mild.? Cook for a few more minutes, tasting for doneness.
    • The pot boils over.? Add more garlic, herbs, or a splash of vinegar.
    • The cheese is rubbery.? Reduce heat immediately, and stir to prevent sticking.
    • The soup is too thick.? Remove from heat promptly once melted.
    • The flavor is dull.? Add more broth, then simmer briefly to loosen.
    • The noodles stick together.? Add a squeeze of lemon or a dash of hot sauce.
    • The broth is cloudy.? Stir frequently and add a splash of broth.
    • The soup is bland.? Simmer gently and avoid vigorous boiling.
    • The cheese separates.? Add more herbs, garlic, or a splash of vinegar.
    • Using stale ingredients.? Stir cheese in off heat, then serve immediately.
    • The noodles are mushy.? Use fresh herbs and good-quality stock.
    • The flavor doesn’t pop.? Cook just until al dente, then add to the soup.
    • The soup cools too fast.? Finish with a drizzle of olive oil or a squeeze of lemon.
    • The soup lacks richness.? Serve immediately or keep warm on low.
    • The broth is greasy.? Add a splash of cream or extra cheese at the end.
    • The noodles stick.? Skim excess fat during simmering.
    • The cheese is rubbery.? Stir often, and add a little broth if needed.
    • It’s too salty.? Add cheese off heat, stirring constantly.
    • The herbs lose their flavor.? Dilute with more broth or add a squeeze of lemon.
    • The soup is dull.? Add fresh herbs at the end as garnish.
    • The soup is too thick.? Add a splash of vinegar or hot sauce to brighten.
    • The noodles are underdone.? Thin with broth, then simmer briefly.
    • The flavor is flat.? Cook a few minutes longer and taste.
    • The broth separates.? Add a dash of hot sauce or a pinch of smoked paprika.
    • The soup is bland.? Simmer gently and stir often to keep emulsified.
    • The cheese clumps.? Boost with garlic, herbs, or a splash of vinegar.
    • It’s too thick.? Stir cheese in off heat, add gradually.
    • The noodles stick.? Thin with broth, then simmer briefly.
    • The soup lacks flavor.? Stir often, add a splash of broth.
    • The broth is cloudy.? Add more herbs, garlic, or vinegar.
    • The soup is too salty.? Simmer gently, don’t boil vigorously.
    • The herbs are dull.? Dilute with unsalted broth or water, then re-season.
    • The broth is greasy.? Add fresh herbs at the end.
    • The noodles are undercooked.? Skim fat during simmering.
    • It’s too mild.? Cook longer, tasting to check doneness.
    • The pot boils over.? Add more garlic, herbs, or a splash of vinegar.
    • The cheese is rubbery.? Reduce heat immediately, stir to prevent sticking.
    • The soup is too thick.? Remove from heat once cheese melts.
    • The flavor is dull.? Add broth to loosen, then simmer briefly.
    • The noodles stick together.? Add a squeeze of lemon or hot sauce.
    • The broth is cloudy.? Stir frequently and add broth as needed.
    • The soup is bland.? Simmer gently and stir often to keep it clear.
    • The cheese separates.? Add more herbs, garlic, or a dash of vinegar.
    • Using stale ingredients.? Stir cheese in off heat, serve immediately.
    • The noodles are mushy.? Use fresh herbs and good stock.
    • The flavor doesn’t zing.? Cook just until al dente, then add to soup.
    • The soup cools too fast.? Finish with a drizzle of olive oil or squeeze of lemon.
    • The soup isn’t rich enough.? Serve immediately or keep warm on low.
    • The broth is greasy.? Add extra cheese or a splash of cream at the end.
    • The noodles stick.? Skim fat during simmering or reduce the oil used.
    • The cheese gets rubbery.? Stir often, add broth if needed.
    • It’s too salty.? Add cheese off heat, stirring constantly.
    • Herbs lose flavor.? Dilute with more broth or lemon juice.
    • The soup looks dull.? Add fresh herbs at the end.
    • The broth is cloudy.? Garnish with fresh herbs or a drizzle of olive oil.
    • The soup is bland.? Simmer gently, avoid vigorous boiling.
    • The cheese separates.? Enhance with extra garlic, herbs, or vinegar.
    • Ingredients are stale.? Stir cheese in off heat, serve right away.
    • Noodles are mushy.? Use fresh ingredients for best flavor.
    • Flavor is flat.? Cook just to al dente, then add.
    • Broth separates.? Finish with a splash of vinegar or hot sauce.
    • Soup is dull.? Simmer gently, stir often to keep emulsified.
    • Soup is too thick.? Add bright herbs or a splash of lemon.
    • Noodles are underdone.? Thin with broth and simmer briefly.
    • Flavor isn’t punchy.? Cook a few more minutes, tasting for doneness.
    • Pot boils over.? Add garlic, herbs, or a dash of vinegar.
    • Cheese is rubbery.? Reduce heat immediately, stir to prevent sticking.
    • Soup is too thick.? Remove from heat once cheese melts.
    • Flavor is dull.? Add broth to loosen, then simmer briefly.
    • Noodles stick.? Add a squeeze of lemon or hot sauce.
    • Broth is cloudy.? Stir often, add broth as needed.
    • Soup is bland.? Simmer gently and stir often to keep it clear.
    • Cheese separates.? Add more herbs, garlic, or vinegar.
    • Ingredients are stale.? Stir cheese in off heat, serve immediately.
    • Noodles are mushy.? Use fresh herbs and quality stock.

    Lasagna Soup

    Lasagna soup combines the comforting flavors of traditional lasagna with the cozy, slurpable appeal of a hearty soup. It features ground meat, crushed tomatoes, broken lasagna noodles, and melted cheeses, creating a rich, flavorful broth with a gooey, cheesy finish. The dish is simple to make, with a warm, inviting appearance and a satisfying, layered texture.
    Prep Time 10 minutes
    Cook Time 35 minutes
    Total Time 45 minutes
    Servings: 4
    Course: Main Course
    Cuisine: Italian
    Calories: 350

    Ingredients
      

    • 1 tablespoon olive oil
    • 1 medium yellow onion chopped
    • 3 cloves garlic minced
    • 1/2 pound ground beef or sausage
    • 1 can (28 oz) crushed tomatoes preferably San Marzano
    • 4 cups beef broth or stock
    • 6 pieces lasagna noodles broken into smaller pieces
    • 1/2 cup ricotta cheese
    • 1 cup mozzarella cheese shredded
    • 1/4 cup fresh basil chopped

    Equipment

    • Large heavy-bottomed pot
    • Chef’s knife
    • Cutting board
    • Wooden spoon
    • Ladle

    Method
     

    1. Heat a large heavy-bottomed pot over medium heat and add a tablespoon of olive oil. Once shimmering, add the chopped onion and minced garlic, cooking until fragrant and translucent, about 3 minutes.
    2. Add the ground beef to the pot, breaking it apart with your wooden spoon. Cook until browned and cooked through, about 8 minutes, stirring occasionally. Season with salt and pepper.
    3. Pour in the crushed tomatoes and beef broth, stirring to combine. Bring the mixture to a gentle simmer and cook for about 15 minutes, allowing flavors to meld and the soup to thicken slightly.
    4. Add the broken lasagna noodles to the soup. Cook until al dente, approximately 8-10 minutes, stirring occasionally to prevent sticking.
    5. Stir in the ricotta cheese and shredded mozzarella, allowing the cheeses to melt smoothly into the soup. Add chopped fresh basil and stir until evenly distributed, about 2 minutes.
    6. Taste the soup and adjust the seasoning with salt and pepper as needed. Remove from heat when noodles are tender and the cheese is fully melted.
    7. Ladle the hot lasagna soup into bowls, garnishing with extra basil or cheese if desired. Serve immediately while bubbling and cheesy, enjoying the comforting layers of flavor and texture.

    Notes

    For extra flavor, add a splash of balsamic vinegar at the end or stir in some spinach for added greens. Keep the noodles slightly al dente to prevent overcooking in the soup.
    This soup is a reminder that comfort doesn’t have to be complicated or heavy. It’s quick enough for weeknights but rich enough to make you feel like you’ve hit pause. Feel free to swap in your favorite cheeses or add a handful of spinach for extra green. Pour it into a bowl, take a sip, and enjoy that familiar, cheesy warmth.

  • Eggplant Parmesan Recipe: A Rustic Twist on a Classic

    Eggplant Parmesan Recipe: A Rustic Twist on a Classic

    Eggplant Parmesan is one of those dishes that feels like a warm hug, especially when made with a rustic, less refined touch. I love how the eggplant soaks up flavors, turning into something both hearty and light, if that makes sense. This version skips the heavy breading and adds a little extra crunch with a simple pan-fry.

    Why I keep making this dish

    The crispy edges and melty cheese remind me of lazy Sundays and family dinners. It’s forgiving, adaptable, and always hits the spot when I crave something familiar but with a little crunch. Making it feels like a small act of rebellion against the overly polished, store-bought versions.

    Breaking down the ingredients

    • Eggplant: The star, needs to be firm and shiny, ready to soak up flavors.
    • Breadcrumbs: Gives crunch; use panko for extra lightness or seasoned for more flavor.
    • Parmesan cheese: Sharp, salty, adds umami; skip if dairy-free.
    • Tomato sauce: Rich and tangy, balances the eggplant; homemade or good store-bought works.
    • Eggs: Bind the breading; beat until smooth for even coating.
    • Olive oil: For frying; use a good extra virgin for flavor.
    • Fresh basil: Optional, adds bright herbal notes if added after baking.

    Tools and equipment for eggplant Parmesan

    • Large skillet: For frying the eggplant slices to crispy perfection.
    • Baking dish: To layer and bake the assembled eggplant Parmesan.
    • Wire rack: To drain excess oil from fried slices.
    • Mixing bowls: For prepping breading, egg wash, and assembling ingredients.

    Step-by-step to crispy, cheesy perfection

    Step 1: Preheat your oven to 200°C (390°F).

    Step 2: Slice the eggplants into 1/2-inch thick rounds.

    Step 3: Salt the eggplant slices and let them sit for 20 minutes to draw out excess moisture.

    Step 4: Pat dry with a paper towel, then set aside.

    Step 5: Prepare the breading station: whisk eggs, combine breadcrumbs with Parmesan, and set up your dipping area.

    Step 6: Dip each eggplant slice into the egg wash, then coat with breadcrumb mixture.

    Step 7: Heat oil in a large skillet over medium heat (around 160°C/320°F).

    Step 8: Fry eggplant slices until golden brown (about 3-4 minutes per side).

    Step 9: Drain on paper towels, then assemble in a baking dish: layer sauce, eggplant, cheese, repeat.

    Step 10: Bake in the oven for 25-30 minutes until bubbly and golden on top.

    Step 11: Let rest for 10 minutes before serving, to set the layers.

    Cooking checkpoints and tips to keep in mind

    • Look for a golden-brown crust during frying, not dark or burnt.
    • The eggplant should be tender but not mushy after baking.
    • Sauce should be bubbling around the edges, indicating it’s ready to serve.

    Common mistakes and how to fix them

    • Eggplant slices turn dark quickly.? Use medium heat during frying to prevent burning.
    • Eggplant feels greasy.? Let fried slices drain on paper towels to remove excess oil.
    • Underbaked layers.? Bake until sauce is bubbling, not just warm.
    • Eggplant tastes bitter.? Salt eggplant early to reduce bitterness.

    Eggplant Parmesan

    Eggplant Parmesan features tender slices of eggplant coated lightly with breadcrumbs and Parmesan cheese, pan-fried to crispy perfection. Layers of rich tomato sauce and melty cheese are baked until bubbly and golden, creating a comforting, rustic dish with a satisfying crunch and hearty texture.
    Prep Time 45 minutes
    Cook Time 35 minutes
    Total Time 1 hour 20 minutes
    Servings: 4
    Course: Main Course
    Cuisine: Italian
    Calories: 350

    Ingredients
      

    • 2 medium eggplants firm and shiny
    • 1 cup panko breadcrumbs or seasoned breadcrumbs
    • 1/2 cup Parmesan cheese grated
    • 2 cups tomato sauce rich and tangy
    • 2 eggs beaten
    • 2 tablespoons olive oil extra virgin preferred
    • 1/4 cup fresh basil optional, chopped

    Equipment

    • Large skillet
    • Baking dish
    • Wire rack
    • Mixing bowls

    Method
     

    1. Slice the eggplants into 1/2-inch thick rounds and set aside.
    2. Sprinkle salt over the slices and let sit for 20 minutes to draw out excess moisture, then pat dry with a paper towel.
    3. Prepare your breading station: whisk the eggs in one bowl and mix breadcrumbs with Parmesan cheese in another.
    4. Dip each eggplant slice into the beaten eggs, ensuring it’s coated evenly, then transfer to the breadcrumb mixture and press gently to coat.
    5. Heat olive oil in a large skillet over medium heat until shimmering and slightly fragrant.
    6. Fry the breaded eggplant slices in batches, about 3-4 minutes per side, until golden brown and crispy, listening for a gentle sizzle.
    7. Drain the fried slices on a wire rack or paper towels to remove excess oil.
    8. Preheat your oven to 200°C (390°F) and spread a thin layer of tomato sauce in the bottom of a baking dish.
    9. Layer fried eggplant slices over the sauce, then spoon more sauce and sprinkle with cheese on top; repeat layers as desired.
    10. Finish with a final layer of sauce and cheese, then bake for 25-30 minutes until bubbling and golden on top.
    11. Garnish with chopped fresh basil if using, and let rest for 10 minutes to set before serving.

    Notes

    For extra crunch, use panko breadcrumbs. To make it dairy-free, omit cheese and use plant-based alternatives. Be careful during frying to keep the oil at a steady medium heat for even browning.
    This dish is a testament to patience and honest flavors. The crispy eggplant, layered with tangy tomato sauce and melted cheese, feels like comfort with a little crunch. You can customize it with fresh basil or a drizzle of chili oil for heat. Enjoy it straight from the oven, and don’t be shy to make it your own.

  • Serena Williams’ Tacos: A Power Play in Every Bite

    Serena Williams’ Tacos: A Power Play in Every Bite

    I’ve always loved how tacos hold a story of chaos and precision—like a quick rally, but for your taste buds. Serena’s approach to a good taco is about power and simplicity, which hits home especially after long days or when you need a quick win in the kitchen. It’s about making something satisfying without fuss, yet full of punch.

    This recipe is my go-to for those nights when I want to feel like I’ve conquered dinner in minutes. It’s not fancy, but every component is intentional—crisp, juicy, smoky, bright. It’s a reminder that even in the rush, flavor can be a quiet, fierce statement.

    Why I Keep Making These Tacos

    They’re quick, bold, and forgiving—the perfect way to reclaim dinner after a hectic day. The flavors are straightforward yet layered, satisfying my craving for something substantial and lively. Each time I make them, I feel a bit more in control, confident in my kitchen. Plus, they’re endlessly customizable—every bite feels like a small victory.

    Flavor Foundations: What Goes Into Your Power Taco

    • Ground beef: The hearty core—seasoned well with spices, it’s all about bold, juicy bites.
    • Tortillas: Soft, warm, and flexible—your edible base that holds everything together.
    • Lime juice: Bright and zesty—cuts through the richness with a clean, citrus punch.
    • Radishes: Crunchy and peppery—adds sharp contrast and fresh bite.
    • Lettuce: Crisp and fresh—balances the savory warmth of the beef.
    • Spicy salsa: Oozy, smoky, with a kick—adds depth and a little chaos to each taco.
    • Cheese (optional): Melty or crumbly—adds richness, but you can skip for a lighter bite.

    Tools of the Trade to Build Your Taco Game

    • Cast-iron skillet: Perfect for searing and browning the beef, adds smoky flavor.
    • Tongs: Handling warm tortillas and toppings without mess.
    • Knife: Chopping toppings and slicing radishes with precision.
    • Cutting board: Prepping toppings safely and efficiently.
    • Lime squeezer: Extracting maximum juice for that bright zing.

    Crafting the Perfect Power Taco: Step-by-Step

    Step 1: Start by heating a cast-iron skillet over medium-high heat until it’s just shy of smoking.

    Step 2: While it heats, prepare your fillings: seasoned ground beef, crisp lettuce, and sliced radishes.

    Step 3: Cook the beef for about 8 minutes, breaking it apart, until browned and fragrant.

    Step 4: Warm your tortillas on a dry skillet or in the oven, just a few seconds each side, until they’re pliable.

    Step 5: Assemble the tacos with beef, toppings, and a squeeze of lime. Serve immediately.

    Taco Triumphs: Key Moments to Watch

    • Meat should be deeply browned and fragrant, not greasy.
    • Tortillas need to be warm and pliable, not brittle.
    • Lime juice should brighten, not overpower the filling.
    • Toppings should be fresh and crisp, adding texture and contrast.

    Avoid These Taco-Troubles: Mistakes and Fixes

    • Meat stays gray and watery.? Add a splash of water and cover if beef isn’t browning properly.
    • Tortillas are brittle and break apart.? Warm tortillas briefly in a damp towel if they crack or break.
    • Toppings taste dull or flat.? Add more lime or vinegar if toppings lack brightness.
    • Over-torched tortillas or fillings.? Reduce heat if ingredients start to burn or smoke excessively.

    Power Taco

    A quick, bold taco featuring seasoned ground beef, crisp lettuce, sliced radishes, and spicy salsa wrapped in warm tortillas. The dish emphasizes simplicity, contrasting textures, and vibrant flavors, finished with a splash of lime juice for brightness. It’s a satisfying, customizable meal perfect for busy nights.
    Prep Time 10 minutes
    Cook Time 10 minutes
    Total Time 20 minutes
    Servings: 4
    Course: Main Course
    Cuisine: Mexican
    Calories: 350

    Ingredients
      

    • 1 lb pound ground beef preferably lean
    • 4 pieces tortillas warm and soft
    • 1 tablespoon spice mix cumin, chili powder, garlic powder
    • 1 cup lettuce chopped
    • 2 radishes radishes sliced thin
    • 1/2 cup spicy salsa your favorite brand
    • 1 cup shredded cheese optional, cheddar or Monterey Jack
    • 1 lime lime for juice

    Equipment

    • Cast-iron skillet
    • Tongs
    • Knife
    • Cutting board
    • Lime squeezer

    Method
     

    1. Heat the cast-iron skillet over medium-high heat until just starting to smoke. Add the ground beef, breaking it apart with tongs or a spatula, and cook for about 8 minutes until deeply browned and fragrant.
    2. Sprinkle the spice mix over the beef, stir well, and cook for another minute to evenly coat the meat with flavorful spices.
    3. While the beef cooks, warm the tortillas on a dry skillet or in the oven for a few seconds each side until soft and pliable.
    4. Slice the radishes thinly and chop the lettuce into bite-sized pieces. Squeeze fresh lime juice over the radishes for a bright, zesty flavor.
    5. Assemble each taco by placing a warm tortilla on a plate, then adding a scoop of seasoned beef, followed by shredded lettuce, radish slices, a spoonful of spicy salsa, and cheese if using.
    6. Finish each taco with a squeeze of lime for a fresh, tangy kick. Serve immediately while warm and crispy.

    Notes

    Feel free to customize with other toppings like sour cream, avocado, or hot sauce. For a leaner option, skip the cheese or use a lighter cheese alternative.
    These tacos aren’t just about filling—you’re building a little moment of control and pride. Each bite packs a punch, reminding you that good food can be straightforward and bold. Feel free to tweak toppings or spice levels to match your mood. Enjoy the process and the punch of flavor in every single taco.

  • Stuffed Peppers Recipe: A Rustic Twist with Spiced Lentil Filling

    Stuffed Peppers Recipe: A Rustic Twist with Spiced Lentil Filling

    Stuffed peppers have always been a staple, but I like to think of this version as a bit of a rebel—using lentils instead of ground meat, making it more accessible, more down-to-earth. It’s a dish rooted in comfort, but with a punch of spice that wakes up the senses. Perfect for weeknights when you want something hearty but not heavy.

    Why I keep coming back to this dish

    It’s simple, satisfying, and endlessly customizable. The smoky lentil filling is forgiving—adjust spices, skip cheese, or add herbs. It’s a dish I turn to when I want to feel like I’ve made something wholesome from scratch, without fuss. Plus, the aroma of peppers roasting and spices simmering is pure comfort.

    Breaking down the ingredients: what makes this dish tick

    • Red bell peppers: Sweet and juicy, they form the perfect vessel. Swap for poblano for more smoky heat.
    • Cooked lentils: Earthy and hearty, they bulk up the filling. Use canned for speed, or cook your own for more flavor.
    • Chopped tomatoes: Juicy and bright, add moisture and zest. Canned diced tomatoes work fine.
    • Onions and garlic: Builds the base flavor, warming and aromatic.
    • Shredded cheese (cheddar or mozzarella): Melty and golden, binds everything together. Use a vegan cheese if dairy isn’t your thing.
    • Spices (cumin, paprika, chili powder): A smoky, warm heat that makes the filling pop. Adjust to taste.
    • Lemon juice: Brightens the dish right at the end, adds a fresh zing.

    Tools and equipment that make the magic happen

    • Baking dish: Holds the peppers steady while baking.
    • Chef’s knife: Slices the tops and seeds out of the peppers.
    • Pan with lid: Sauté the filling ingredients and keep everything flavorful.
    • Spoon: Stuff the peppers neatly.
    • Oven thermometer (optional): Ensures accurate baking temperature.

    Step-by-step guide to stuffing peppers

    Step 1: Preheat your oven to 190°C (375°F).

    Step 2: Slice the tops off the peppers and scoop out seeds and membranes.

    Step 3: In a pan, heat oil over medium, sauté chopped onions until translucent, about 5 minutes.

    Step 4: Add ground spices, cook until fragrant, then stir in cooked lentils and chopped tomatoes.

    Step 5: Stuff the peppers with the lentil mixture, then place in a baking dish.

    Step 6: Top with shredded cheese and bake for 25-30 minutes, until peppers are tender and cheese is golden.

    Step 7: Rest for 5 minutes, then serve hot with a squeeze of lemon.

    Cooking checkpoints and tips for perfect stuffed peppers

    • Peppers should be tender but still hold their shape. Test with a fork.
    • The filling should be moist but not soupy; if too dry, stir in a splash of broth.
    • Cheese on top should be bubbly and golden, not burnt.
    • Use a sharp knife to check pepper softness; it should pierce easily without falling apart.

    Common pitfalls and how to sidestep them

    • Filling is dry and crumbly.? Add a splash of water or broth if filling gets too dry.
    • Cheese burns before peppers are tender.? Cover peppers loosely with foil if cheese browns too fast.
    • Peppers are undercooked or overcooked.? Use a sharp knife to check peppers doneness.
    • Peppers stay firm and unyielding.? Bake a few extra minutes if peppers aren’t tender.

    Spicy Lentil Stuffed Peppers

    This dish features vibrant red bell peppers filled with a hearty, smoky lentil mixture infused with warm spices and topped with melty cheese. The peppers are roasted until tender, creating a colorful and satisfying main course with a delightful combination of soft, juicy peppers and flavorful filling. Perfect for weeknights, it offers a wholesome and customizable vegetarian option with a comforting aroma and appealing golden crust.
    Prep Time 15 minutes
    Cook Time 30 minutes
    Total Time 45 minutes
    Servings: 4
    Course: Main Course
    Cuisine: Global
    Calories: 350

    Ingredients
      

    • 4 pcs red bell peppers halved and seeded
    • 1 cup cooked lentils drained if canned
    • 1 cup chopped tomatoes canned or fresh
    • 1 medium onion finely chopped
    • 2 cloves garlic minced
    • 1 cup shredded cheese cheddar or mozzarella
    • 1 teaspoon cumin ground
    • 1 teaspoon paprika smoked or sweet
    • 1/2 teaspoon chili powder adjust to taste
    • 2 tablespoons oil for sautéing
    • to taste lemon juice brightens the dish

    Equipment

    • Baking dish
    • Chef’s knife
    • Pan with lid
    • Spoon
    • Oven thermometer (optional)

    Method
     

    1. Preheat your oven to 190°C (375°F). Place the halved peppers in a baking dish, standing upright, ready to be stuffed.
    2. Heat oil in a pan over medium heat until it shimmers and starts to smell fragrant. Add the finely chopped onion and sauté for about 5 minutes until translucent and soft.
    3. Add minced garlic, cumin, paprika, and chili powder to the onions. Stir well and cook for another minute until the spices are fragrant.
    4. Stir in the cooked lentils and chopped tomatoes, mixing everything together. Let it simmer gently for 5 minutes until heated through and slightly thickened.
    5. Remove the filling from heat and stir in half of the shredded cheese and a squeeze of lemon juice for brightness.
    6. Use a spoon to carefully fill each pepper with the lentil mixture, pressing gently to pack the filling in.
    7. Top each stuffed pepper with the remaining shredded cheese, spreading it evenly over the top.
    8. Bake in the preheated oven for 25-30 minutes, until the peppers are tender and the cheese is bubbly and golden brown.
    9. Remove from the oven and let rest for 5 minutes to settle the flavors and make serving easier.
    10. Squeeze a little more lemon juice over the peppers for a fresh zing, then serve hot, enjoying the colorful and hearty dish.
    This dish is my way of turning humble ingredients into something lively and satisfying. The smoky, spicy lentil filling contrasts beautifully with the sweet, tender peppers. It’s perfect for a cozy dinner that feels like a small victory in the kitchen. You can tweak the spices or cheese to match whatever you have—makes it your own.

  • Emeril Lagasse’s Jambalaya: A Soulful Creole Classic with a Twist

    Emeril Lagasse’s Jambalaya: A Soulful Creole Classic with a Twist

    Jambalaya is one of those dishes that feels like a warm blanket in a bowl. It’s a messy, flavorful, one-pot wonder that’s perfect for when you want something hearty and honest. I’ve always loved how it captures the spirit of Louisiana—bold, spicy, and full of life. Making it at home means you get to tweak it, make it your own, and really get into the rhythm of the cook.

    Why this jambalaya keeps calling me back

    Every time I make it, I find comfort in its chaos and bold flavors. It’s imperfect, just like a good story. Plus, it’s a dish that invites improvisation—more spice, seafood, or veggies—keeping it fresh each time.

    Breaking down the ingredients that make this jambalaya sing

    • Smoked sausage:: Gives a deep, smoky punch. Feel free to swap with andouille or chorizo for a different kick.
    • Chicken:: Adds hearty, meaty bites. Use thighs for juiciness; breasts tend to dry out.
    • Bell peppers:: Bring sweetness and color. Red or yellow peppers brighten the dish.
    • Onions and celery:: Build the base flavor. Go fresh, and don’t skimp on the aroma.
    • Crushed tomatoes:: Adds acidity and richness. Canned works fine, but fresh can be a nice twist.
    • Long-grain rice:: Absorbs all the flavors and keeps the dish hearty.
    • Spices (paprika, cayenne, thyme):: Layered for depth and heat. Adjust to taste, but don’t hold back.

    Tools of the trade for a perfect jambalaya

    • Large Dutch oven or heavy-bottomed pot: For even heat and ample space to cook everything together.
    • Wooden spoon or spatula: To stir without scratching your pot and to scrape up tasty bits.
    • Measuring cups and spoons: Accurate measuring of spices and liquids is key.
    • Sharp knife: Chopping vegetables and meat efficiently.

    Step-by-step guide to creating a hearty, flavorful jambalaya

    Step 1: Gather your ingredients and equipment before you start. Have your rice, smoked sausage, chicken, and spices ready.

    Step 2: In a large pot or Dutch oven, heat some oil over medium heat. Sauté the sausage until browned, about 5 minutes.

    Step 3: Add chopped chicken, cook until lightly browned and cooked through, about 7 minutes.

    Step 4: Stir in chopped onions, bell peppers, and celery. Cook until veggies soften and release aroma, about 8 minutes.

    Step 5: Pour in crushed tomatoes, add spices, and cook for another 10 minutes to develop flavor.

    Step 6: Add rice and chicken broth, bring to a boil, then reduce heat to low. Cover and simmer for 25-30 minutes.

    Step 7: Check rice for doneness; it should be tender and slightly smoky. Adjust seasoning if needed.

    Step 8: Let the jambalaya rest off heat for 10 minutes. Fluff with a fork and serve hot.

    Cooking checkpoints and tips to keep in mind

    • Ensure the sausage is well browned for added smoky flavor.
    • Vegetables should be softened but not mushy—listen for a gentle sizzle.
    • Rice should be tender and slightly al dente, not gluey or undercooked.

    Common mistakes and how to fix them

    • Sausage burning before browning.? Use too much oil? Drain excess or reduce heat for next time.
    • Veggies over-softening or burning.? Add a splash of water or broth to loosen stuck bits.
    • Rice undercooked or mushy.? Lower heat and stir more frequently.
    • Too dry or undercooked rice.? Cover the pot tightly and cook longer, or add a little more broth.

    Classic Cajun Jambalaya

    This hearty one-pot Cajun jambalaya is made by sautéing smoked sausage, chicken, and vegetables, then simmering with rice and spices until tender. The dish boasts a bold, smoky flavor with a slightly spicy kick, resulting in a vibrant, flavorful stew with a slightly smoky, saucy texture and colorful appearance.
    Prep Time 15 minutes
    Cook Time 45 minutes
    Total Time 1 hour
    Servings: 6
    Course: Main Course
    Cuisine: Louisiana
    Calories: 450

    Ingredients
      

    • 1 pound smoked sausage sliced into rounds
    • 1.5 pounds chicken thighs boneless and skinless, cut into chunks
    • 1 large onion chopped
    • 1 large bell pepper red or yellow, chopped
    • 2 stalks celery chopped
    • 1 can crushed tomatoes 14 oz can
    • 1 cup long-grain rice
    • 2 cups chicken broth
    • 1 teaspoon paprika
    • 1/2 teaspoon cayenne pepper adjust for heat preference
    • 1 teaspoon dried thyme
    • to taste salt and pepper
    • 2 tablespoons oil vegetable or olive oil

    Equipment

    • Large Dutch oven or heavy-bottomed pot
    • Wooden spoon or spatula
    • Measuring cups and spoons
    • Sharp knife

    Method
     

    1. Begin by heating oil in your large Dutch oven over medium heat until shimmering. Add sliced smoked sausage and cook until browned and crispy around the edges, about 5 minutes, releasing a wonderful smoky aroma.
    2. Add the chicken chunks to the pot and cook until lightly browned and cooked through, about 7 minutes, stirring occasionally to ensure even cooking and a nice color.
    3. Stir in the chopped onion, bell pepper, and celery. Cook until the vegetables soften and become fragrant, about 8 minutes, listening for a gentle sizzle and watching for the vegetables to turn translucent and slightly tender.
    4. Add in the crushed tomatoes along with paprika, cayenne, thyme, and a pinch of salt and pepper. Stir well, then let everything simmer together for about 10 minutes, allowing the flavors to meld and the mixture to thicken slightly.
    5. Pour in the rice and chicken broth, stirring to combine. Increase the heat to bring the mixture to a boil, then reduce to low, cover tightly, and let it simmer gently for 25 to 30 minutes, or until the rice is tender and has absorbed most of the liquid.
    6. Check the rice for doneness— it should be tender, slightly smoky, and flavorful. If needed, season with more salt, pepper, or spices to taste, then remove from heat.
    7. Let the jambalaya rest, uncovered, for about 10 minutes to allow the flavors to settle and the dish to firm up slightly. Fluff with a fork before serving to distribute the ingredients evenly.
    8. Spoon the vibrant, smoky jambalaya into bowls and enjoy immediately, savoring the bold flavors and hearty texture in every bite.
    This dish isn’t just about the ingredients—it’s about the memories stirred up with each spoonful. The smoky aroma, the tender bites of sausage, and the vibrant peppers all come together in a warm, satisfying pot. Feel free to tweak the spice levels or add your favorite seafood—jambalaya is forgiving and meant to be personalized. Enjoy the process and embrace the chaos of cooking something soulful.

  • Rachael Ray’s 30-Minute Meal: A Lazy Sunday Revival

    Rachael Ray’s 30-Minute Meal: A Lazy Sunday Revival

    In my kitchen, quick meals often turn into the most memorable ones. Rachael Ray’s 30-minute meals remind me that you don’t need hours to create something cozy. It’s about efficiency, yes, but also about embracing the chaos of last-minute cooking. That rush, that burst of aroma, makes the whole process a little more alive.

    Why I Keep Coming Back to This Meal

    It’s honest, fast, and forgiving. No matter how chaotic the day, this dish offers a moment of calm and satisfaction. It reminds me that good food doesn’t need hours—just a little patience and some quality ingredients.

    Deconstructing the Ingredients

    • Pasta: Quick-cooking, starchy base that absorbs flavors beautifully.
    • Garlic: Aromatic and punchy, it should be fragrant but not burnt—think golden, not charred.
    • Fresh herbs: Basil or parsley add brightness, a fresh contrast to rich cheese.
    • Cheese: A good melting cheese like Parmesan or Pecorino gives a salty, umami kick.
    • Lemon: Brightens everything with a quick squeeze, balancing richness.
    • Olive oil: Foundation for flavor—use a fruity, good-quality oil for best results.
    • Pasta water: Salty and starchy, it helps create a silky sauce that clings.

    Tools of the Trade for a 30-Minute Meal

    • Large skillet: To cook everything in one pan, saving time and dishes.
    • Pot for boiling pasta: To cook pasta separately but quickly.
    • Chef’s knife: For chopping garlic, herbs, and cheese.
    • Slotted spoon: To drain pasta without losing too much water.
    • Measuring cup: To save pasta water for sauce consistency.

    Step-by-Step: Crafting a 30-Minute Magic

    Step 1: Start by gathering your favorite quick-cook ingredients: pasta, fresh herbs, and a good cheese.

    Step 2: Heat a large skillet over medium-high, add a splash of olive oil, and toss in chopped garlic until fragrant—about 30 seconds.

    Step 3: Cook your pasta in boiling salted water until al dente, then drain, saving a cup of starchy water.

    Step 4: Add the cooked pasta directly into the skillet, toss with herbs and cheese, adding a splash of pasta water to create a silky sauce.

    Step 5: Finish with a squeeze of lemon, salt, and pepper to taste, then serve immediately.

    Cooking Checkpoints & Tips

    • Pasta should be just shy of fully cooked when you add it to the skillet—residual heat continues to cook it.
    • The sauce should cling to the pasta smoothly; if it’s too thick, splash in some reserved pasta water.
    • Watch for garlic turning golden—remove from heat immediately to avoid bitterness.
    • Your cheese should melt into a creamy, slightly gooey texture—don’t overheat or you risk it becoming rubbery.

    Common Mistakes & How to Fix Them

    • Burning garlic and ending up with a bitter smell.? Use high heat to prevent garlic from burning and turning bitter.
    • Sauce being too thick or clumpy.? Add pasta water gradually until sauce reaches silky consistency.
    • Overcooked, mushy pasta ruining the dish.? Don’t overcook pasta—al dente is best for quick sauces.
    • Clumpy or greasy cheese coating.? Toss ingredients quickly to prevent cheese from seizing or becoming greasy.

    Quick Lemon Basil Pasta

    This pasta dish combines quick-cooking noodles with fragrant garlic, fresh herbs, and a splash of lemon for a bright, flavorful meal. The ingredients are tossed together in a single skillet, creating a silky sauce with a final texture that’s tender, vibrant, and satisfying. Perfect for busy weeknights, it’s a simple yet memorable dish that comes together in under 30 minutes.
    Prep Time 5 minutes
    Cook Time 15 minutes
    Total Time 20 minutes
    Servings: 4
    Course: Main Course
    Cuisine: Italian
    Calories: 450

    Ingredients
      

    • 12 oz pasta (e.g., spaghetti or linguine) quick-cooking variety
    • 3 cloves garlic minced
    • 1/4 cup fresh basil leaves chopped
    • 1/2 cup Parmesan cheese grated
    • 1 whole lemon zested and squeezed
    • 2 tablespoons olive oil good quality, fruity
    • 1/2 cup pasta water reserved from boiling pasta
    • to taste salt and pepper

    Equipment

    • Large skillet
    • Pot for boiling pasta
    • Chef’s knife
    • Slotted spoon
    • Measuring cup

    Method
     

    1. Bring a large pot of salted water to a rolling boil and cook the pasta until just al dente, about 1-2 minutes less than package instructions.
    2. While the pasta cooks, heat a large skillet over medium heat and add the olive oil. Once shimmering, add the minced garlic and sauté for about 30 seconds until fragrant and golden, but not browned.
    3. Drain the pasta, reserving about half a cup of the starchy pasta water. Add the hot pasta directly into the skillet with garlic and toss to coat evenly.
    4. Sprinkle the grated Parmesan cheese and chopped basil over the pasta, tossing gently to combine. Add a splash of the reserved pasta water to help create a smooth, silky sauce that clings to the noodles.
    5. Zest and squeeze the lemon over the pasta, then toss again until everything is well combined. Season with salt and freshly ground pepper to taste.
    6. Serve immediately, garnished with extra basil or Parmesan if desired, and enjoy the bright, flavorful bites of this quick pasta.

    Notes

    For an extra touch, add a pinch of red pepper flakes or a drizzle of balsamic vinegar for extra depth.
    This meal is a testament to how simplicity and a bit of speed can still deliver comfort. It’s perfect for those evenings when you want something warm and satisfying without the fuss. Feel free to tweak the herbs or cheese based on what’s in your fridge—improvisation is part of the fun. Enjoy making this your own quick tradition.